RED TETHER Application User Interface
|
This section includes: |
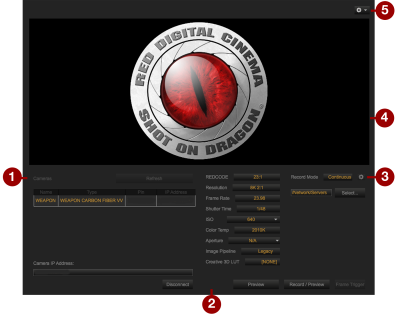
Figure: RED TETHER Application User Interface
The RED TETHER application user interface allows you to use RED TETHER without opening REDCINE-X PRO.
|
# |
GUI Element |
Description |
Details |
|---|---|---|---|
|
1 |
Camera List |
View a list of connected cameras |
|
|
2 |
Camera Settings |
Control camera settings |
|
|
3 |
Record Mode |
Specify how many frames are recorded to an R3D |
|
|
4 |
Viewer |
View streaming R3D footage |
|
|
5 |
Settings |
Select metadata location |
Display Metadata During Streaming
To display metadata during streaming, follow the instructions below:
- Click
 .
. - Select Metadata.
- Select one of the following:
- Viewer: Metadata displays in the Viewer.
- Controls: Metadata displays in the Controls.
- Disabled: Metadata does not display.
Camera List
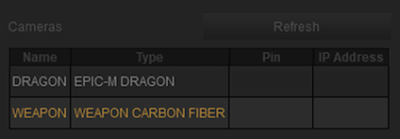
Figure: Camera List
Double-click the camera ID to connect. If your camera does not display, click Refresh.
Camera Settings
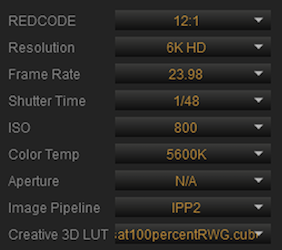
Figure: Camera Settings
You can change the following camera settings in RED TETHER: REDCODE, Resolution, Frame Rate, Shutter Time, ISO, Color Temp, and Aperture. For cameras that support the IPP2 Mode, you can additionally change Image Pipeline and Creative 3D LUT.
Record Mode
You can change the Record Mode in RED TETHER.
Continuous Record
Continuous record allows you to save and preview the video stream from the camera. To apply continuous record, click the Record Mode drop-down and select Continuous Record.
Internal Timelapse Timer
Internal Timelapse Timer allows you to create a time lapse. To apply the Internal Timelapse Timer, follow the instructions below:
- Click the Record Mode drop-down and select Internal Timelapse Timer.
- Click the
 (Gear).
A window opens.
- Set the following options:
- Frame Count: Set the number of frames to record.
- Interval: Set the number of seconds to wait between frames.
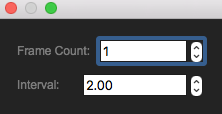
Figure: Internal Timelapse Timer
Frame Trigger
Frame trigger allows you to record multiple clips in one session. To apply Frame Trigger, follow the instructions below:
- Click the Record Mode drop-down and select Internal Timelapse Timer.
- Click the
 (Gear).
A window opens.
- Set the following options:
- Pre Count: Increase or decrease the Pre Count value.
- Post Count: Increase or decrease the Post Count value.
- New Clip Every Trigger: Deselect or select the check box.
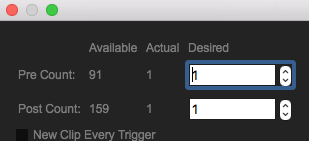
Figure: Frame Trigger
Speed Ramp Mode
To apply Speed Ramp Mode, click the Record Mode drop-down and select Speed Ramp Mode.
REDCODE Burst
To apply REDCODE® Burst, follow the instructions below:
- Click the Record Mode drop-down and select REDCODE® Burst.
- Click the
 (Gear).
A window opens.
- Set the following options:
- Pre Count: Increase or decrease the Pre Count value.
- Post Count: Increase or decrease the Post Count value.
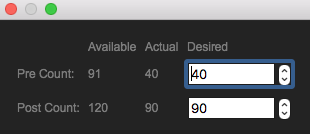
Figure: REDCODE Burst
Multi-Shot
To apply Mult-Shot, click the Record Mode drop-down and select Multi-Shot.
Motion + Stills
To apply Motion + Stills, click the Record Mode drop-down and select Motion + Stills.