Install RED ROCKET Driver (Windows)
To install the RED ROCKET driver for Windows operating systems, follow the instructions below:
-
Ensure that you have already downloaded the RED ROCKET Installer. For more information about how to download the RED ROCKET Installer, go to Download Driver and Firmware.
-
Ensure that you have already installed the RED ROCKET.
-
Click Start, right-click Computer, and select Properties.
The System window opens.
-
Click Device Manager.

Figure: Click Device Manager
-
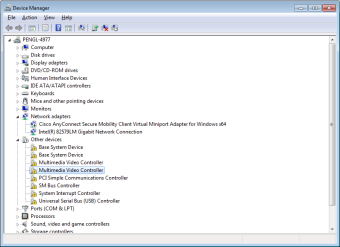
Expand Other devices.
-
Right-click Multimedia Video Controller and select Properties.

Figure: Select Properties
NOTE: Your Device Manager may display multiple instances of Multimedia Video Controller; you can select any of these instances.
The Multimedia Video Controller Properties window opens.
-
Click Update Driver.

Figure: Click Update Driver
The Update Driver Software - Multimedia Video Controller window opens.
-
Click Browse my computer for driver software.

Figure: Click Browse My Computer for Driver Software
-
Click Browse.
-
Select the RED_Rocket_Installer_vx.x.x > RED_Rocket_Windows > REDrocket_Driver_Win_vx.x.x.x folder.

Figure: Select the RED ROCKET Installer Folder
- Click OK.
-
Click Next.

Figure: Click Next
-
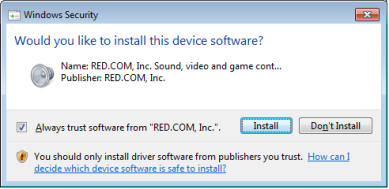
If the Windows Security window opens, select the Always trust software from “RED.COM, Inc.” check box and click Install.

Figure: Click Install
A progress bar shows the progress of the driver installation. The message “Windows has successfully updated your driver software” displays when installation is complete.

Figure: Successful Installation
-
Start the computer.
-
To upgrade RED ROCKET firmware, go to Upgrade RED ROCKET Firmware.