Mount the W.M.D.
The W.M.D. is designed to support various mounting requirements, enabling you to customize your setup for your own camera configuration.
Attach the W.M.D. to the DSMC Tactical Right Plate
When the V-LOCK is removed from the back of the W.M.D., it can be attached to a DSMC® Tactical Right Plate using the built-in thumbscrew and guide pin.
The W.M.D. can be attached to a DSMC Tactical Right Plate or other mounting plate with 1/4-20 screw holes. The built-in thumbscrew and 1/4" guide pin provide convenient, tool-free attachment for the W.M.D.
-
Ensure that the V-LOCK is removed from the back of the W.M.D. For more information about how to remove the V-LOCK, go to Mount the W.M.D. to a V-Mount Receiver.
-
Use a slotted screwdriver to remove the guide pin from the bottom of the W.M.D.
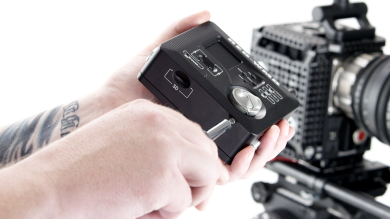
Figure: Remove Guide Pin
-
Use a slotted screwdriver to install the guide pin in the appropriate mounting hole on the back of the W.M.D. Select the mounting hole based on your mounting configuration:
-
DSMC Tactical Right Plate: Use the screw hole closest to the 1/4-20 screw for 18 mm spacing.
-
Third-party cheeseplate: Use the screw hole farthest from the 1/4-20 screw for 25 mm spacing.
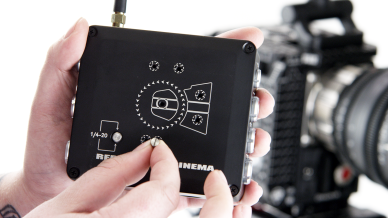
Figure: Install Guide Pin
-
-
Place the W.M.D. against the Tactical Plate so that the guide pin and 1/4-20 screw each align with a 1/4-20 screw hole.
-
Tighten the W.M.D. 1/4-20 thumbscrew.
WARNING: DO NOT OVERTIGHTEN.
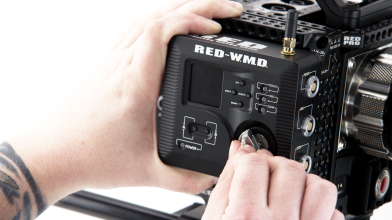
Figure: Push and Turn Thumbscrew
Mount the W.M.D. to a V-Mount Receiver
The W.M.D. ships with a V-LOCK to mount the W.M.D. to most industry-standard female v-mount receivers.
-
Align the V-LOCK on the back of the W.M.D.
-
Use a Phillips® #1 screwdriver to install three (3) M3 x 0.5 x 8 mm flathead screws that attach the V-LOCK to the W.M.D. Fully tighten.
WARNING: DO NOT OVERTIGHTEN.
-
Use a Phillips #1 screwdriver to remove the three (3) M3 x 0.5 x 8 mm flathead screws, when finished.
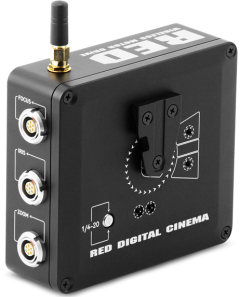
Figure: W.M.D. Rear (V-Lock Installed)