Module Adaptor and +1 Adaptor Module: Install/Remove
Install the Module Adaptor
You must install an adaptor module on the back of the camera before you install a module.
REQUIRED TOOL(S): T20 TORX driver
- Turn off the camera.
- Remove the REDMOTE or R.C.P. Bridge, if attached.
- Position the Module Adaptor over the V-mount on the rear of the camera.

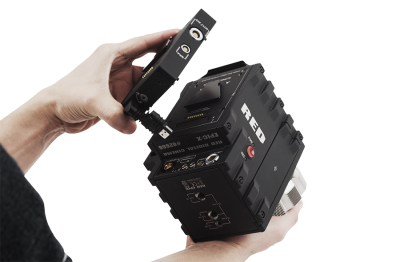
Figure: Install +1 Adaptor Module
- Apply pressure and tighten the four (4) captive screws in a cross pattern (“X” pattern) approximately two (2) turns each using a T20 TORX driver. DO NOT FULLY TIGHTEN.

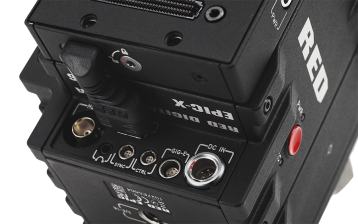
Figure: Insert HDMI Connector into the BRAIN
- Fully tighten the four (4) screws in a cross pattern (“X” pattern) using a T20 TORX driver.

Figure: Tighten Screws
WARNING: DO NOT OVERTIGHTEN.
Remove the Module Adaptor
REQUIRED TOOL(S): T20 TORX driver
- Turn off the camera.
- Use a T20 TORX driver to loosen the screws attaching the Module Adaptor to the camera.
- Remove the Module Adaptor from the camera.
Install the +1 Adaptor Module
REQUIRED TOOL(S): T20 TORX driver
- Turn off the camera.
- Remove the REDMOTE or R.C.P. Bridge, if attached.
- Position the +1 Adaptor Module over the V-mount on the rear of the camera.
- Insert the HDMI connector into the HDMI port on the camera.
- Apply pressure and tighten the four (4) captive screws in a cross pattern (“X” pattern) approximately two (2) turns each using a T20 TORX driver. DO NOT FULLY TIGHTEN.
- Fully tighten the four (4) screws in a cross pattern (“X” pattern) using a T20 TORX driver.
WARNING: DO NOT OVERTIGHTEN.
Remove the +1 Adaptor Module
REQUIRED TOOL(S): T20 TORX driver
- Turn off the camera.
- Loosen the four (4) captive mounting screws in a cross pattern (“X” pattern) using a a T20 TORX driver.
- Disconnect the HDMI connector from the camera.
- Remove the +1 Adaptor Module from the camera.