Upper Status Row (Basic Menu)
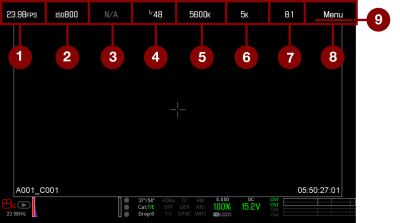
The Upper Status Row displays basic project parameters. The currently selected parameter in the Upper Status Row is underlined with a red bar. The Upper Status Row is also known as the Basic Menu.

Figure: Upper Status Row
The Upper Status Row includes the following GUI elements:
|
# |
Item |
Description |
Details |
|---|---|---|---|
|
1 |
Frame Rate (fps) |
Recording frame rate |
|
|
2 |
ISO |
Camera sensitivity |
|
|
3 |
Aperture |
Lens aperture (F stop) information |
|
|
4 |
Exposure (Shutter) |
Integration time or shutter angle |
|
|
5 |
Color Temperature |
White balance and Tint |
|
|
6 |
Resolution |
Record resolution |
|
|
7 |
REDCODE® |
REDCODE compression setting |
|
|
8 |
Menu |
Access advanced settings |
|
|
9 |
Cursor |
Indicates currently selected Upper Status Row element |
N/A |
Access Advanced Menus
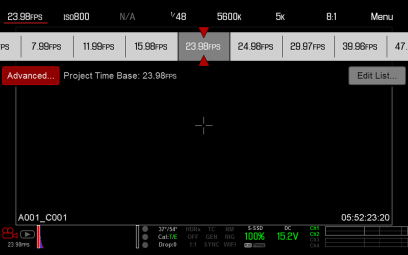
For every Upper Status Row item, you can select the Advanced... button to access the related menu in the Advanced Menus.
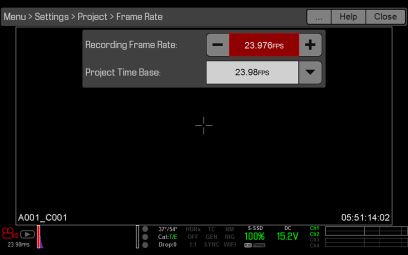
For example, select Advanced... in the Frame Rate menu to open Menu > Settings > Project > Frame Rate.
For more information about Advanced Menus, go Advanced Menus.

Figure: Select "Advanced..." Button

Figure: Advanced Menu
Feature: Edit List
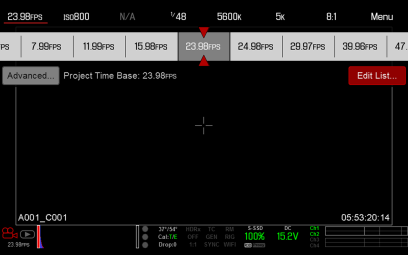
Select the Edit List... button in the Upper Status Row menus to change the values that display for each setting. For example, if you open the Frame Rate menu and select Edit List..., the camera lets you add or remove values.

Figure: Select "Edit List..." Button
Aperture
The aperture (also known as the T stop or F stop) parameter displays when a compatible
- Increasing the aperture to a higher number increases the depth of field, but reduces the exposure (brightness).
- Decreasing the aperture to a lower number decreases the depth of field, but increases the exposure (brightness).
RED DSMC PL Mount Installed
The current aperture of the attached lens displays when a DSMC® PL mount is installed and a supported lens equipped with Cooke® S4/i® system is attached.
DSMC Nikon Mount And Canon Mount Installed
The Aperture menu is visible when
Select the Advanced... button to access the Menu > Settings > Setup > Lens screen. For more information, go to Lens.