Settings
The RED Connect application provides many useful settings for tuning your streaming connection.
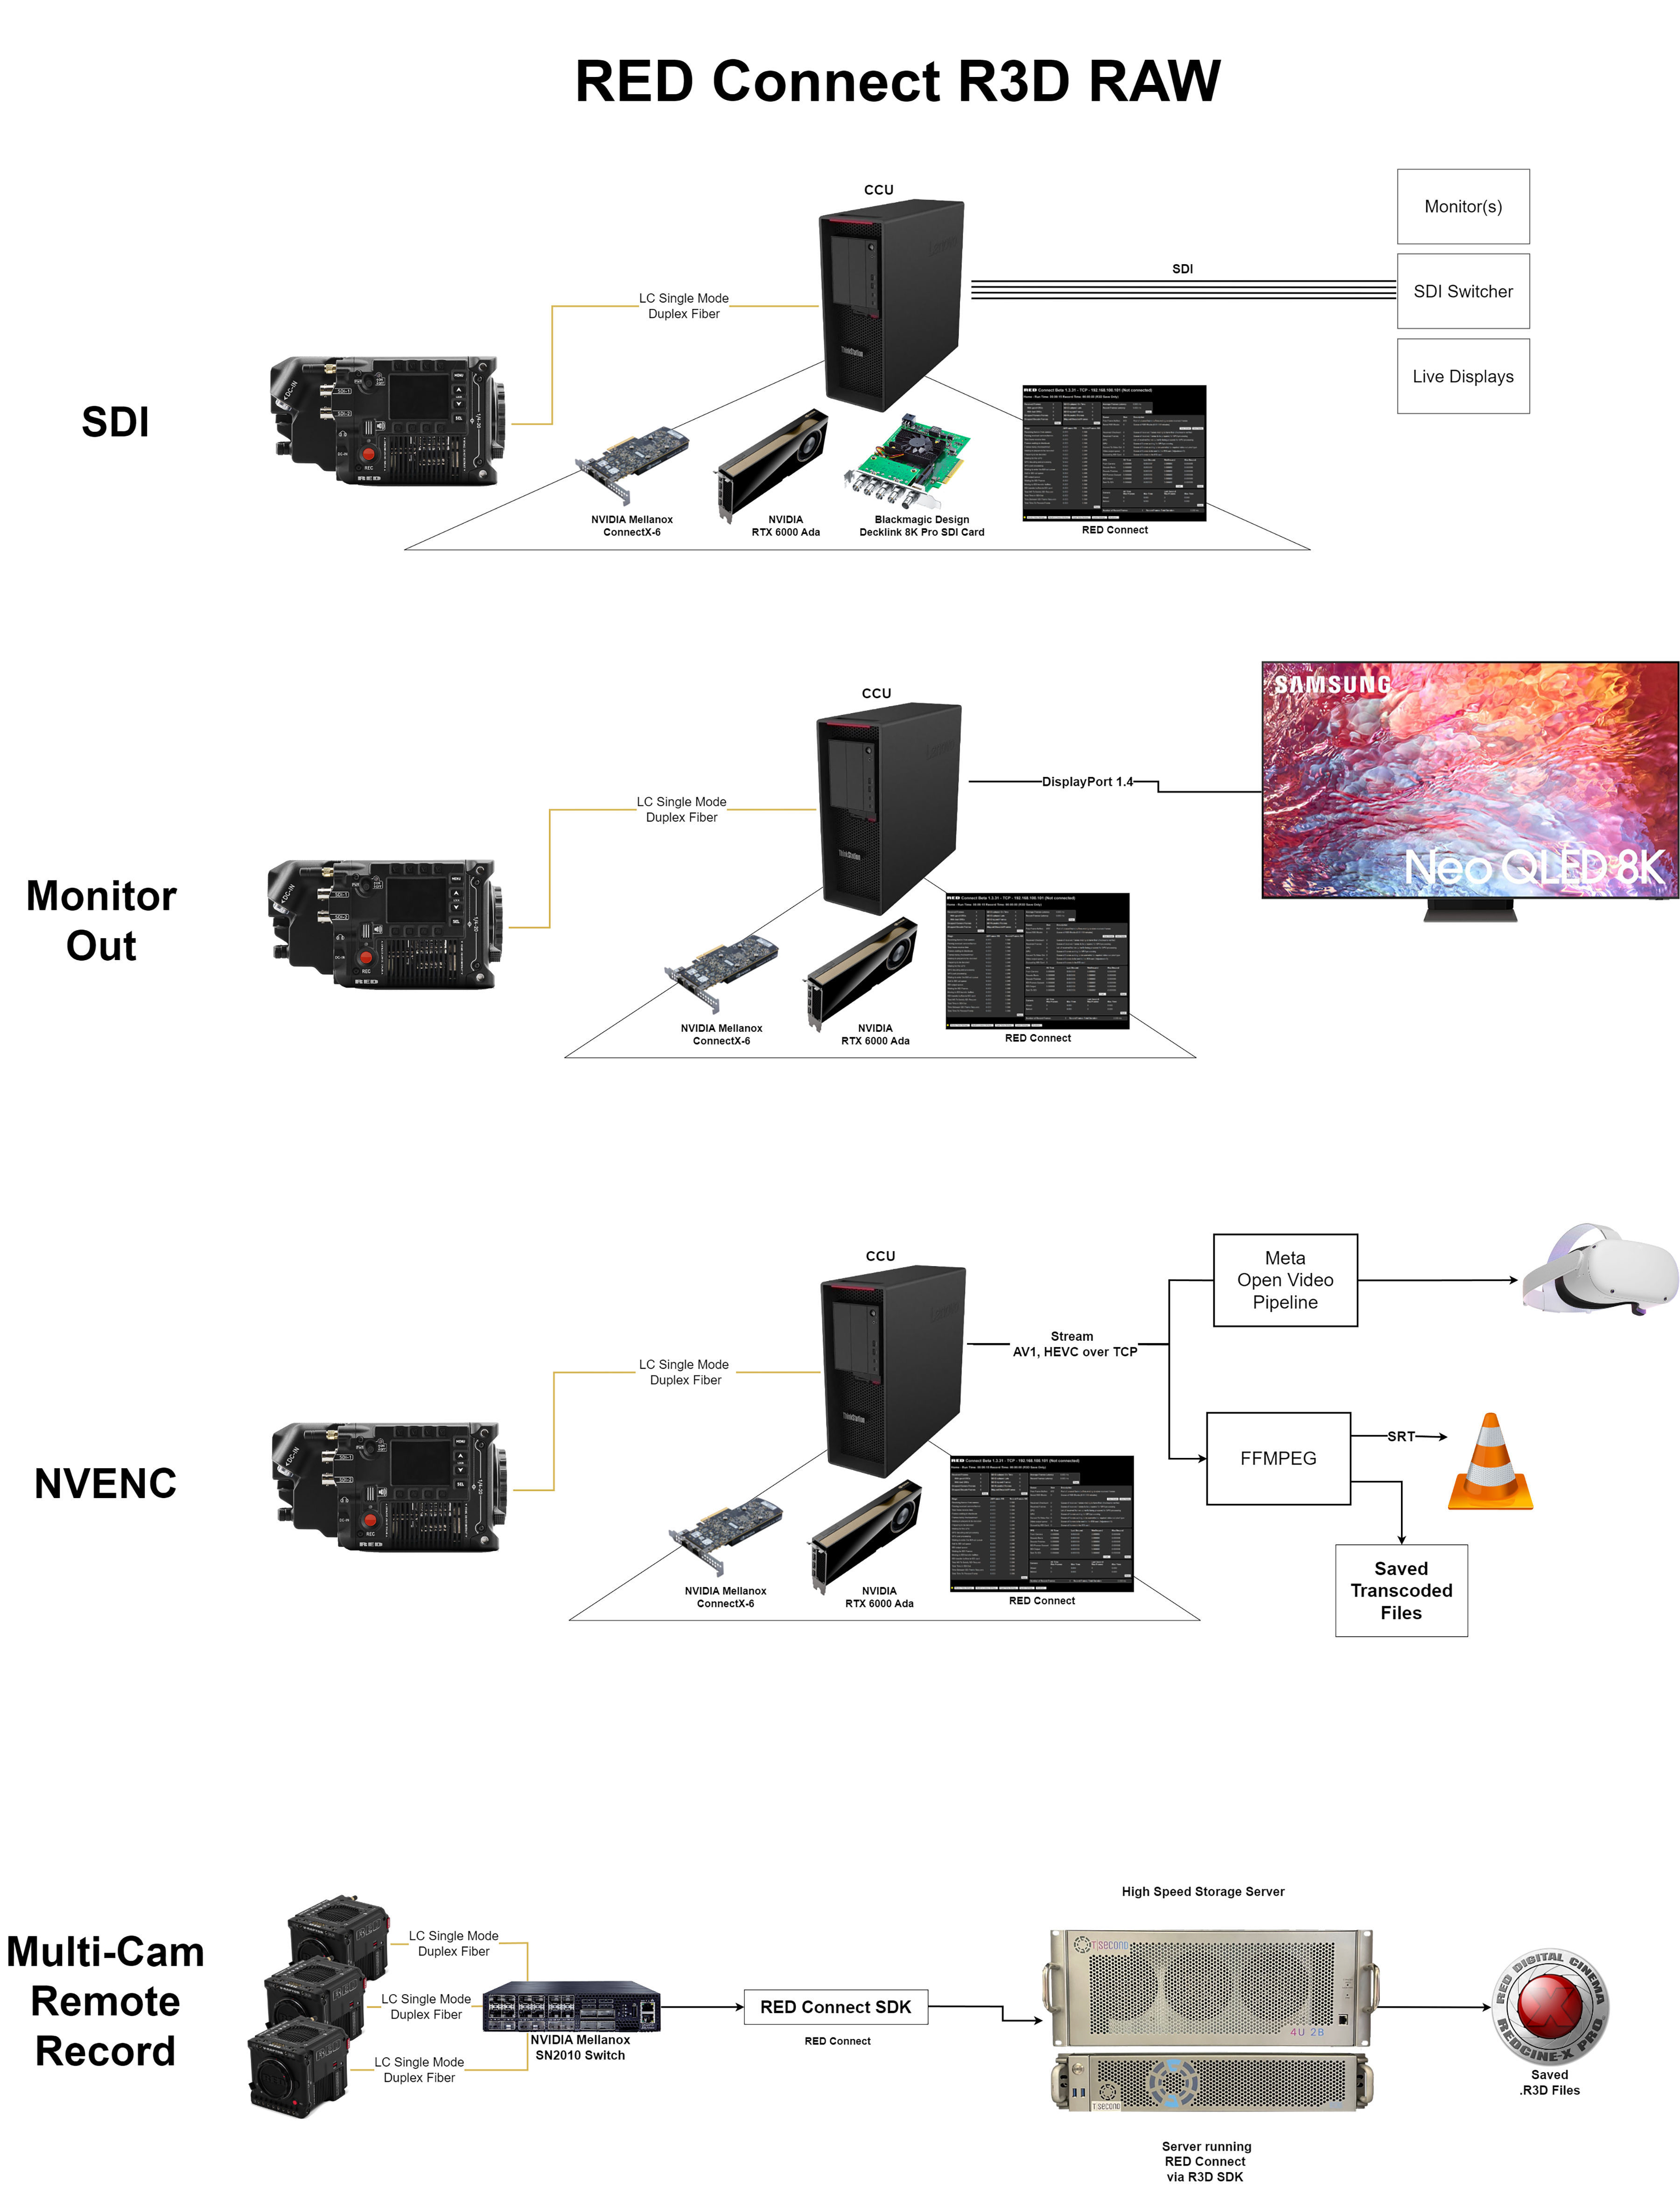
The primary modes of operation are SDI out, Monitor Out, NVENC out, and R3D Save only. All of these settings can be directly edited by editing the value in the RED Connect app, or they can be edited in the redconnect.ini file located in C:\ProgramData\red\REDConnect.
Realtime Latency Settings
The settings on this page can be adjusted while streaming, so that you can reduce the latency of the stream, and to give the GPU enough time to decode your frames to display the video smoothly. We recommend running the system, and setting the Video Out Latency according to the GPU Decode Latency of the stream.
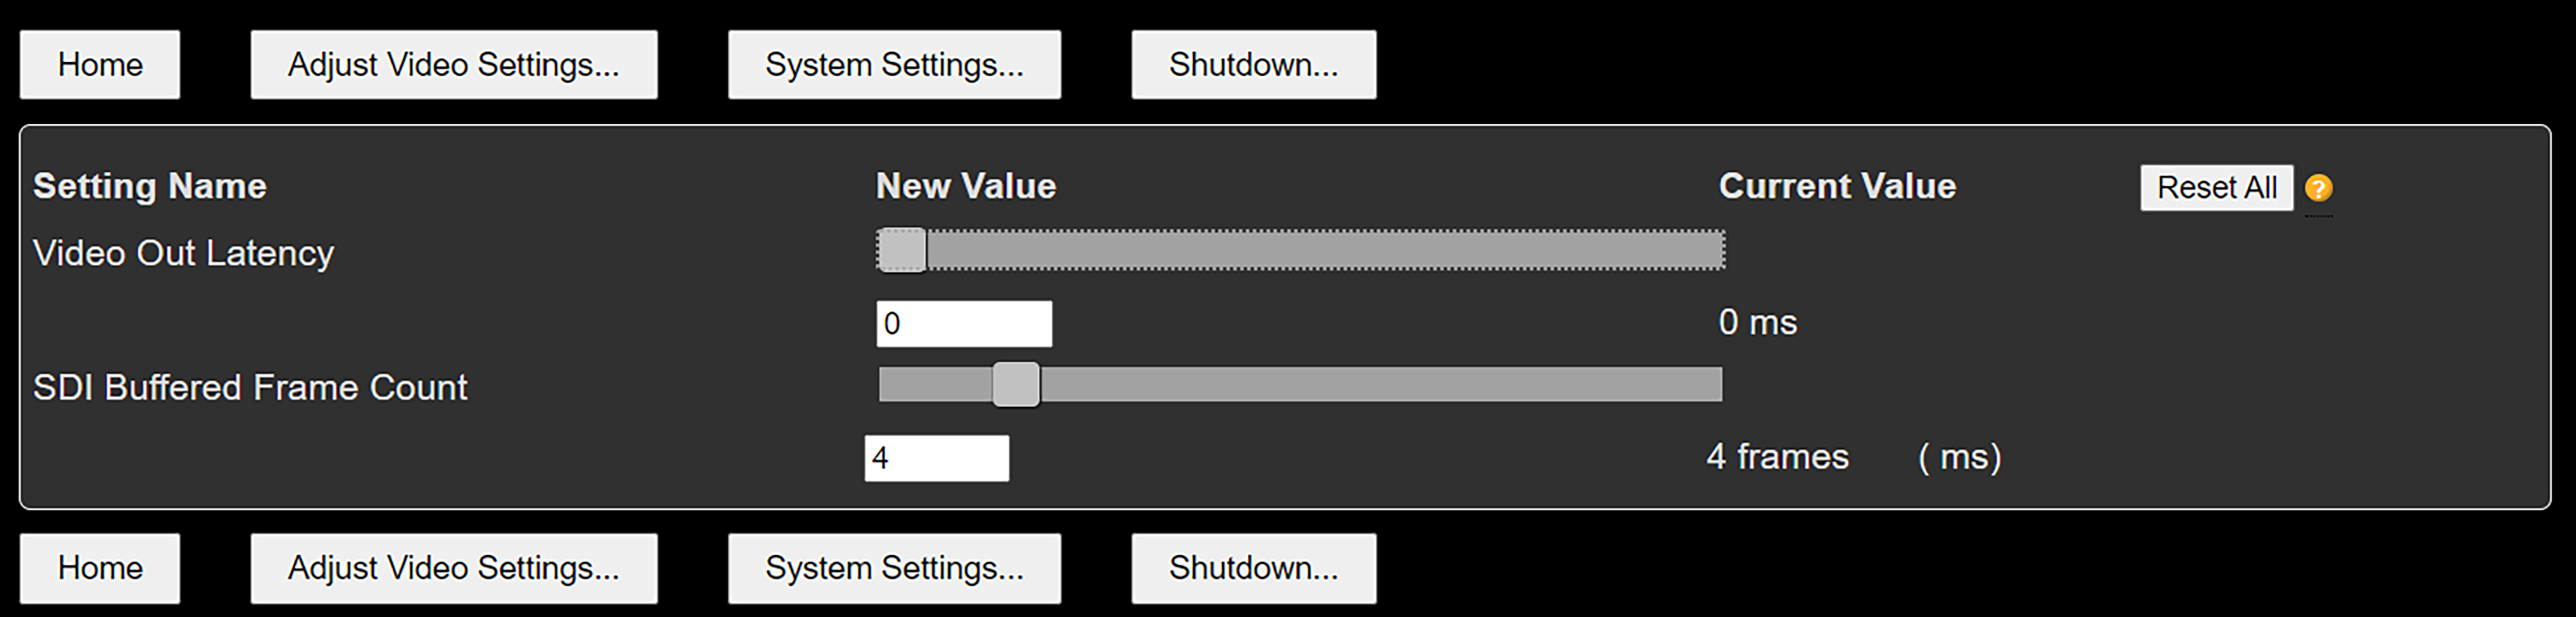
The main settings on this page include:
- Video Out Latency: Controls the amount of time between when the frame was recorded on the camera and when the frame gets added to the SDI device’s SDK for output.
- SDI Buffered Frame Count: The number of frames queued in the SDI device.
Adjust Video Settings
This page has controls for controlling the image settings on the application side. RED Connect alone sends ungraded data from the camera to the CCU. On the CCU side, you have controls to grade the footage to your liking. The image settings set here get applied to the frames as they get decoded in the system.
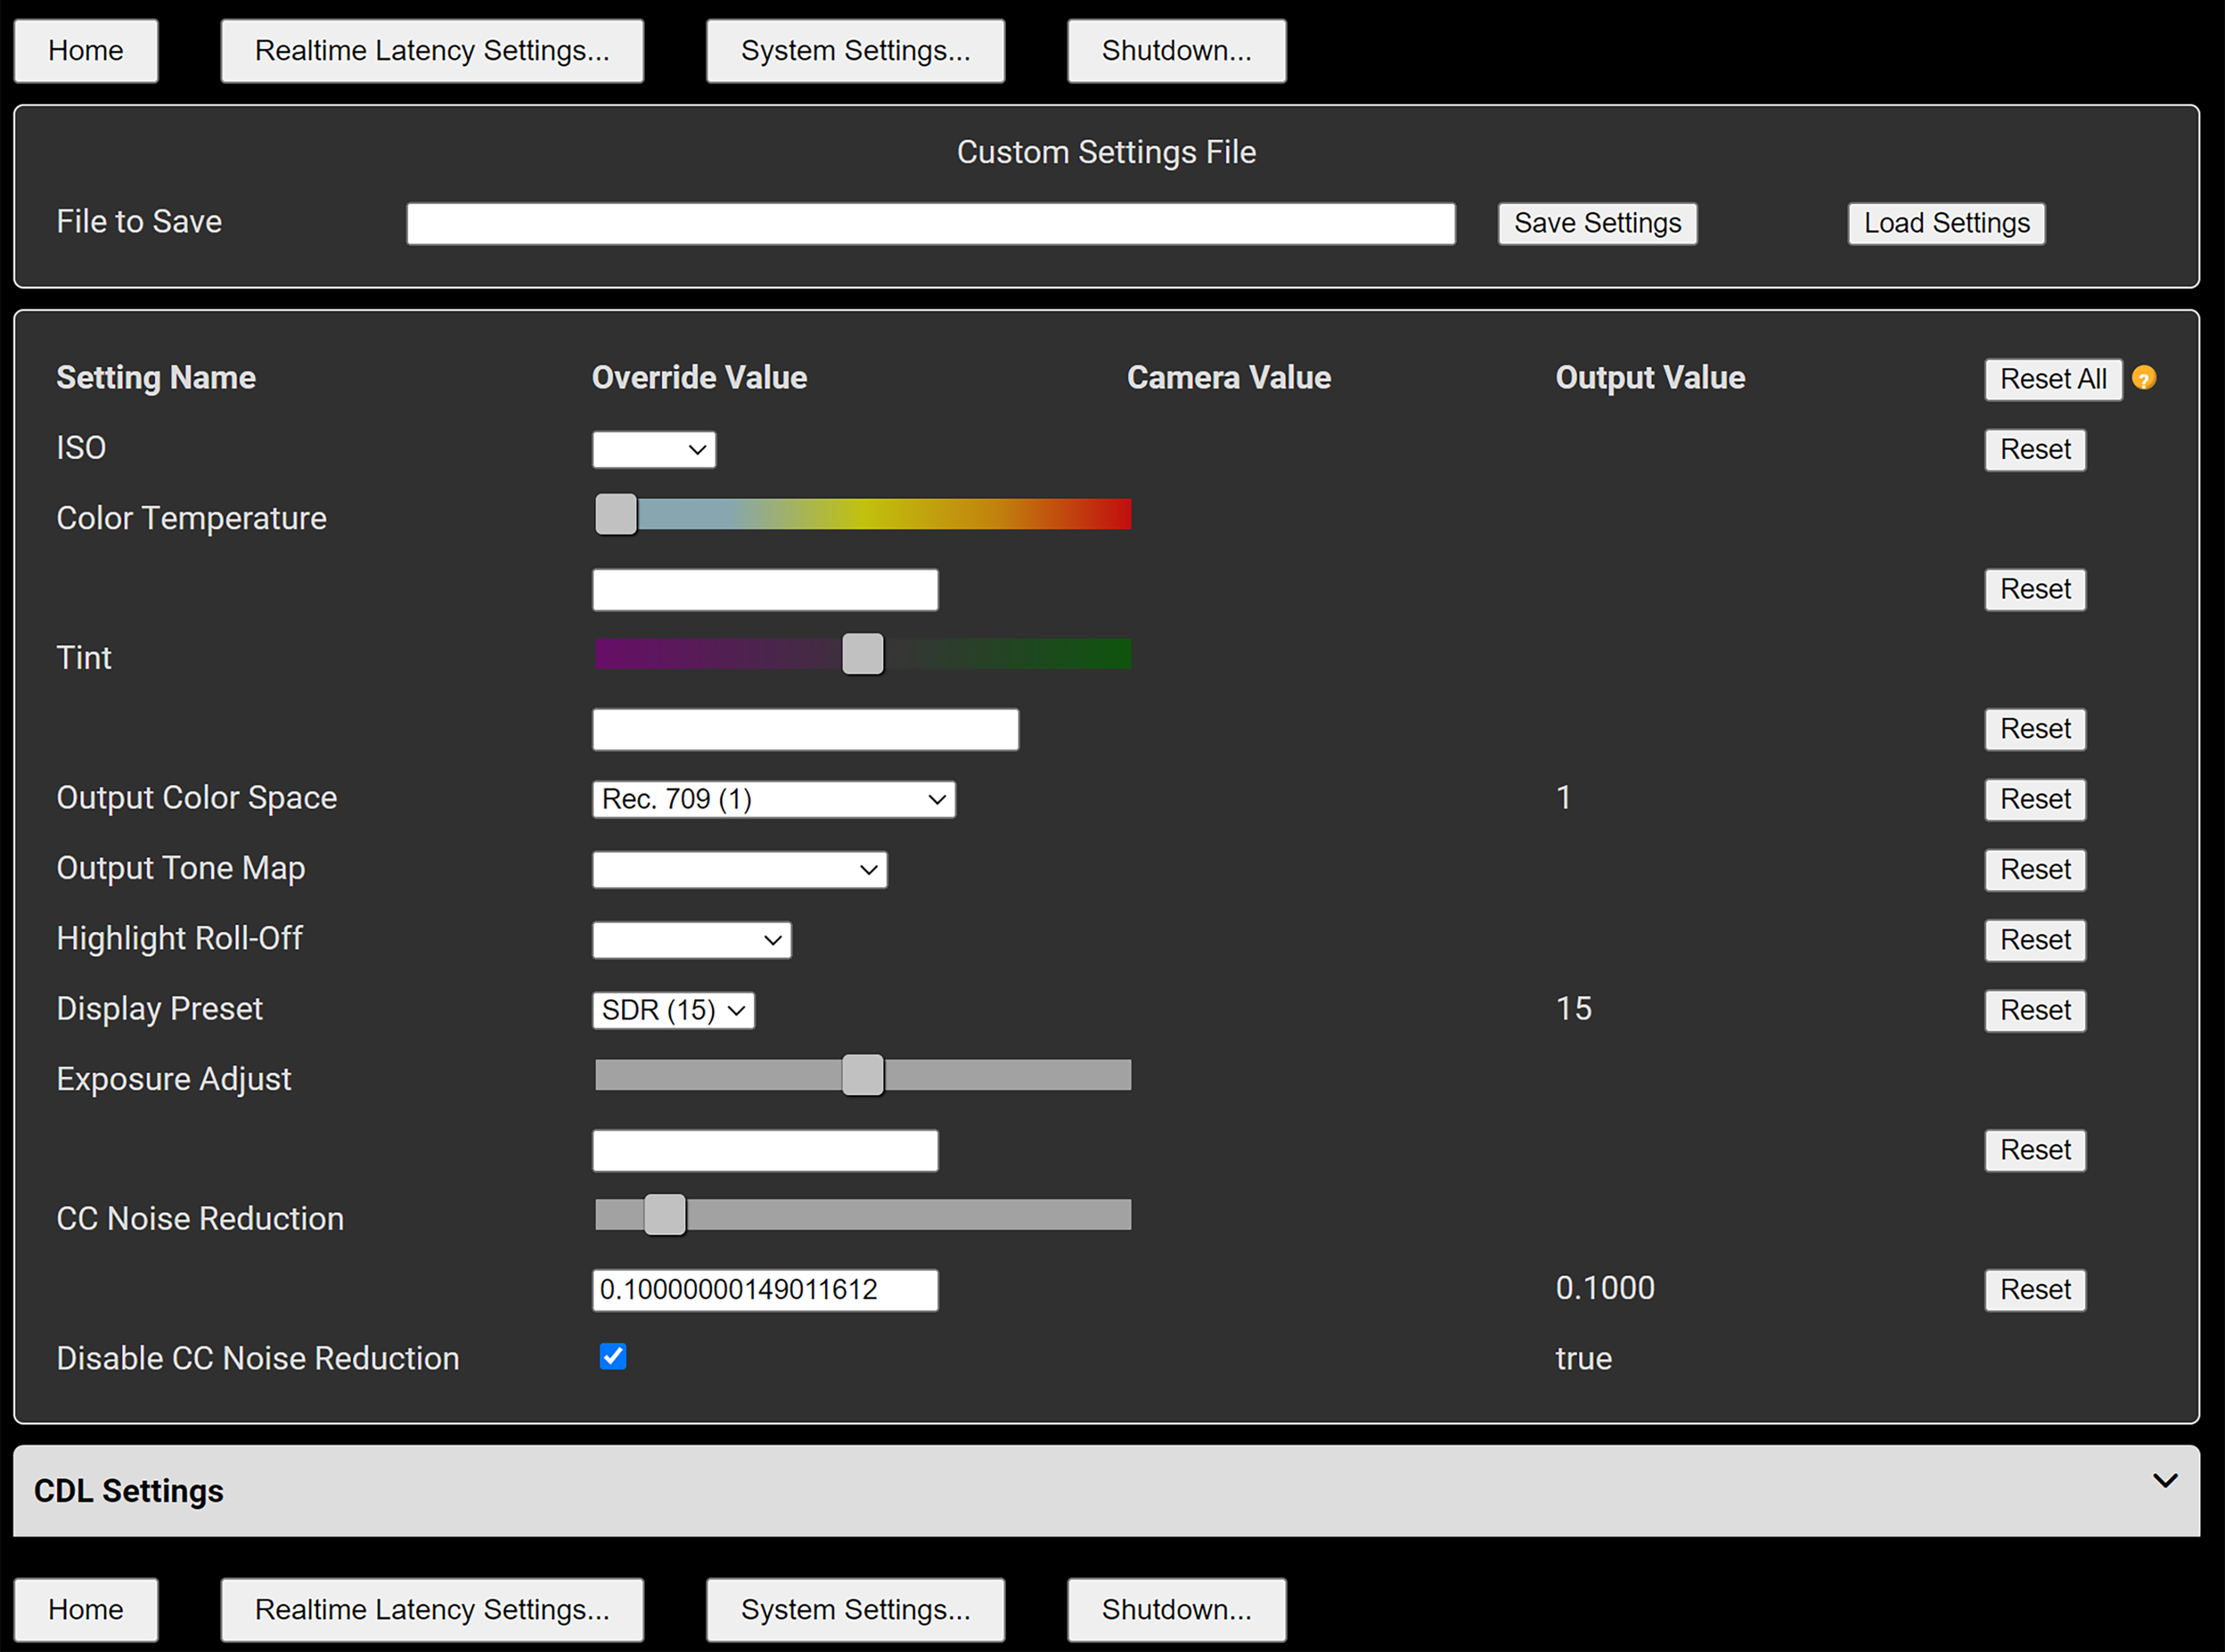
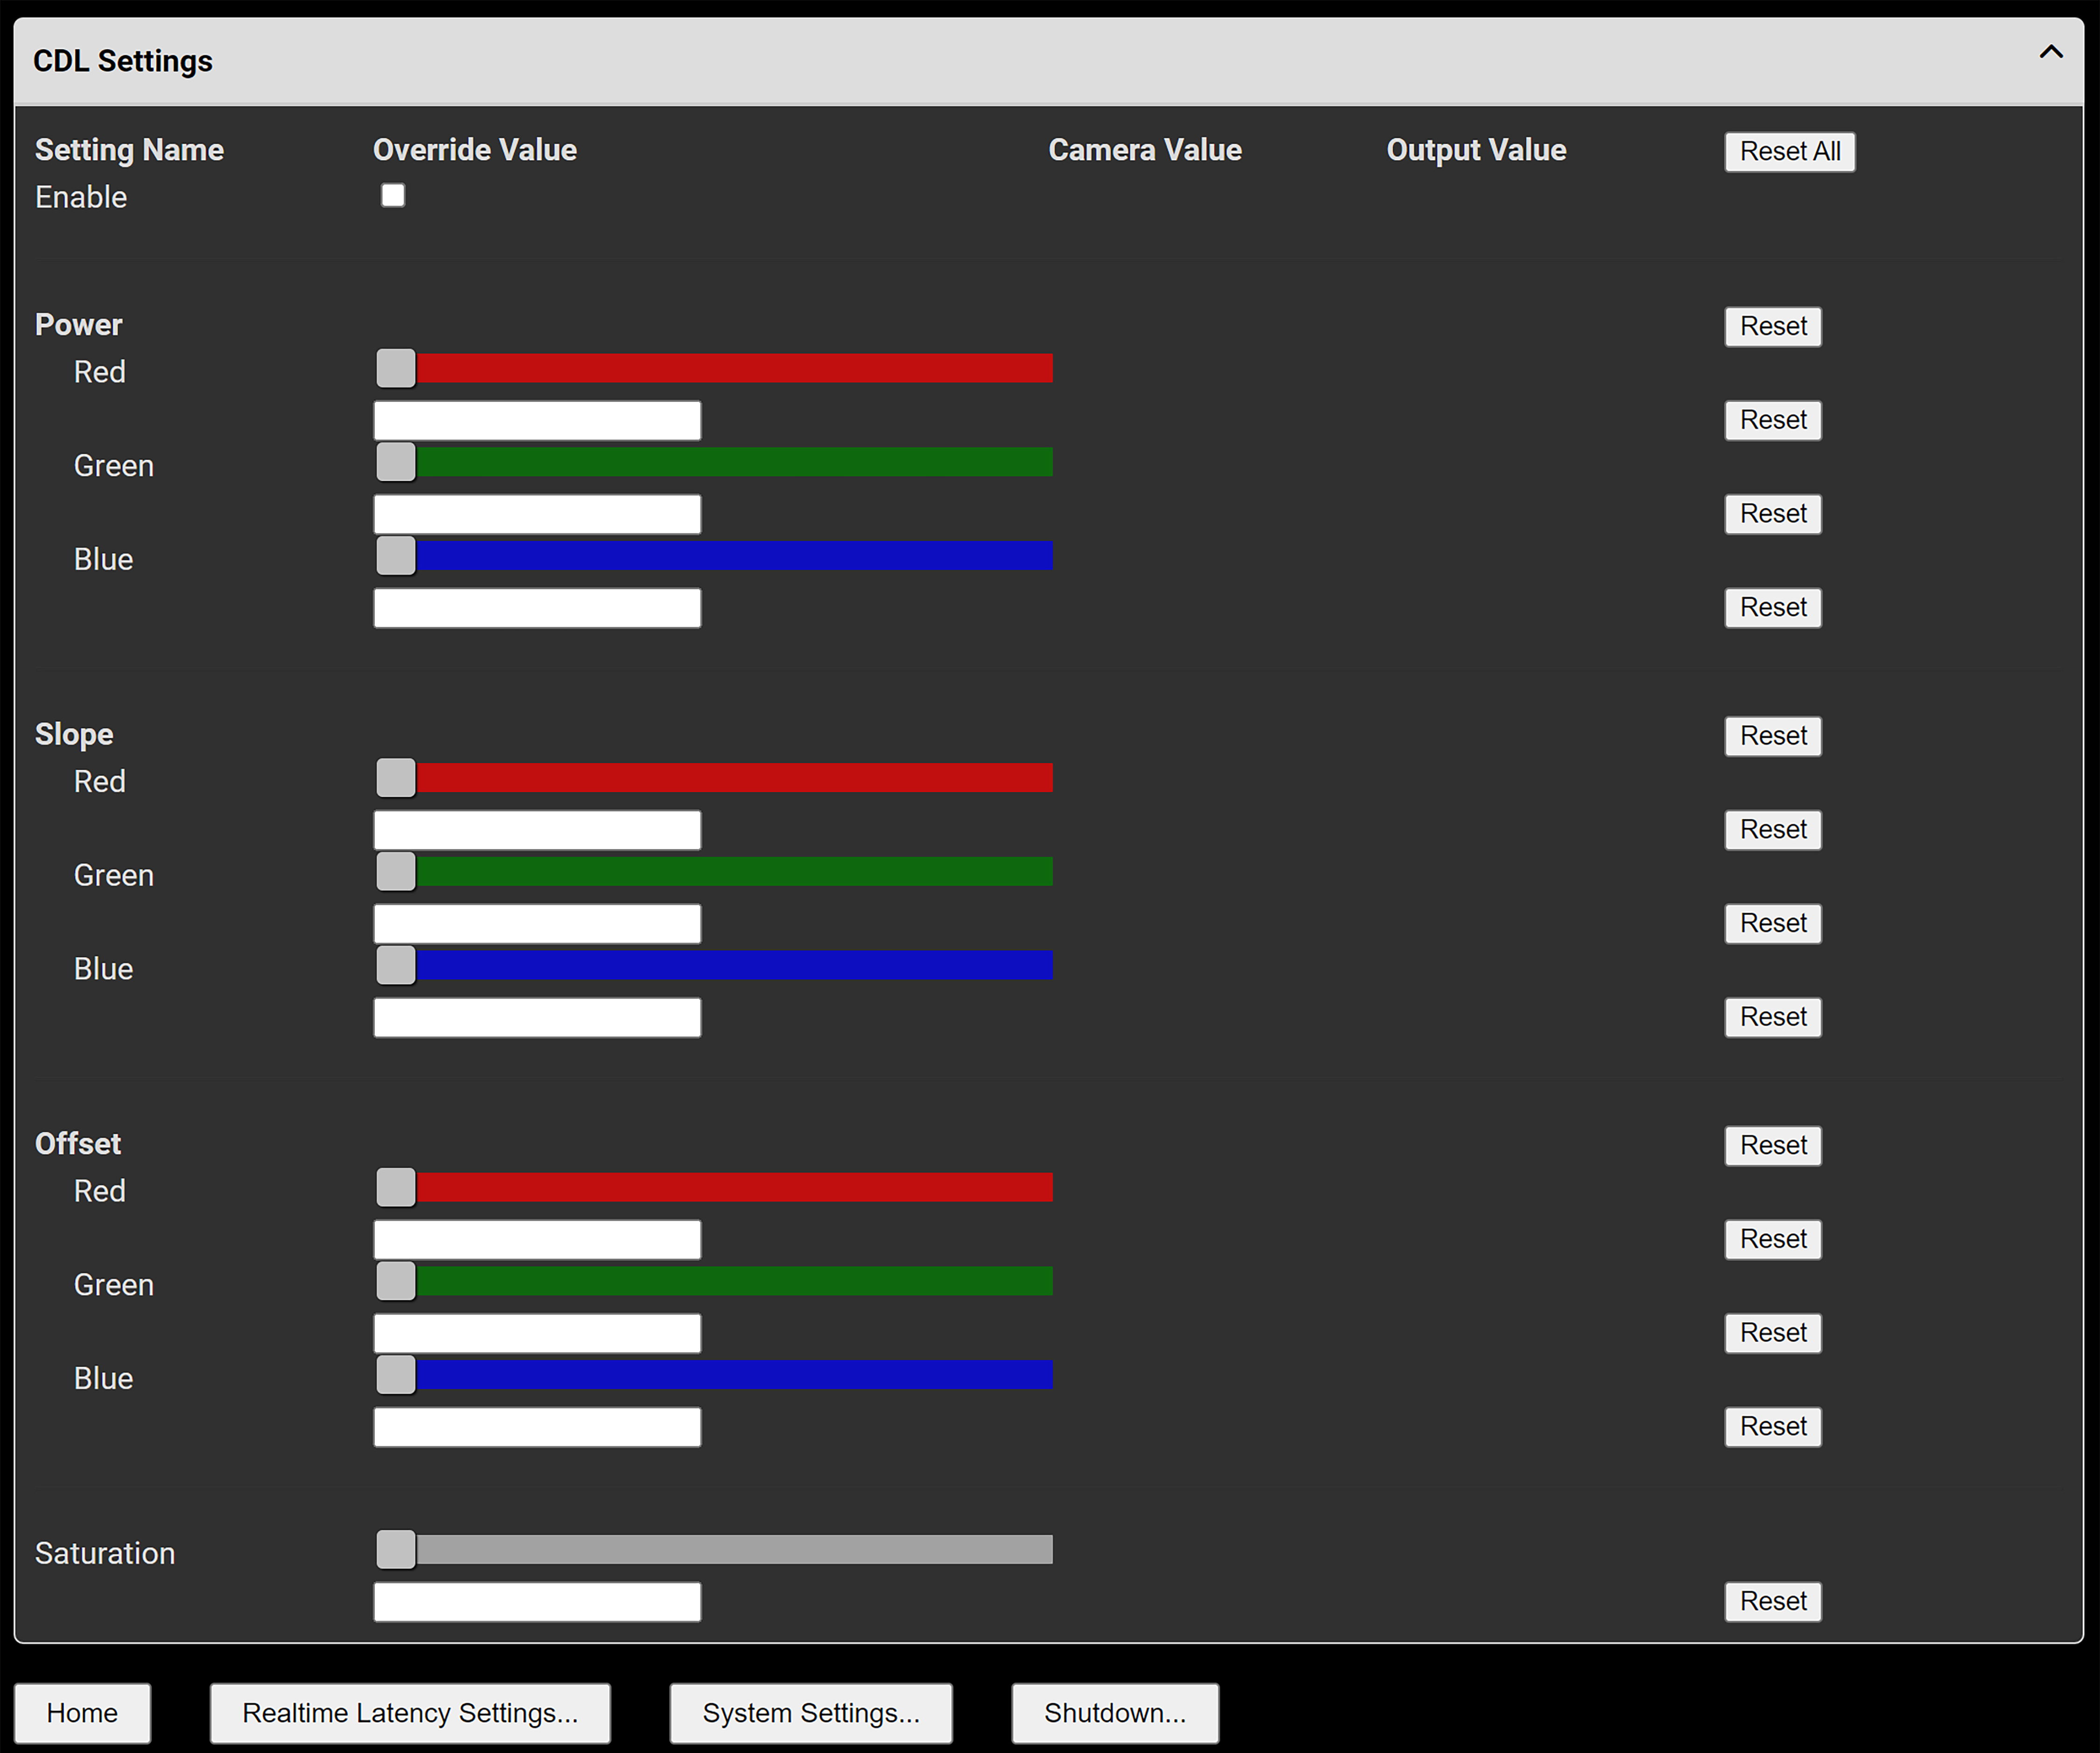
CDL Settings can also be accessed by clicking the CDL Settings button, and checking the Enable checkbox at the top of the drop-down menu. To disable all CDL changes made, you can uncheck the Enable checkbox.
System Settings
The System Settings page allows you to adjust the RED Connect settings after you have already established a connection and started a stream.
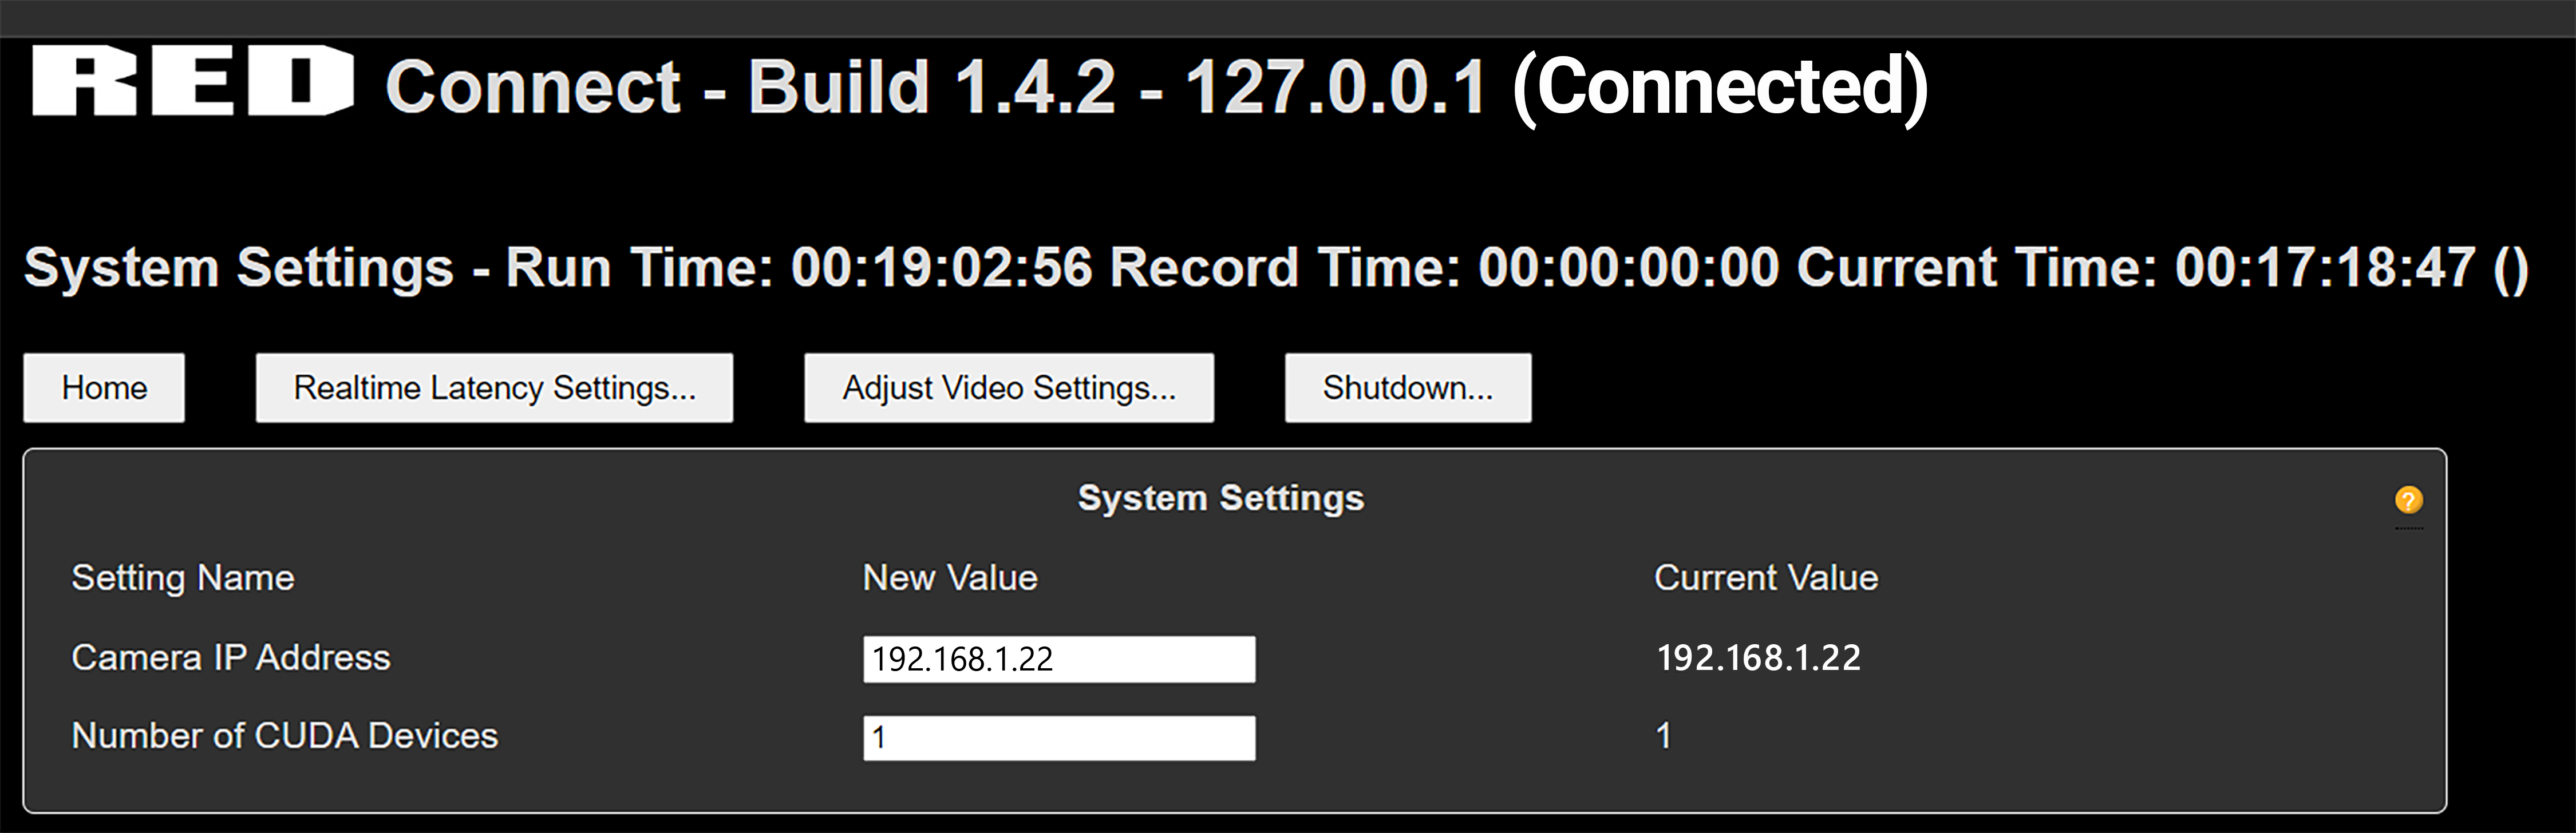
System Settings

Camera IP Address: IP address of the camera found under Menu > Communication > RED Connect / USB-C > IP
Number of CUDA Devices: Number of Graphics cards with CUDA enabled. Non-CUDA GPUs are not used.
Output Video Settings
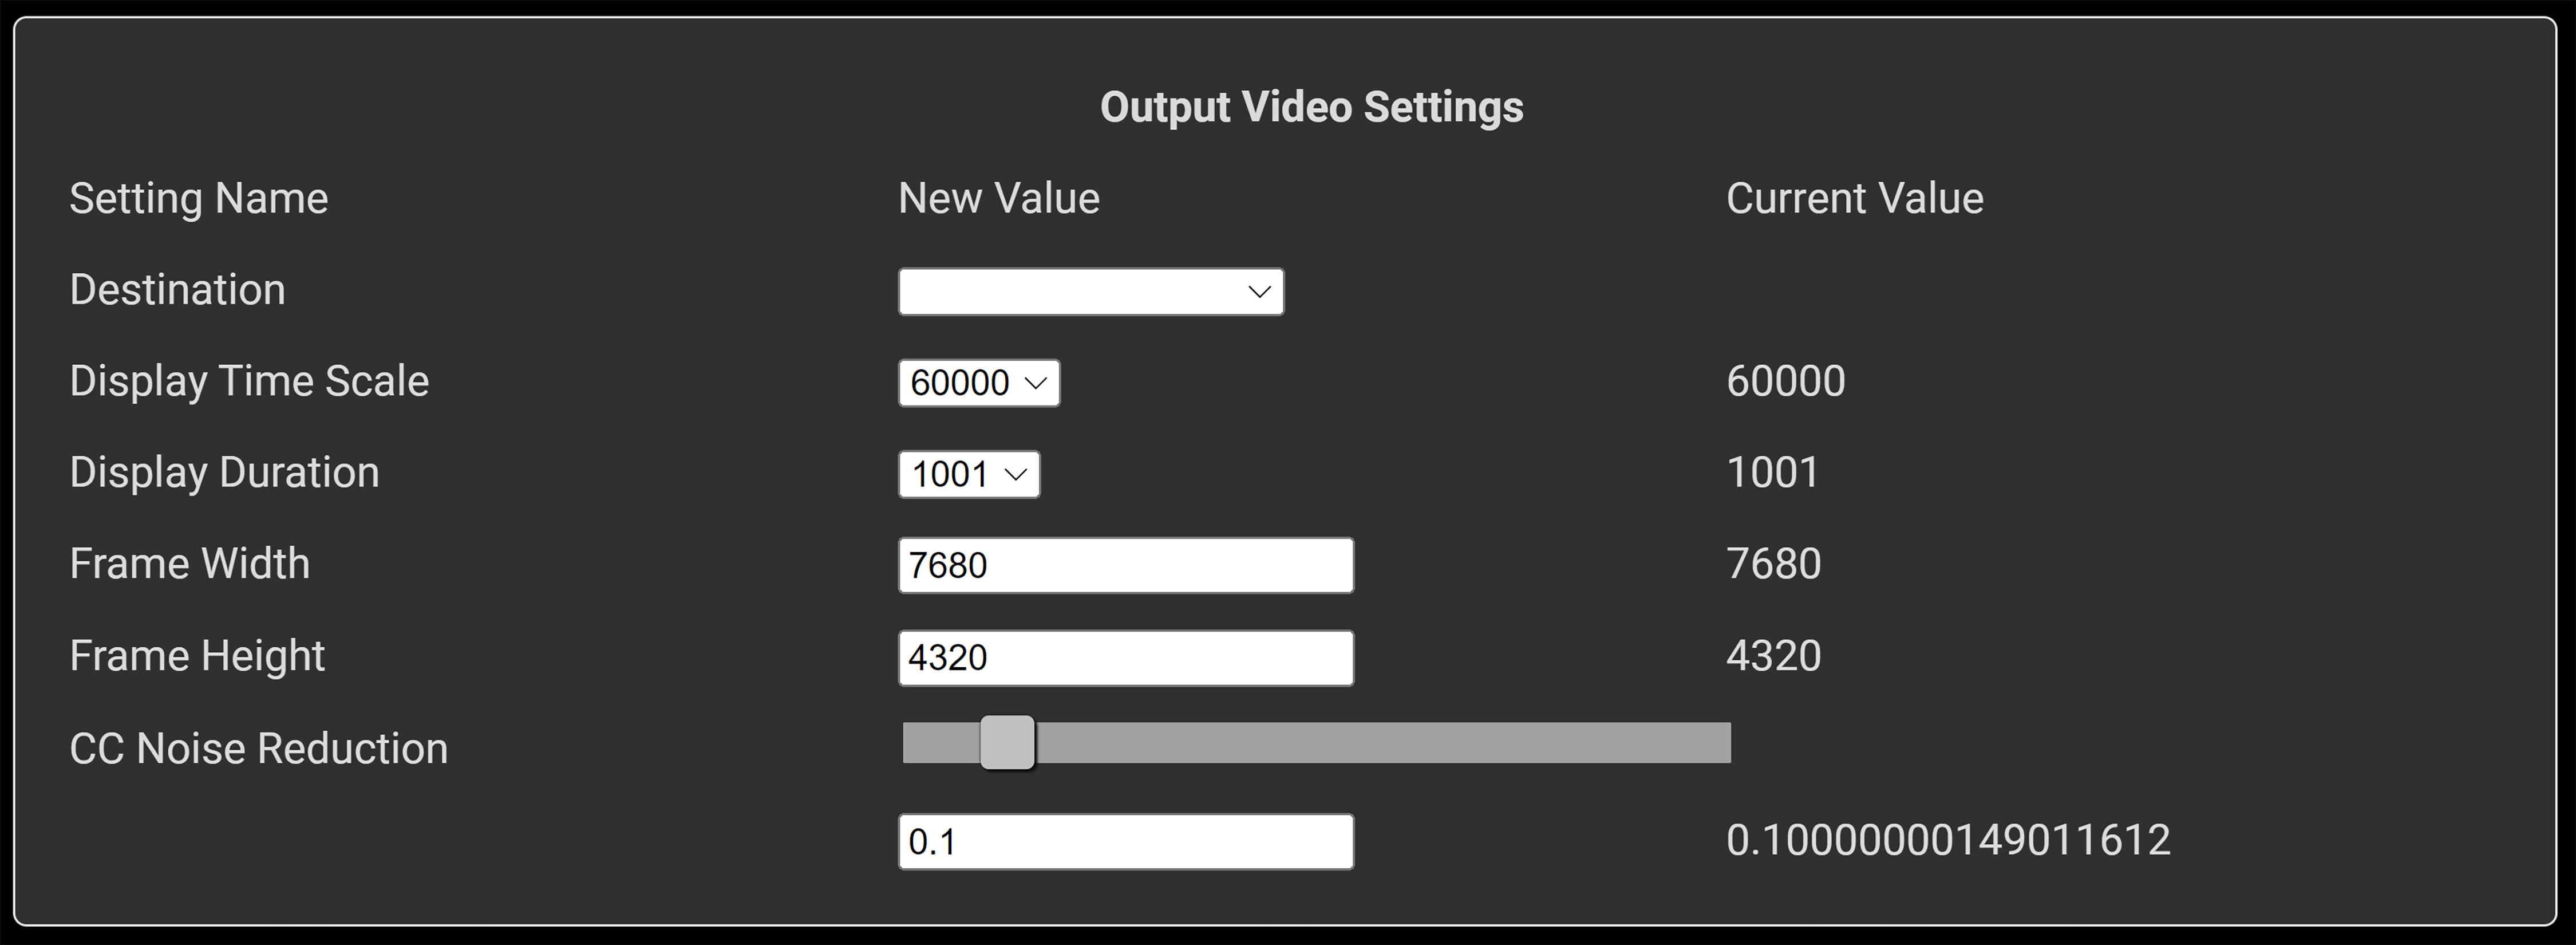
Destination: Allows user to choose the final destination of the frames being sent from the camera. Options currently supported are R3D Save Only, Blackmagic SDI Out, Monitor Out (DisplayPort out of the GPU directly), and NVENC. Each of these destinations has a set of settings in the other boxes in the app.
Display Time Scale: Numerator of FPS calculation (i.e. 60000/1001 = 59.94).
Display Duration: Denominator of FPS calculation.
Frame Width: Width of the frame in pixels. (Can be found in Menu > Project Settings > Frame Dimensions in the camera)
Frame Height: Height of the frame in pixels.
CC Noise Reduction: Noise Reduction
Blackmagic SDI Settings
RED Connect supports the use of the Blackmagic Design Decklink 8K Pro SDI card for sending SDI video out from the CCU. When using Blackmagic SDI Out, you will need to set your Format in the camera to match the Frame Height and Frame Width in the RED Connect app and make sure it is one of the supported formats that the Decklink 8K Pro supports. If the format is not a supported Decklink format, no video will show.

Blackmagic SDI Card Queue Size: Number of frames queued in the Blackmagic SDI card for sending to the output. Increasing this increases latency, but may improve video stream quality.
Blackmagic SDI GPU Direct: Controls whether or not GPU Direct is enabled.
NOTE: Some GPUs do not support GPU Direct.
NVidia NVENC Settings
Usage of the built-in NVENC encoders for video encoding is supported for NVIDIA RTX 6000 Ada graphics card.
To use the NVENC pipeline, navigate to the System Settings - Output VIdeo section, and change the Destination to NVENC Only. Once that is selected, you can scroll down to this NVENC section and change the settings as needed.
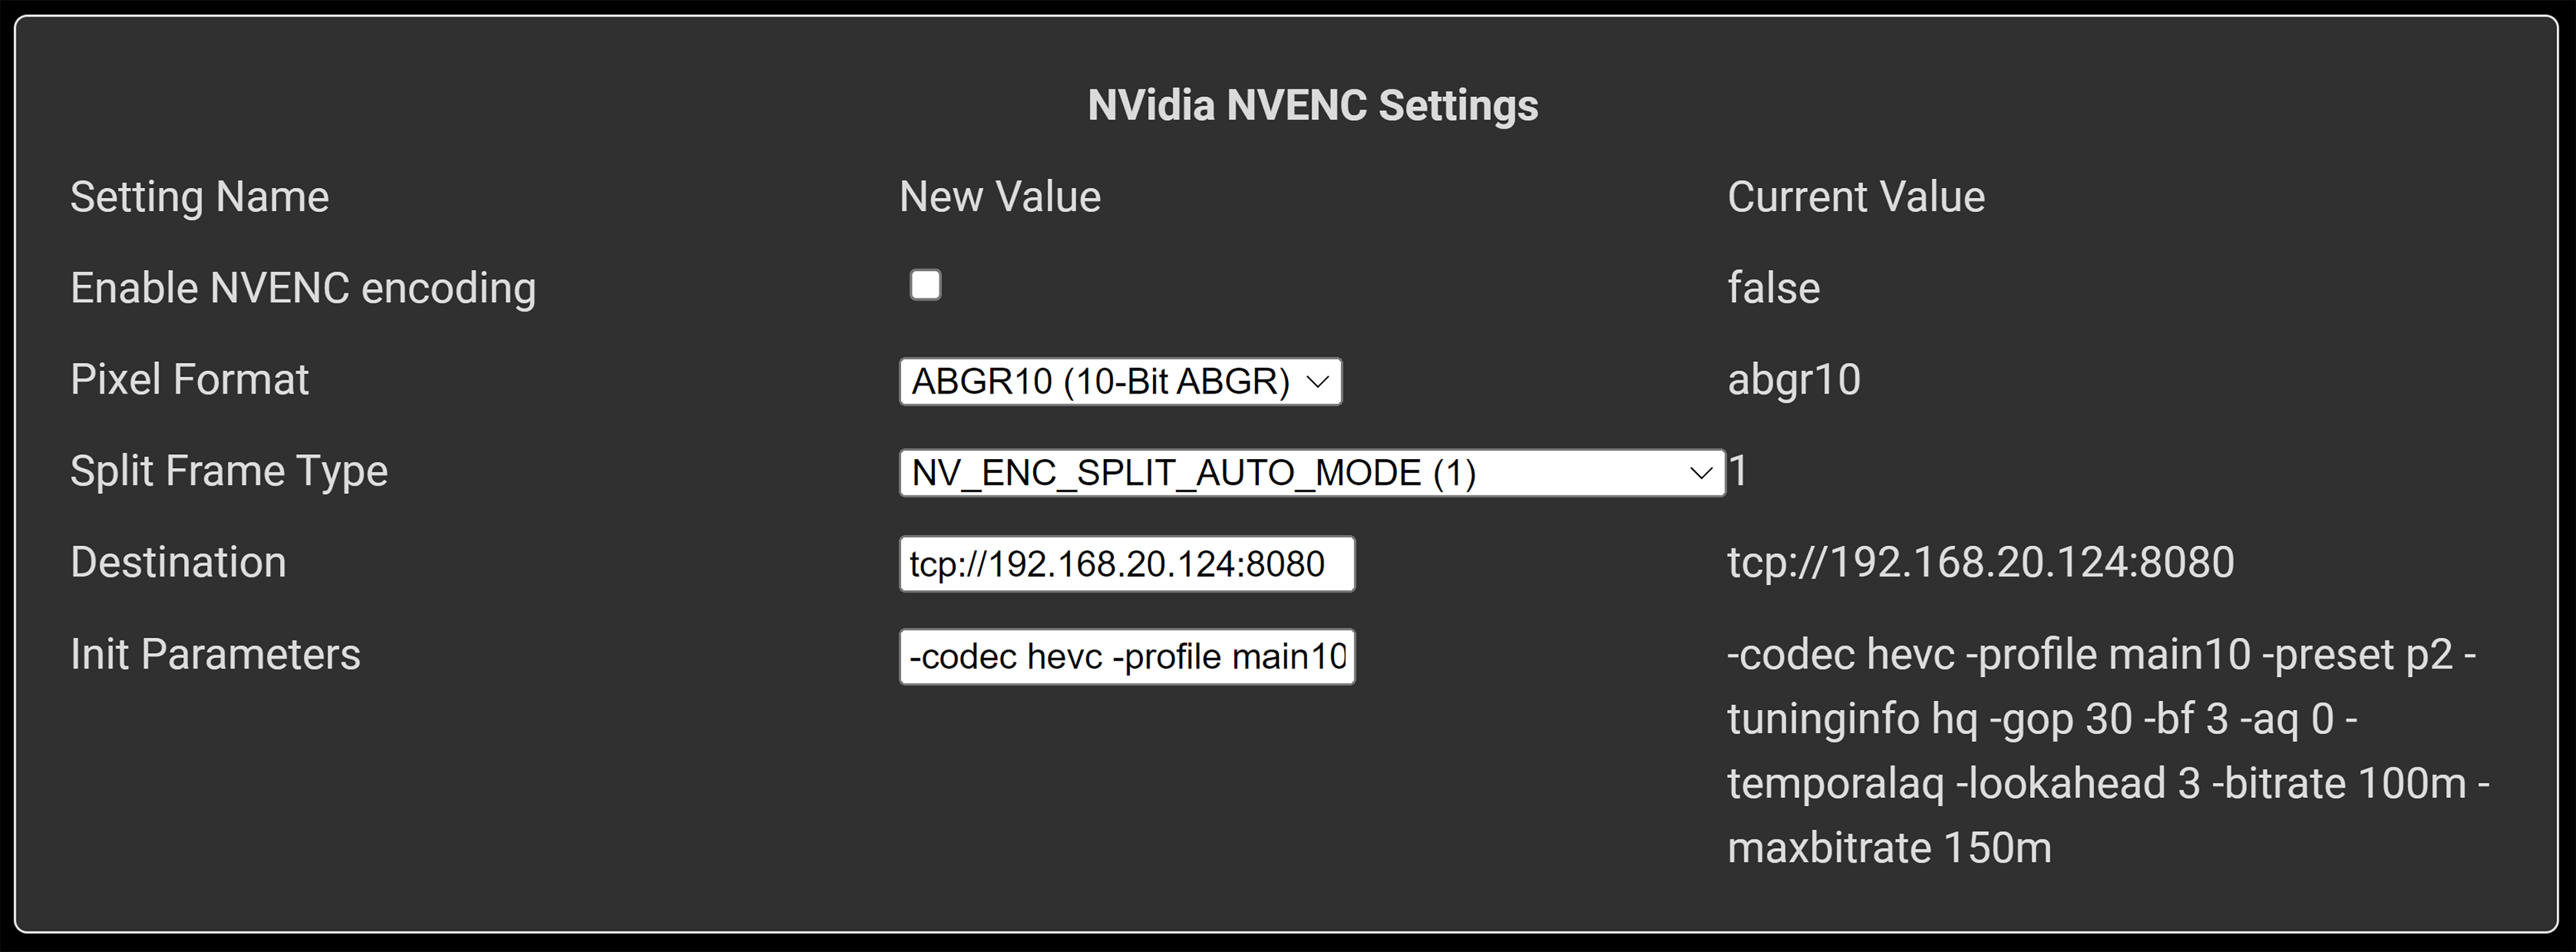
Enable NVidia NVENC encoding: Flag to enable or disable NVENC encoding. This will default to ON if the Destination is NVENC only.
Pixel Format: Determines the pixel format of abgr10 or argb10.
Split Frame Type: Determines Split Frame behavior.
Destination: Determines where the encoded frames are sent. Currently, only TCP is supported as the direct transfer method to your second machine.
Init Parameters: The NVENC Init Parameters are a set of ffmpeg flags that you can pass in to modify the output encoded stream. AV1, HEVC, and h264 are supported as of this time.
Video Monitoring Settings
RED Connect allows you to view the RED Connect stream coming from the camera directly onto a monitor of choice, so long as the monitor is connected to the first (left-most) DisplayPort connection on the graphics card. If the monitor size does not match the incoming video stream dimensions, an internal scaler in the RED Connect app will scale the video to fit to the display.
NOTE: On machines with multiple GPU’s, a second monitor must be attached to the system to properly display the video out. The monitor on which the Monitor Out display is to be shown should be connect to the first, or highest speed DisplayPort / HDMI port on the GPU.
To run video monitoring, navigate to the System Settings page, and change the Destination to Monitor Out Only, and then save the settings. After that, you can go to the desktop and double-click the "Switch to Direct" icon, and you should see a command prompt open, along with a transparent video display window. If everything is setup, you can then press record on the camera, and you should see a live feed of your camera on your connected display.
NOTE: For multiple displays, every Nth frame will be shown, since the frames are distributed amongst the available GPUs.
NOTE: To achieve maximum FPS, you can check the “Disable Noise Reduction” checkbox on the Adjust Video Settings page.
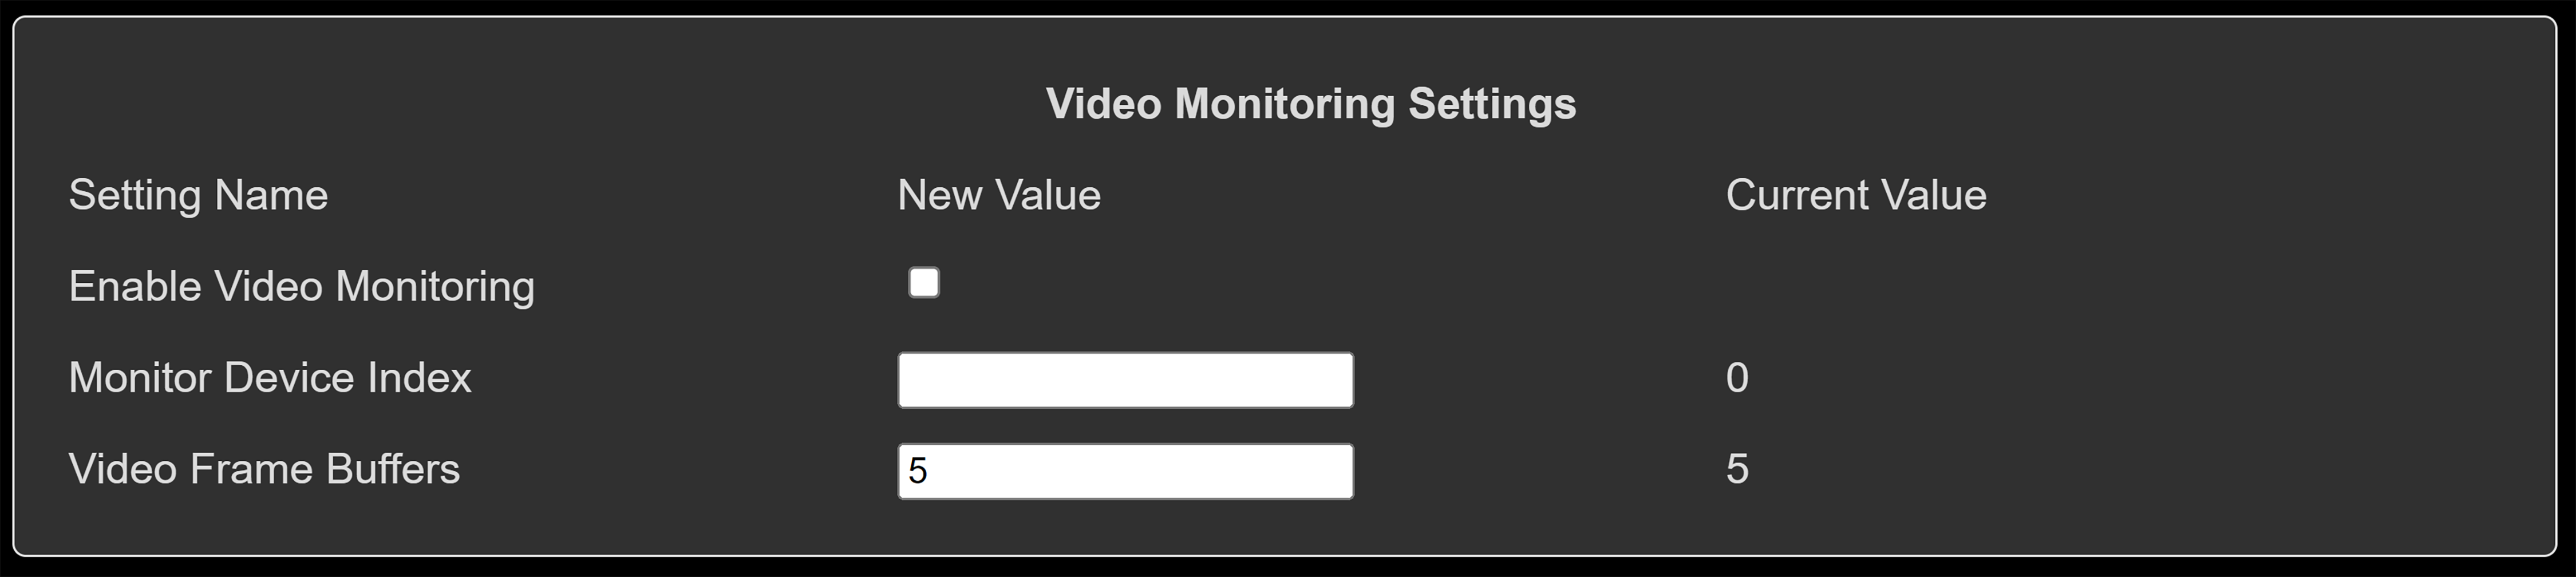
Enable Video Monitoring: Enables or Disables Video Monitoring feature. Enabled by default when Destination is set to Monitor Out Only.
Monitor Device Index: Number of the GPU outputting the video.
Video Frame Buffers: Number of Simultaneous Frame Buffers processed for display.
File Save Settings
Use the File Save Settings to manage how and where clips and replays are saved.
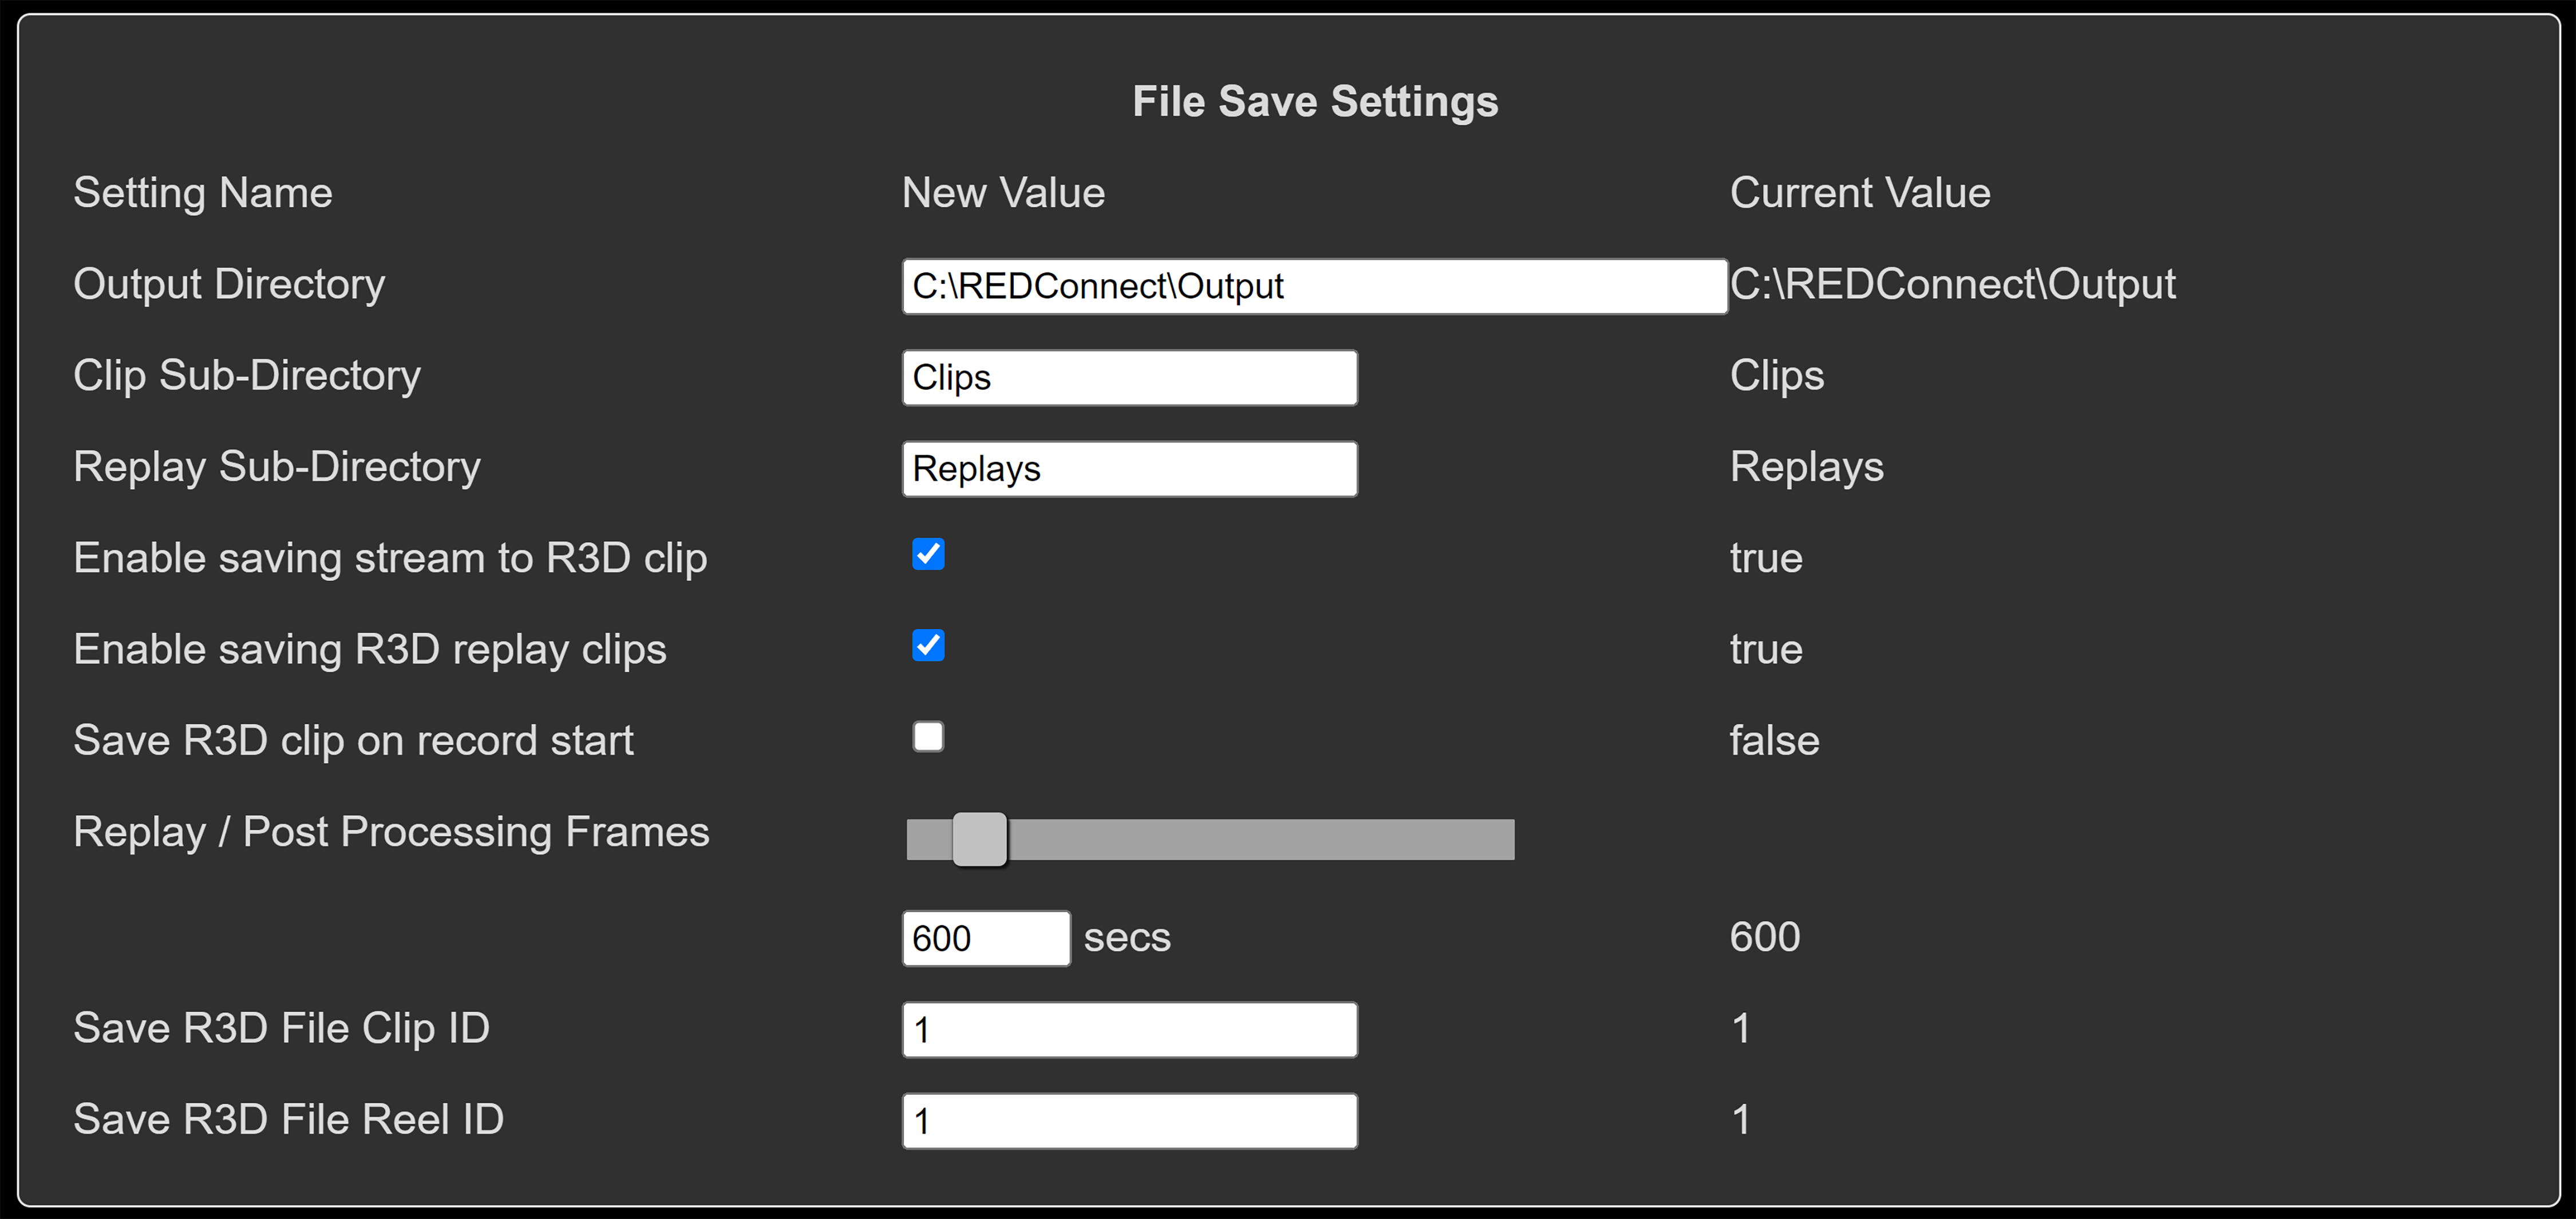
Output Directory: Main directory where RED Connect creates the directories for clips and replays.
Clip Sub-Directory: Sub-Directory where clips get saved. Clicking Save Clip on the home page records the clip to this sub-directory.
Replay Sub-Directory: Sub-directory where replays get saved. Clicking Save Replay saves the replay to this sub-directory.
Enable saving stream to R3D clip: Enables saving clips while streaming.
Enable saving R3D replay clips: Enables saving replays while streaming.
Save R3D clip on Record Start: When this checkbox is checked, whenever the camera starts sending a live feed to the displays, the entire feed will begin to get saved to the designated clip sub-directory, until recording is stopped on the camera. This makes recording behavior function most similarly to typical camera recording.
Replay / Post Processing Frames: Number of frames back a replay will record for. The default is 600 frames, so at 60 FPS, you will get at least 10s of footage.
Save R3D File Clip ID: Clip number in the clip name of the saved clip.
Save R3D File Reel ID: Reel number in the file name of the saved clip.
Advanced Settings
On the System Settings page, there are some settings that you might want to adjust after you have already established a connection and started a stream.
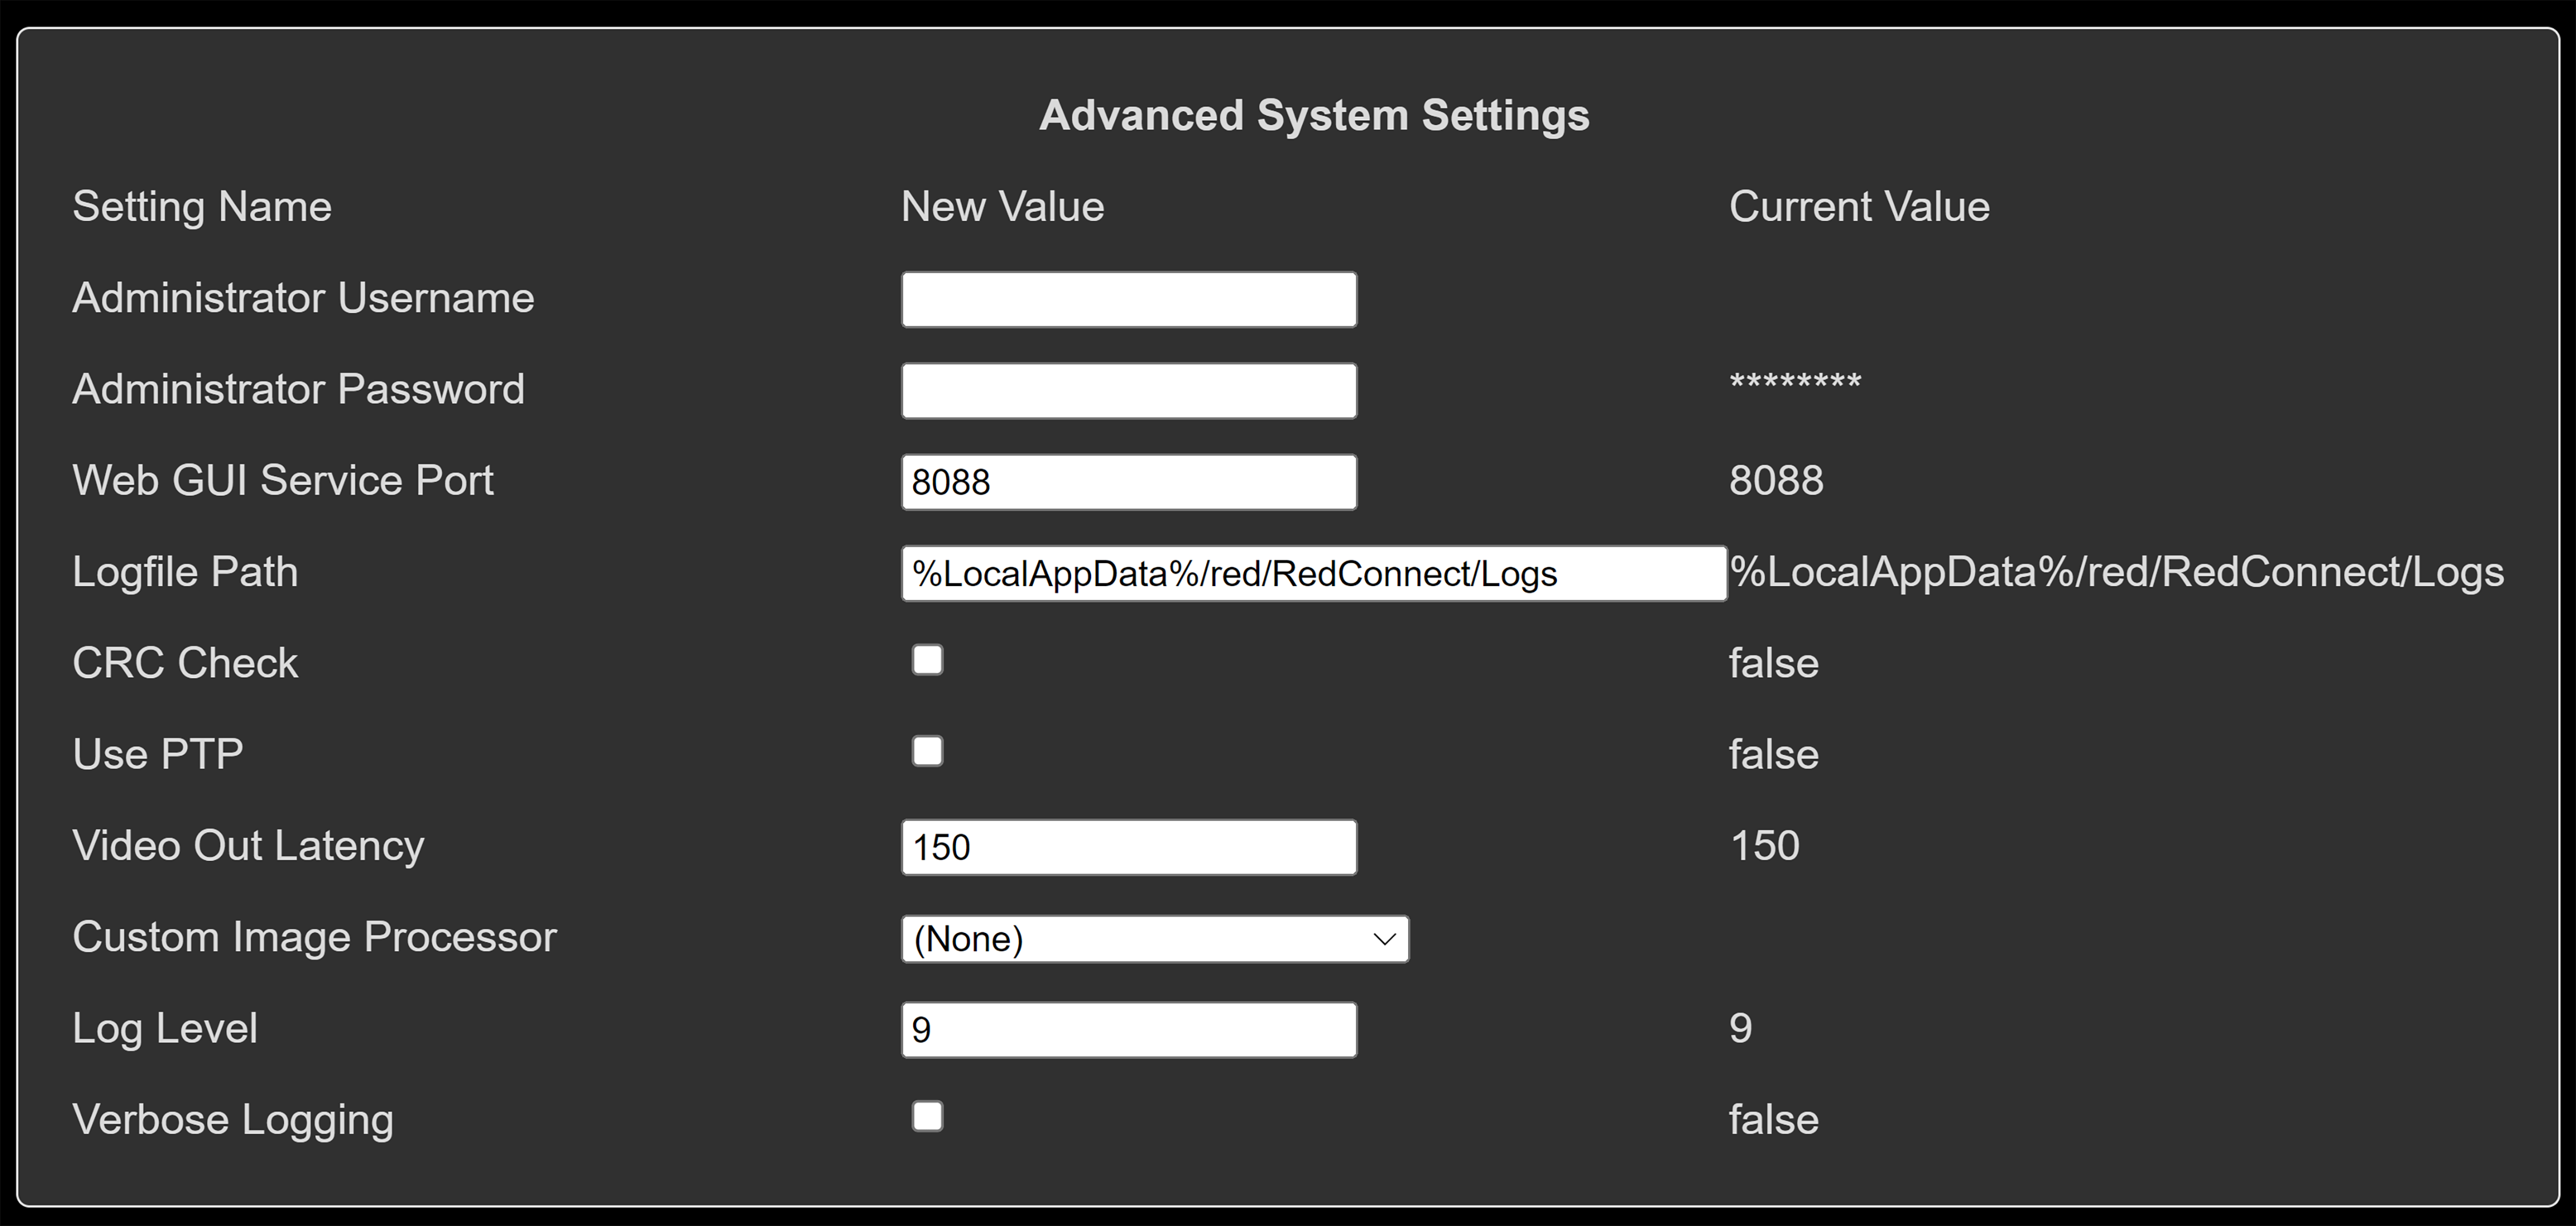
Administrator Username: The username that a user must enter at the bottom of the System Settings page in order to apply the settings made to the page
Administrator Password: The password that must be entered at the bottom of the System Settings page in order to apply the settings made to the page. Default is “password”.
Web GUI Service Port: Changes the port at which the site is hosted. The default is 8088. This can be seen when accessing the page via 127.0.0.1:8088.
Logfile Path: This is where the RED Connect application logs live.
CRC Check: Enabled or Disabled CRC checking of each frame is it arrives to the CCU.
Use PTP: Enables whether or not to use PTP timestamps from the camera and computer.
Video Out Latency: Additional latency before the frame is decoded to the GPU.
Custom Image Processor: These are Custom Image Processor libraries that are included with the app that modify the output image before it is displayed. By default, this setting is blank, meaning that it will not use the included Custom Image Processor. The Sample Custom Image Processor is an example of a lens de-warp library that de-warps the image live. You can include your own Custom Image Processor into the code by using the CustomImageProcessor setting in the RED Connect ini file. Please reach out to RED for more details about custom image processors, and sample code.
Log Level: Controls the level of logging that the app does to the log file located at the Logfile Path setting above. Increasing this value will include more logging, but can slow down system performance. It is not recommended to change this unless debugging an issue with RED.
Verbose Logging: Also controls the amount of information written to the log file located at the Logfile Path setting above. Increasing this will also include more logging done by the system, which can slow it down. This is also not recommended to be increased unless you wish to get a more detailed log of the system.