Exposure
The camera offers multiple tools to determine the current image exposure levels and provides the tools to adjust the exposure to the desired levels.
When using the R3D file format, you can correct color temperature and ISO settings at any time. The aperture and exposure time however, are two of the parameters that you cannot corrected later in R3D files.
NOTE: ProRes file format burns in ISO and White Balance, and does not allow you to adjust these settings post-recording like you can with the R3D format.
While the correct exposure is always an artistic decision, there are best practices for capturing the most dynamic range while also allowing post production to preserve the intended image information.
The goal is to reduce clipping in the bright and dark parts of the image as much as possible. Otherwise the sensor information is lost in the overexposed and underexposed areas.
The primary tool for determining the exposure levels is the histogram. It shows the exact luminance levels of the red, green, and blue pixels after you apply the ISO and White Balance settings. Monitors have their own color gamuts and brightness levels which makes the monitor less than optimal for determining the camera's exposure levels.
This camera includes a full Histogram and a simple RGB raw pixel exposure meter, which allows you to determine proper exposure regardless of the set ISO or camera look (for more information refer to Onboard LCD Touchscreen).
The full histogram provides information about how the brightness is distributed in the image. This allows you to see how close a scene is to clipping in the light and dark areas, which makes it easy to choose aperture, exposure, and ND filters solutions accordingly.
|
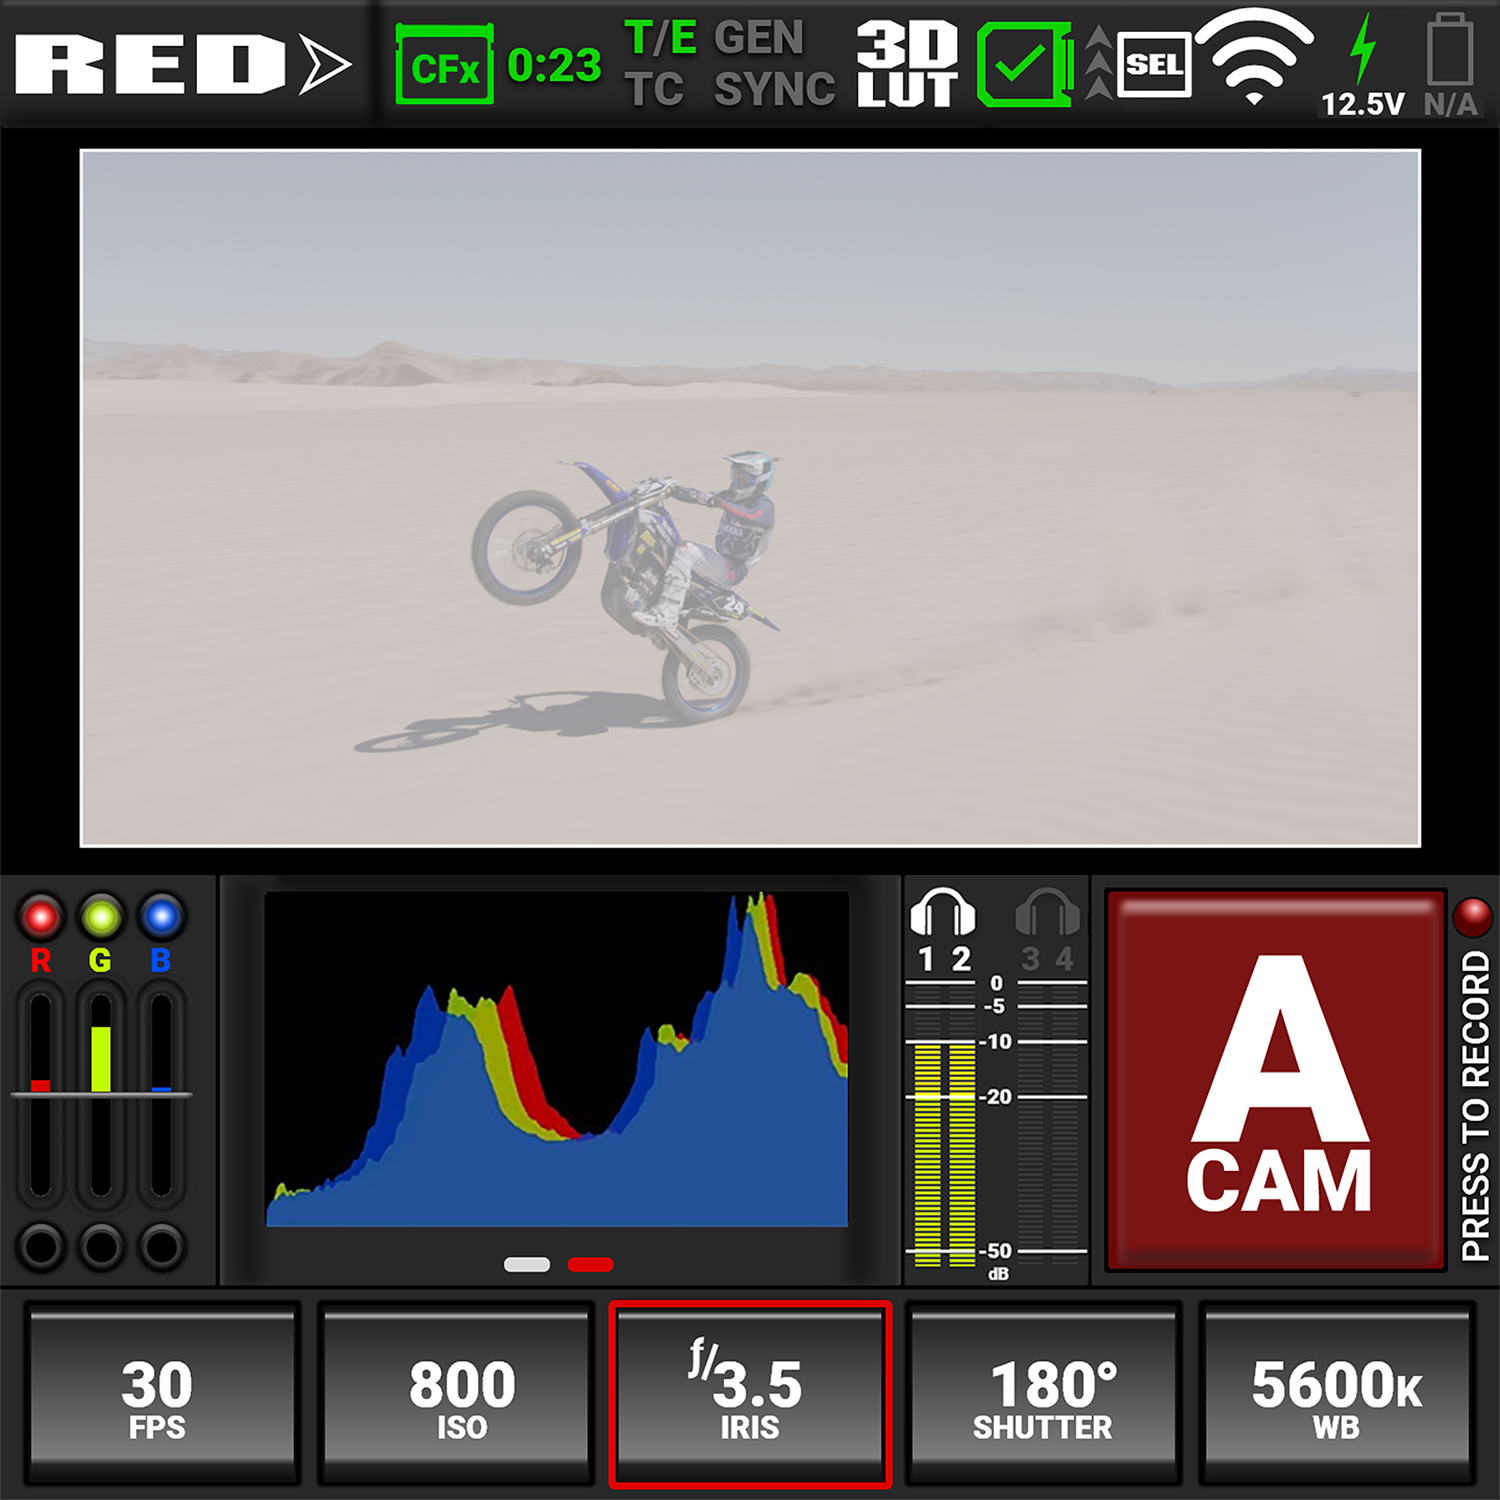
Example of overexposure |
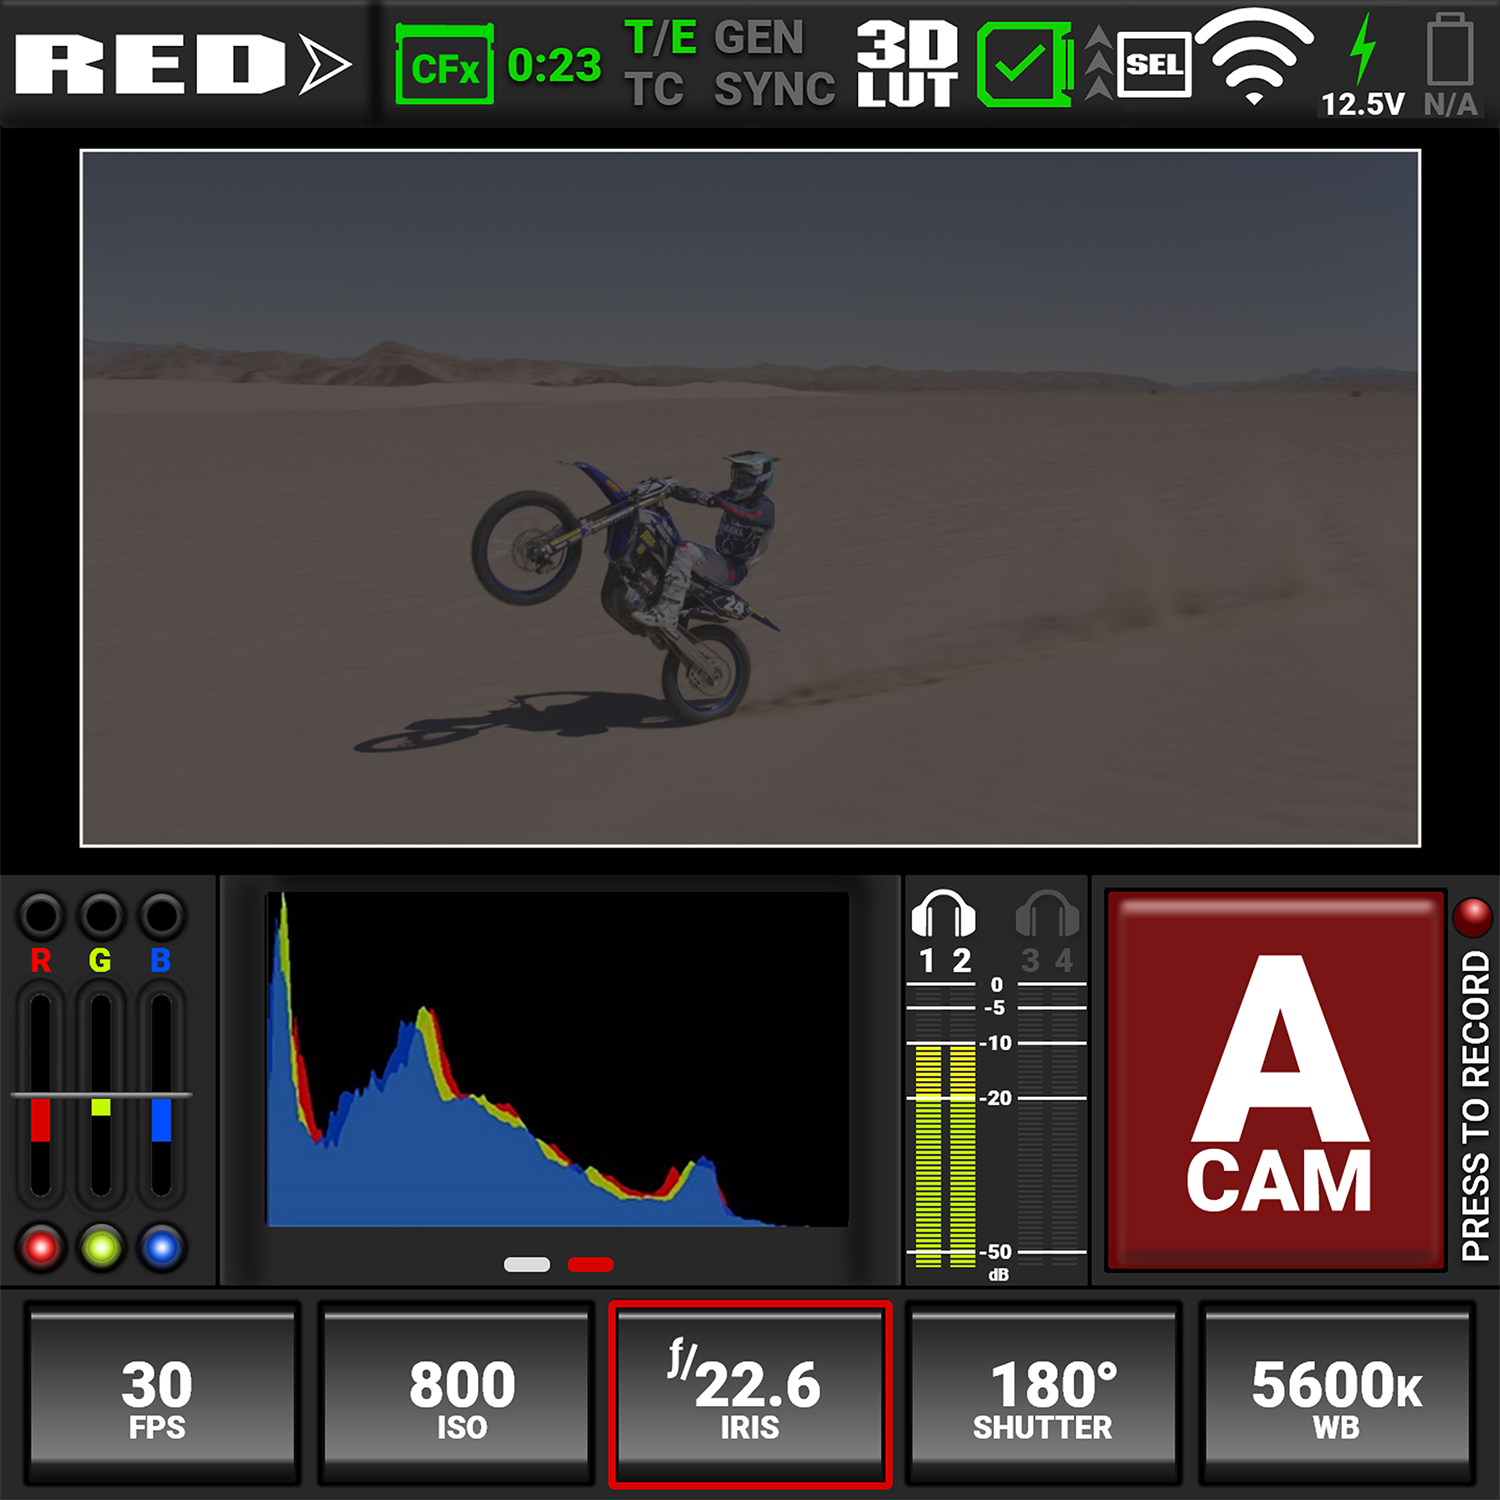
Example of underexposure |
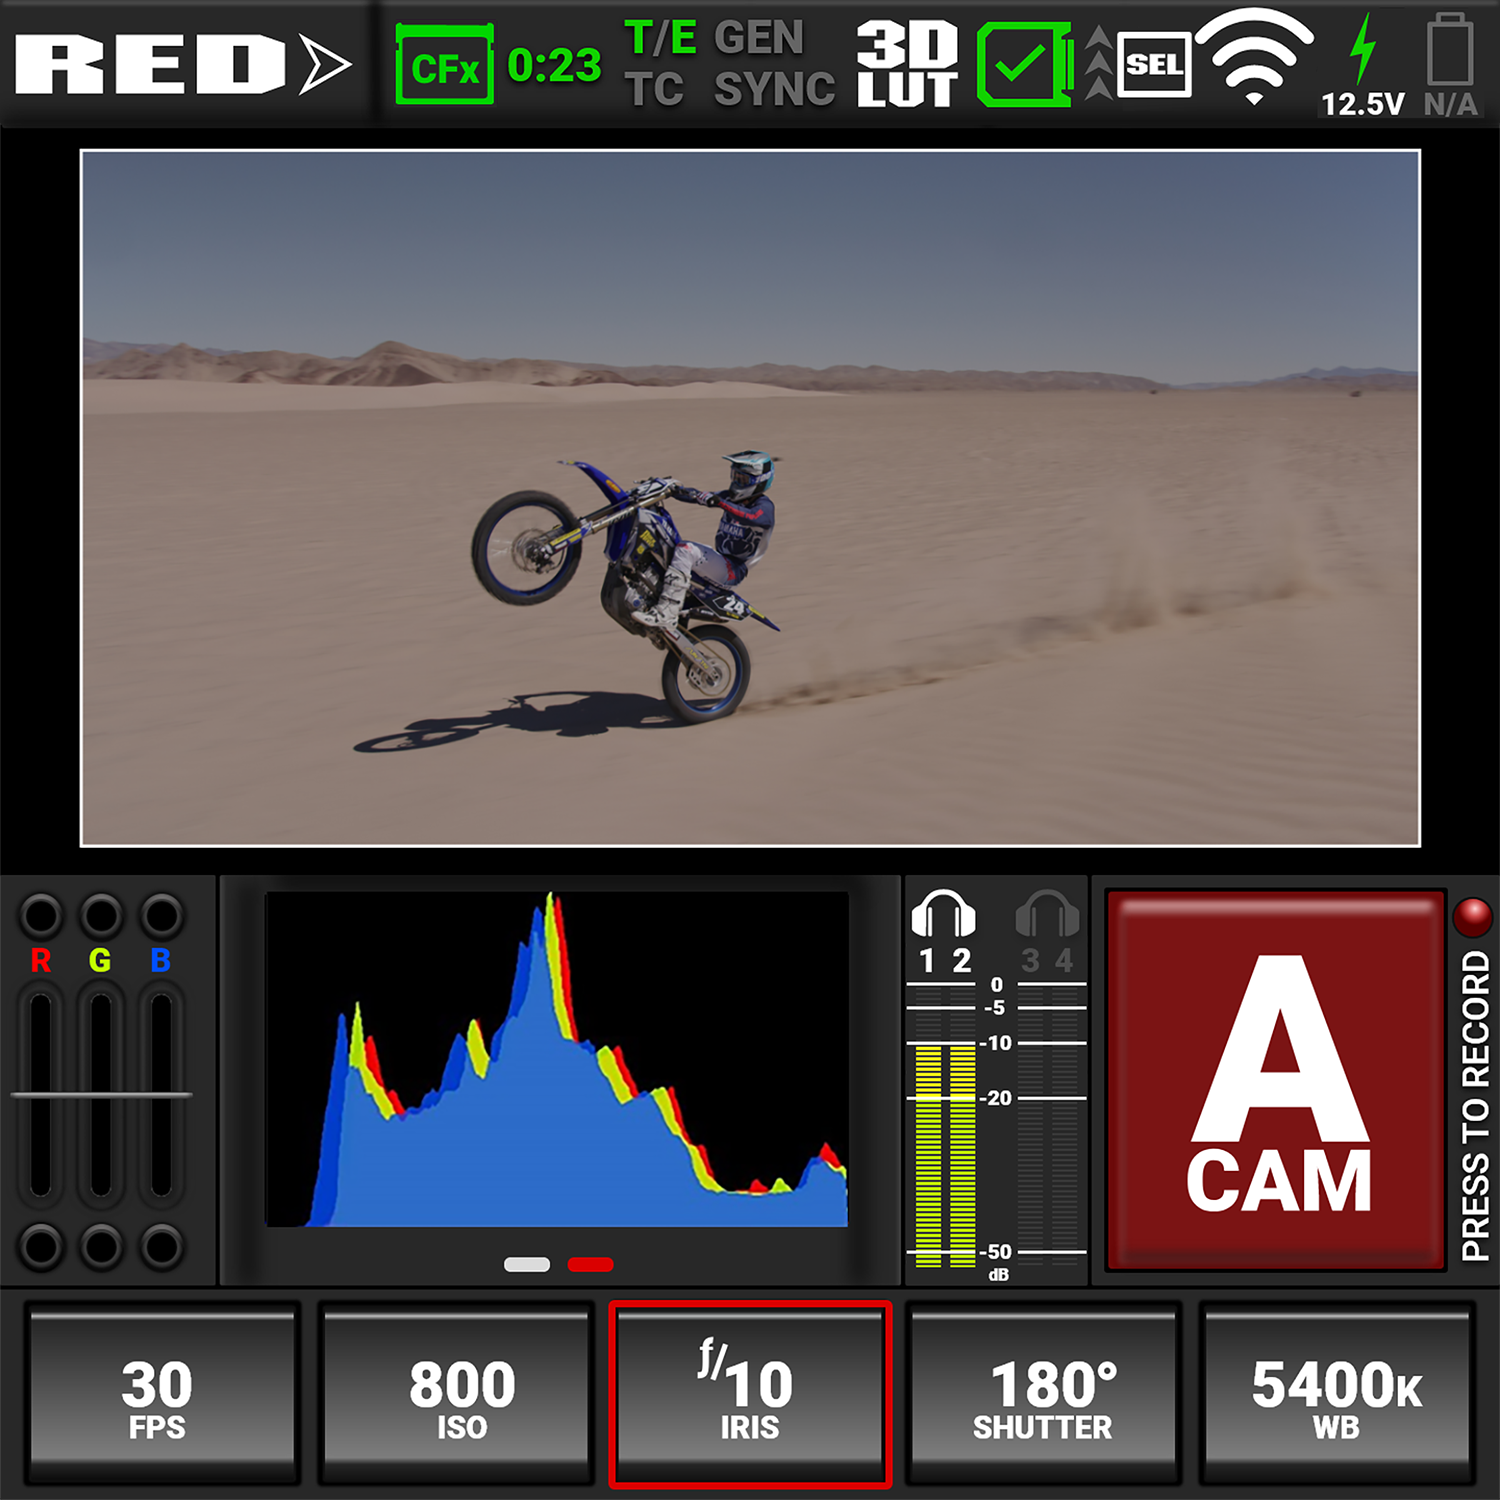
Example of a balanced exposure |
False Color Exposure Tools
While the histogram provides information about the brightness distribution and clipping of the image, it does not show you the areas in the image that are near, or that have reached, clipping. For this, the camera provides image overlays that provide false colors to indicate precise exposure levels.
False Color Exposure Mode
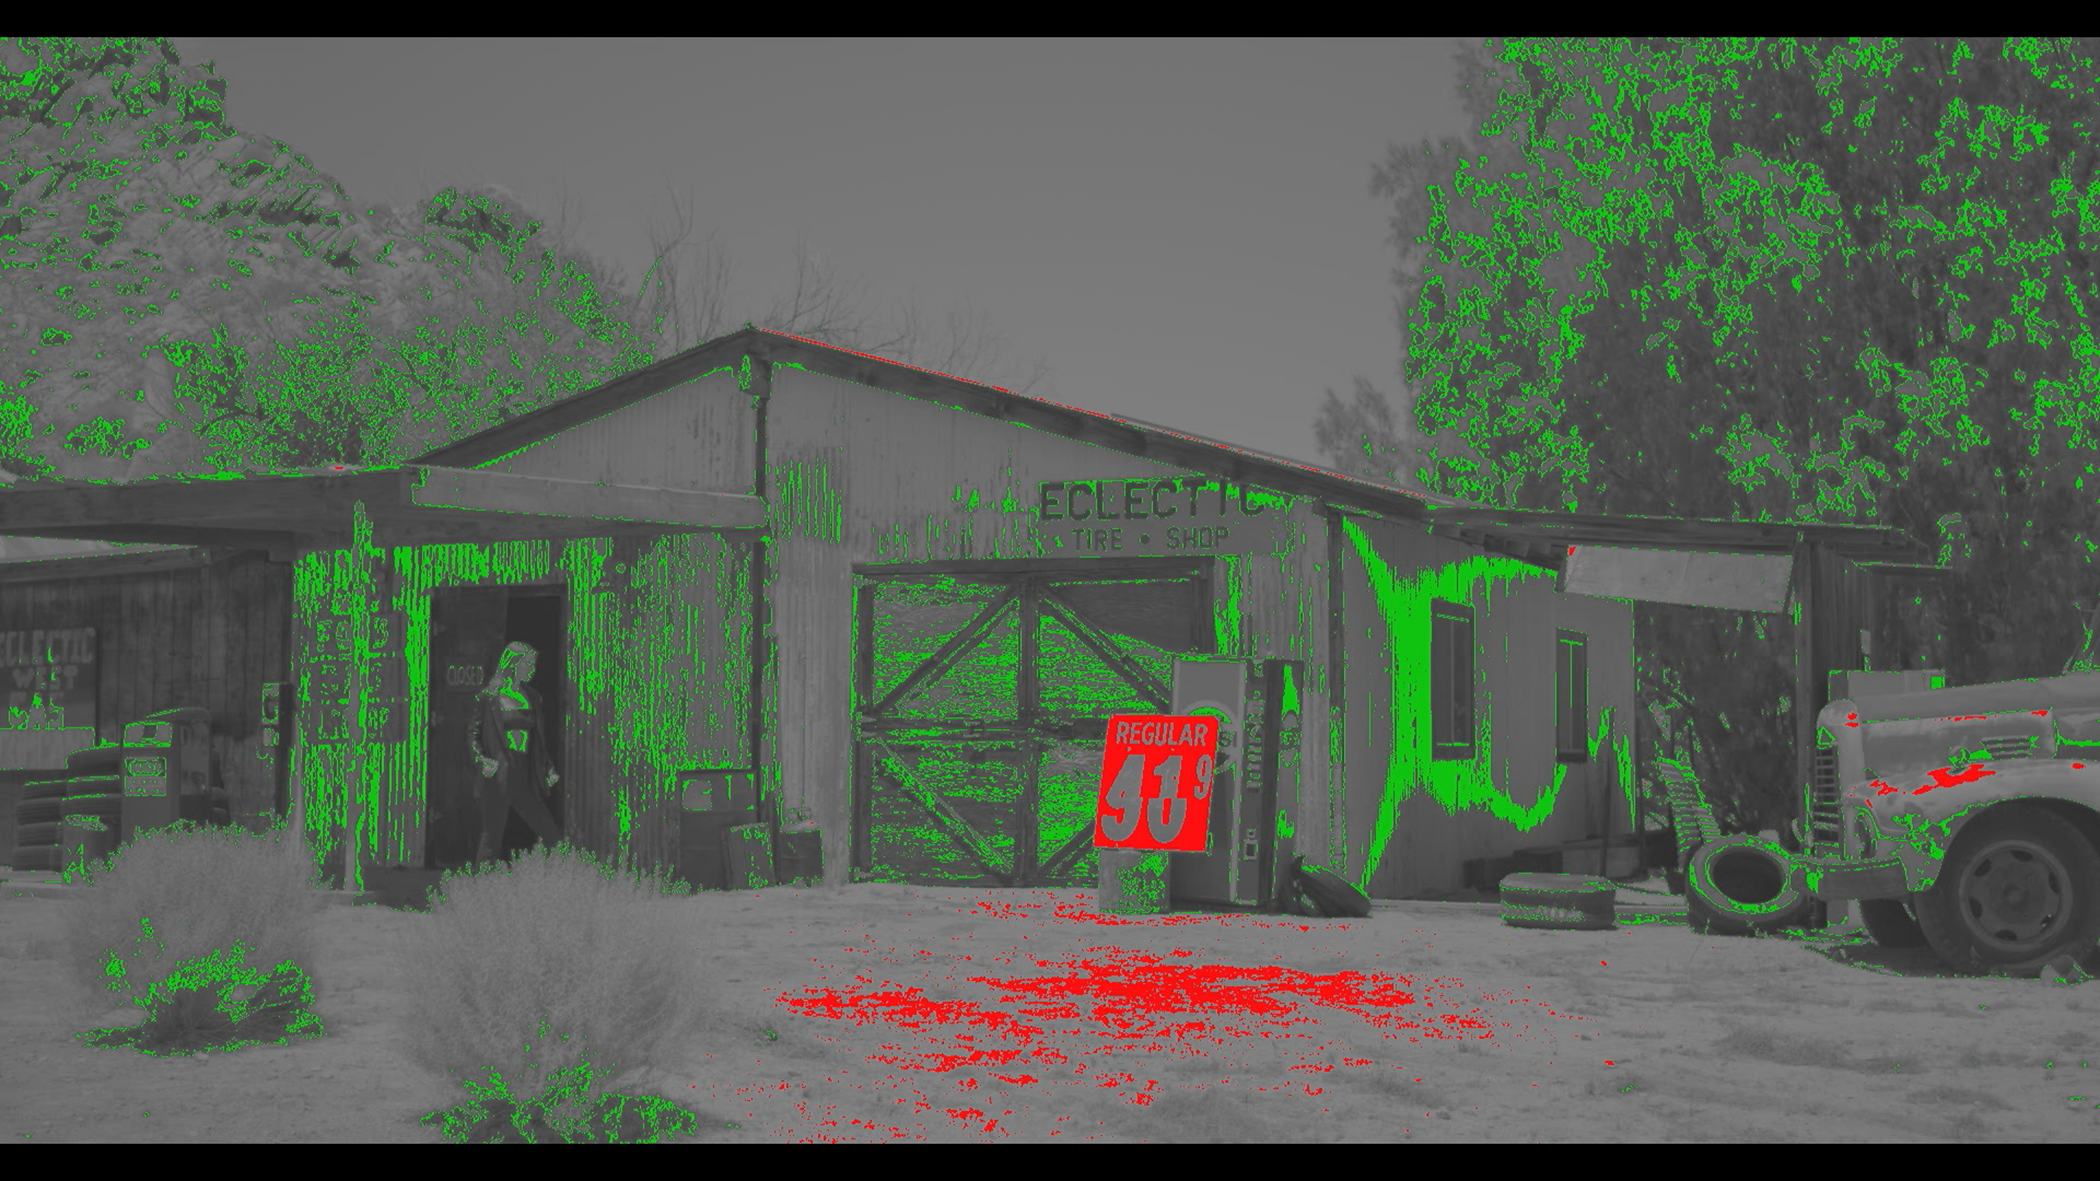
The False Color Exposure mode overlay provides information where the image is close to clipping or already clipping in the highlights (red), midtones (green), and shadows (purple). For more information, refer to False Color Exposure Mode.
Example of Exposure Mode:
False Color Video Mode
The False Color Video mode provides more gradual information about the brightness in different parts of the image. This is helpful when you want to expose skin color at the right level, while ignoring the fact that backgrounds might be overexposed or underexposed (refer to False Color Video Mode).
Example of Video Mode:
False Color Gio Scope Mode
Gio Scope mode displays a color overlay on top of a desaturated RAW sensor image, identifying 16 increments within the dynamic range of the sensor. The RGB settings (color temperature, ISO, LUT, etc.) are not used by this mode.
Each number (1 to 16) indicates a different increment of dynamic range. Number 16 represents the top increment, and is broken up into 1/8th sub-increments to show highlight roll-off. Each 1/8th increment is represented by a different shade of red, ranging from light red (less light) to dark red (most light, clipping).