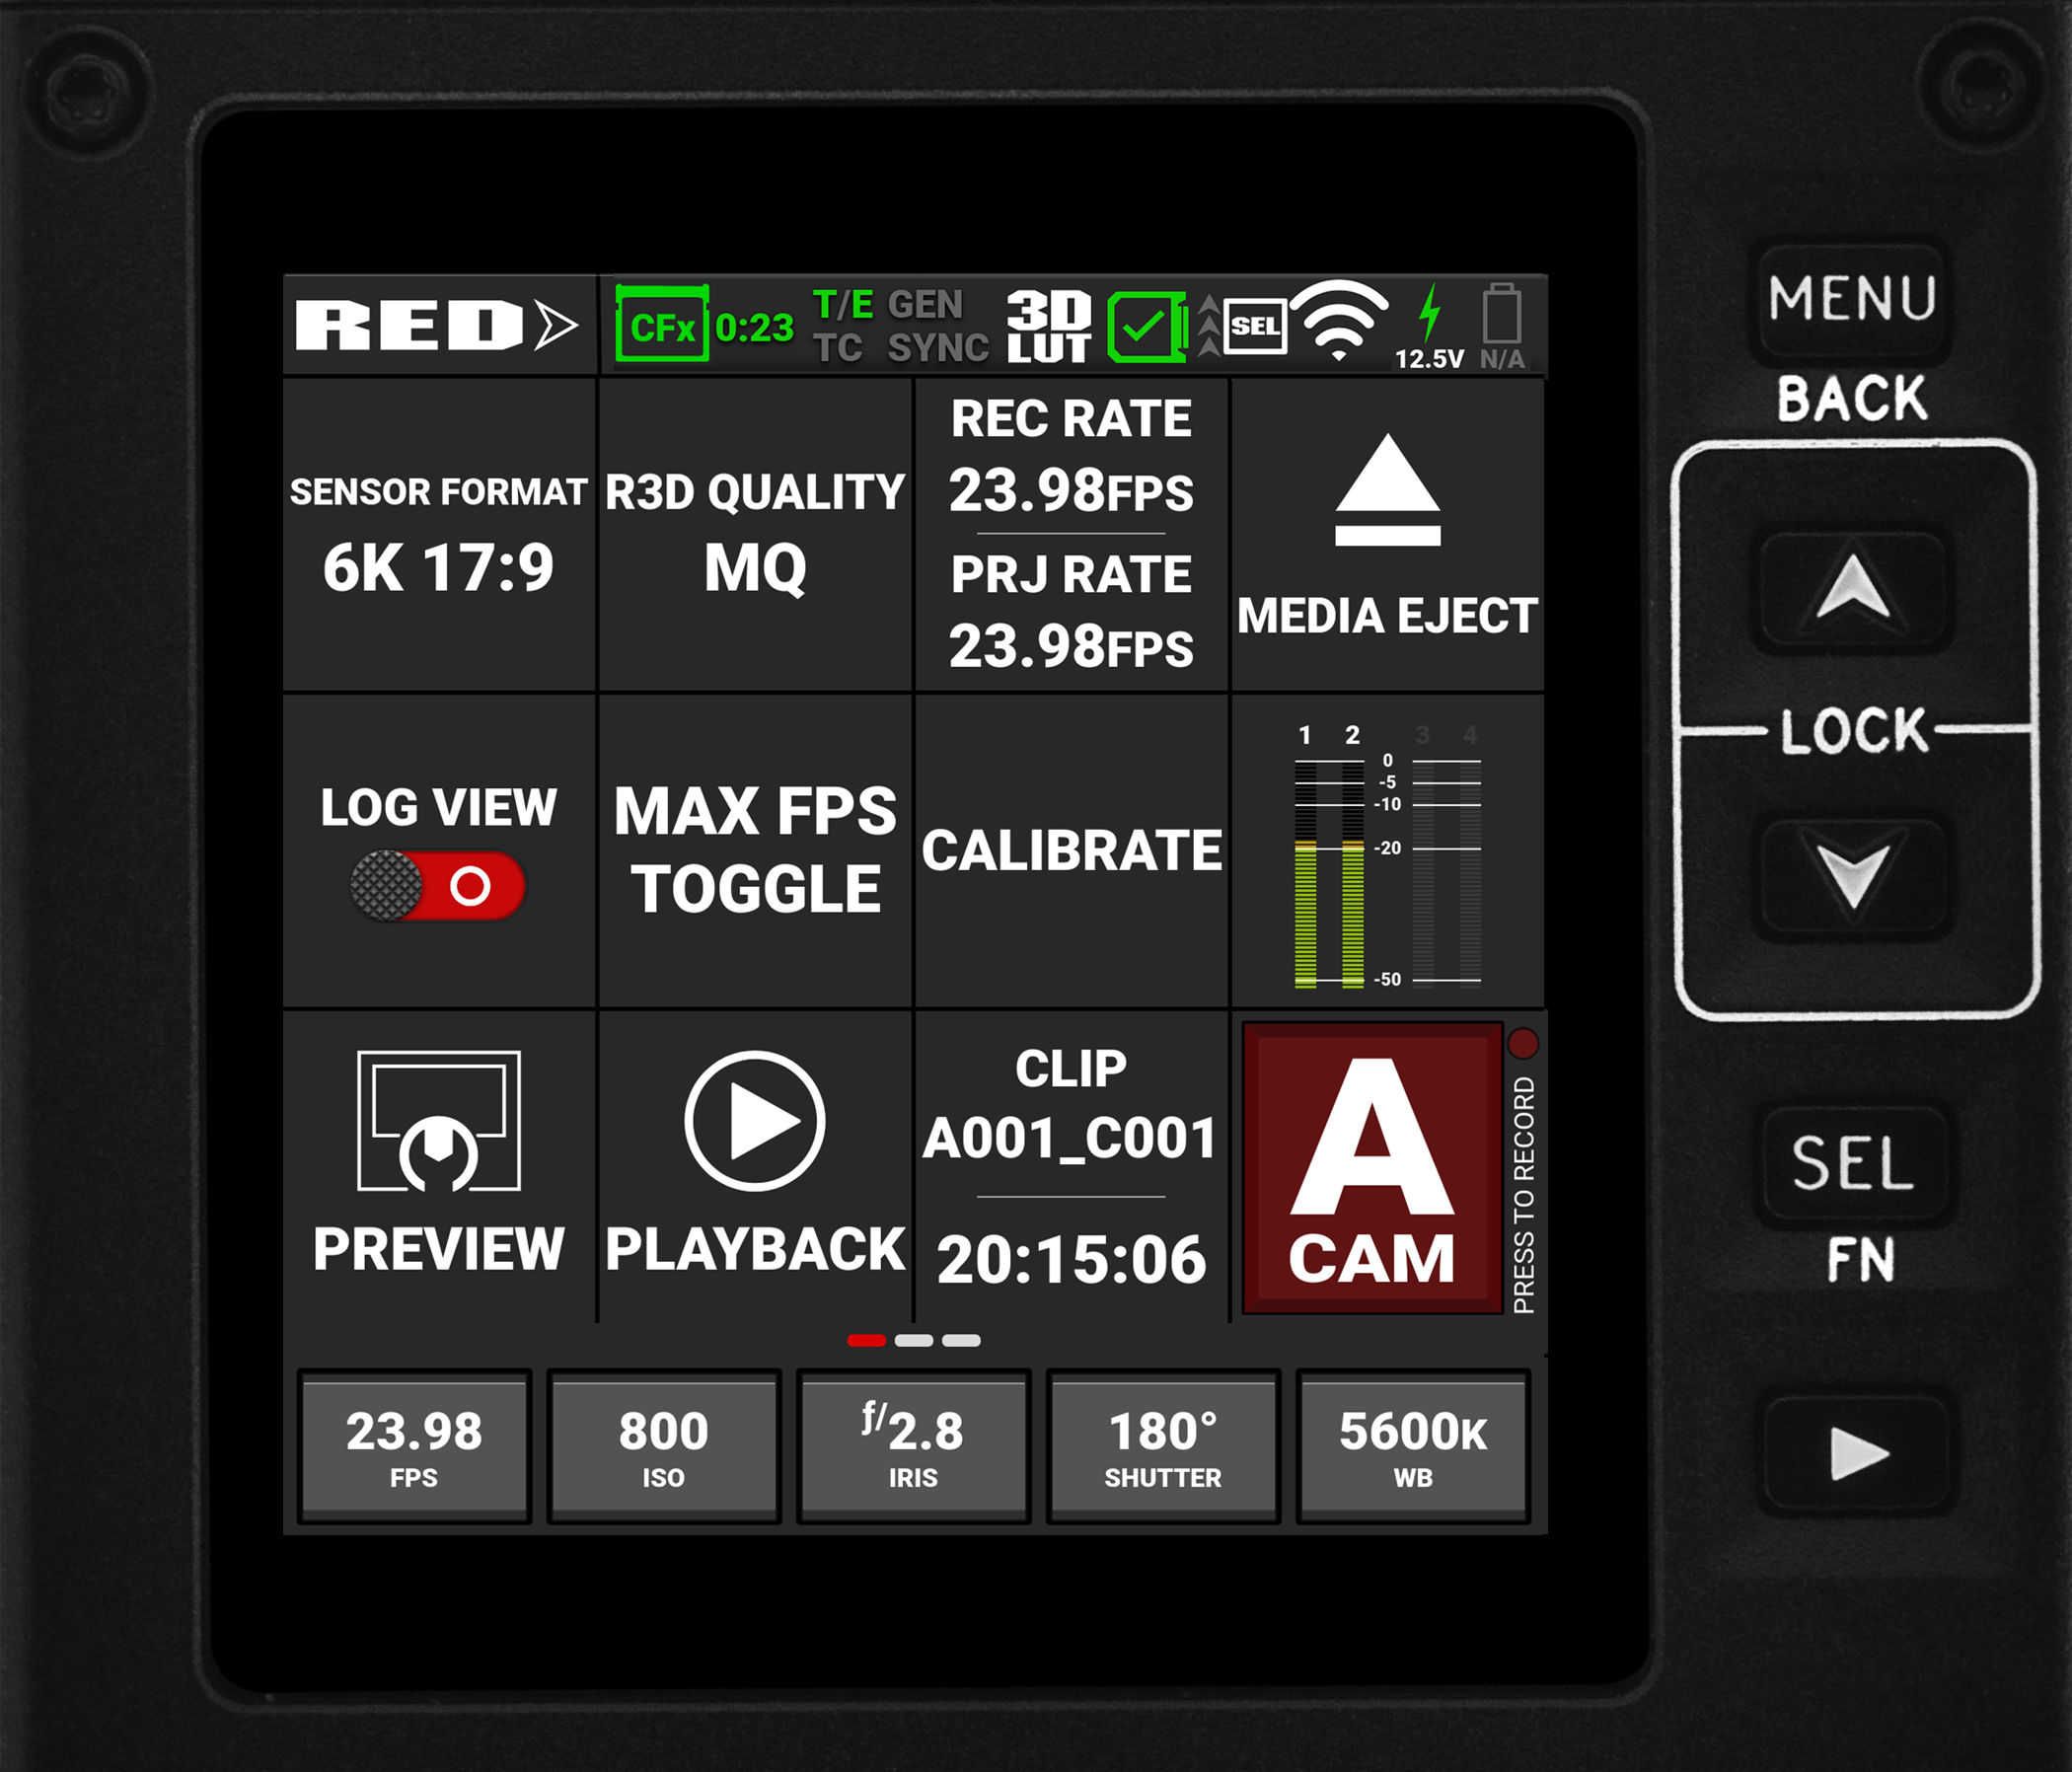
Onboard LCD Touchscreen
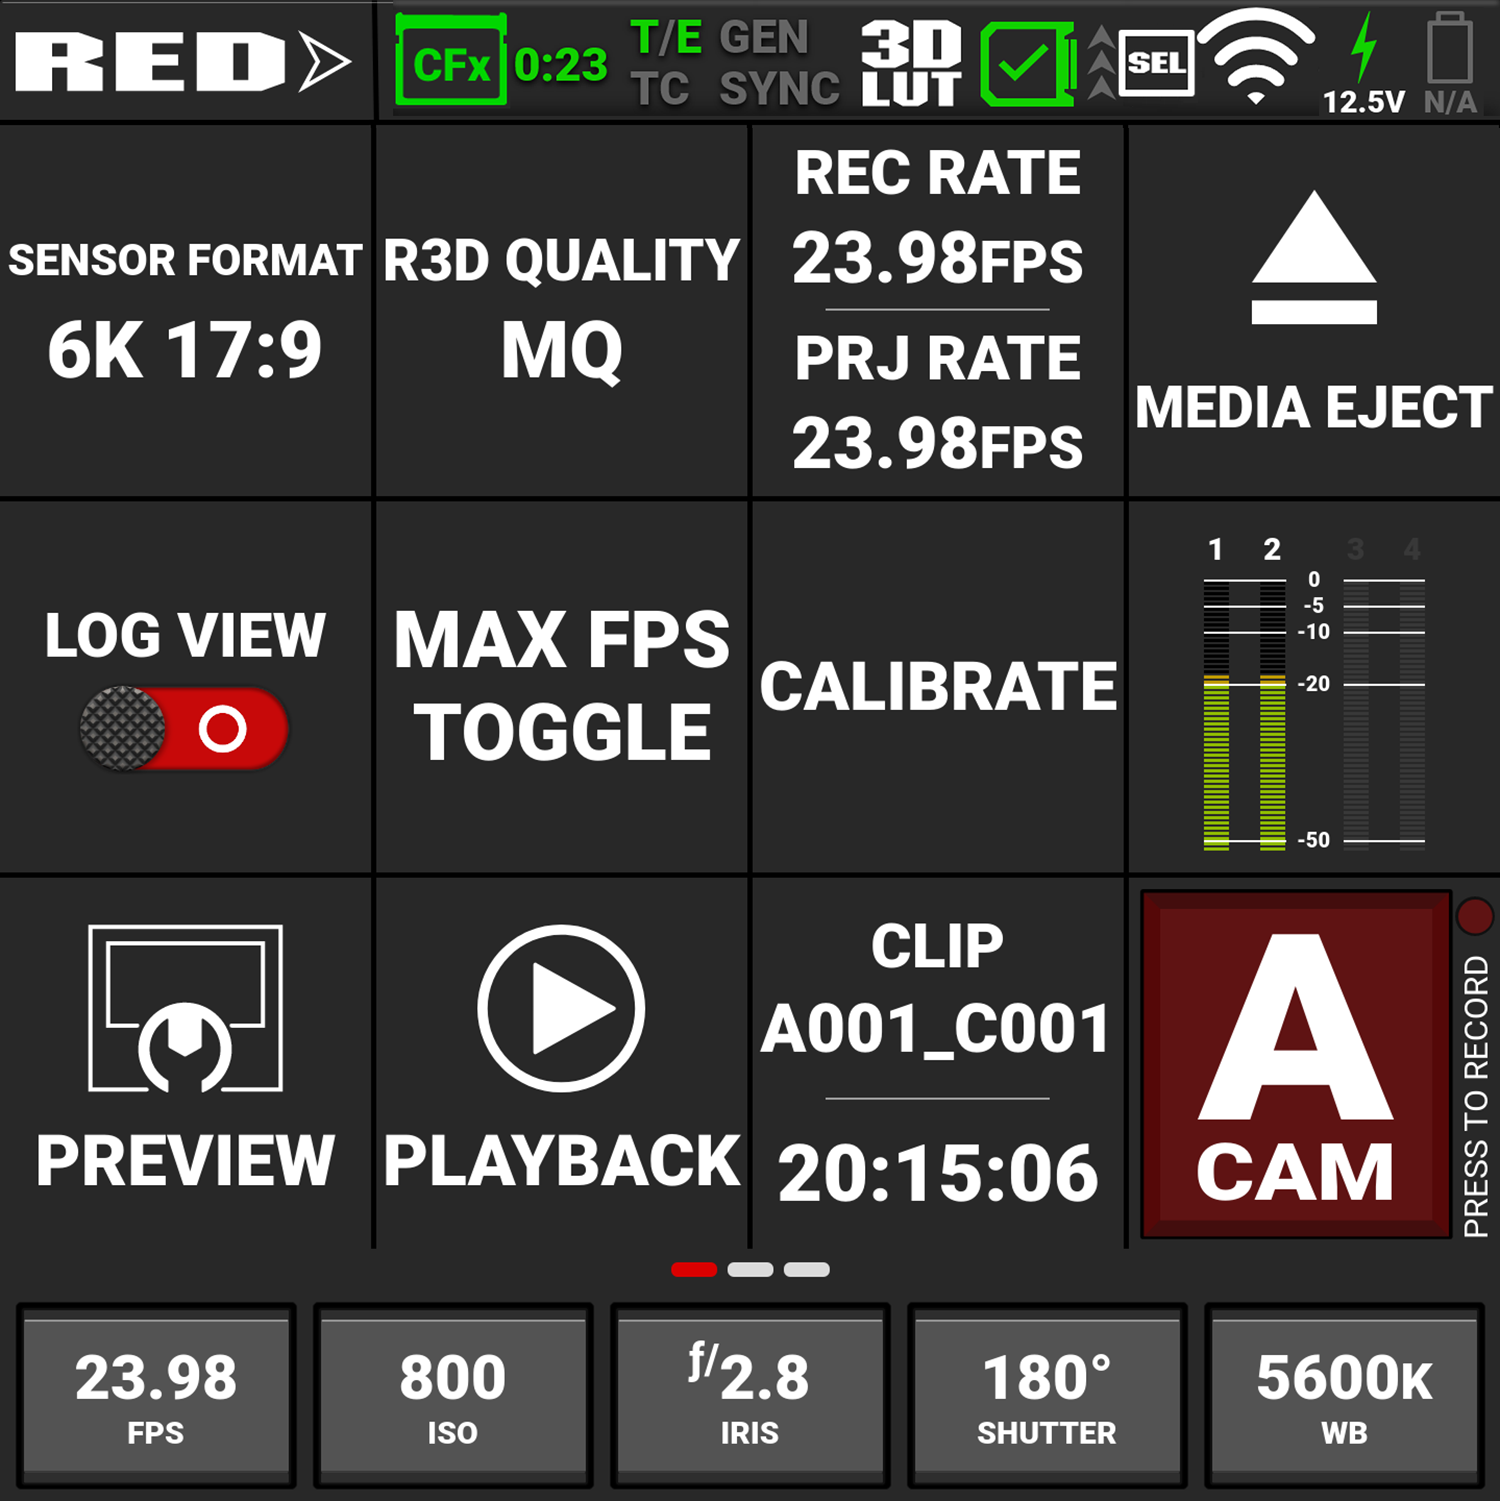
This section describes the structure and layout of the graphical user interface (GUI) for the
NOTE: After 1 hour of inactivity, the touchscreen will go to sleep. Tap the touchscreen or touch any button to wake the touchscreen. The touchscreen will not sleep while the camera is recording.
You can configure the Onboard LCD Touchscreen to initially display the Preview page or the User Pages (refer to Onboard LCD for more information).
The
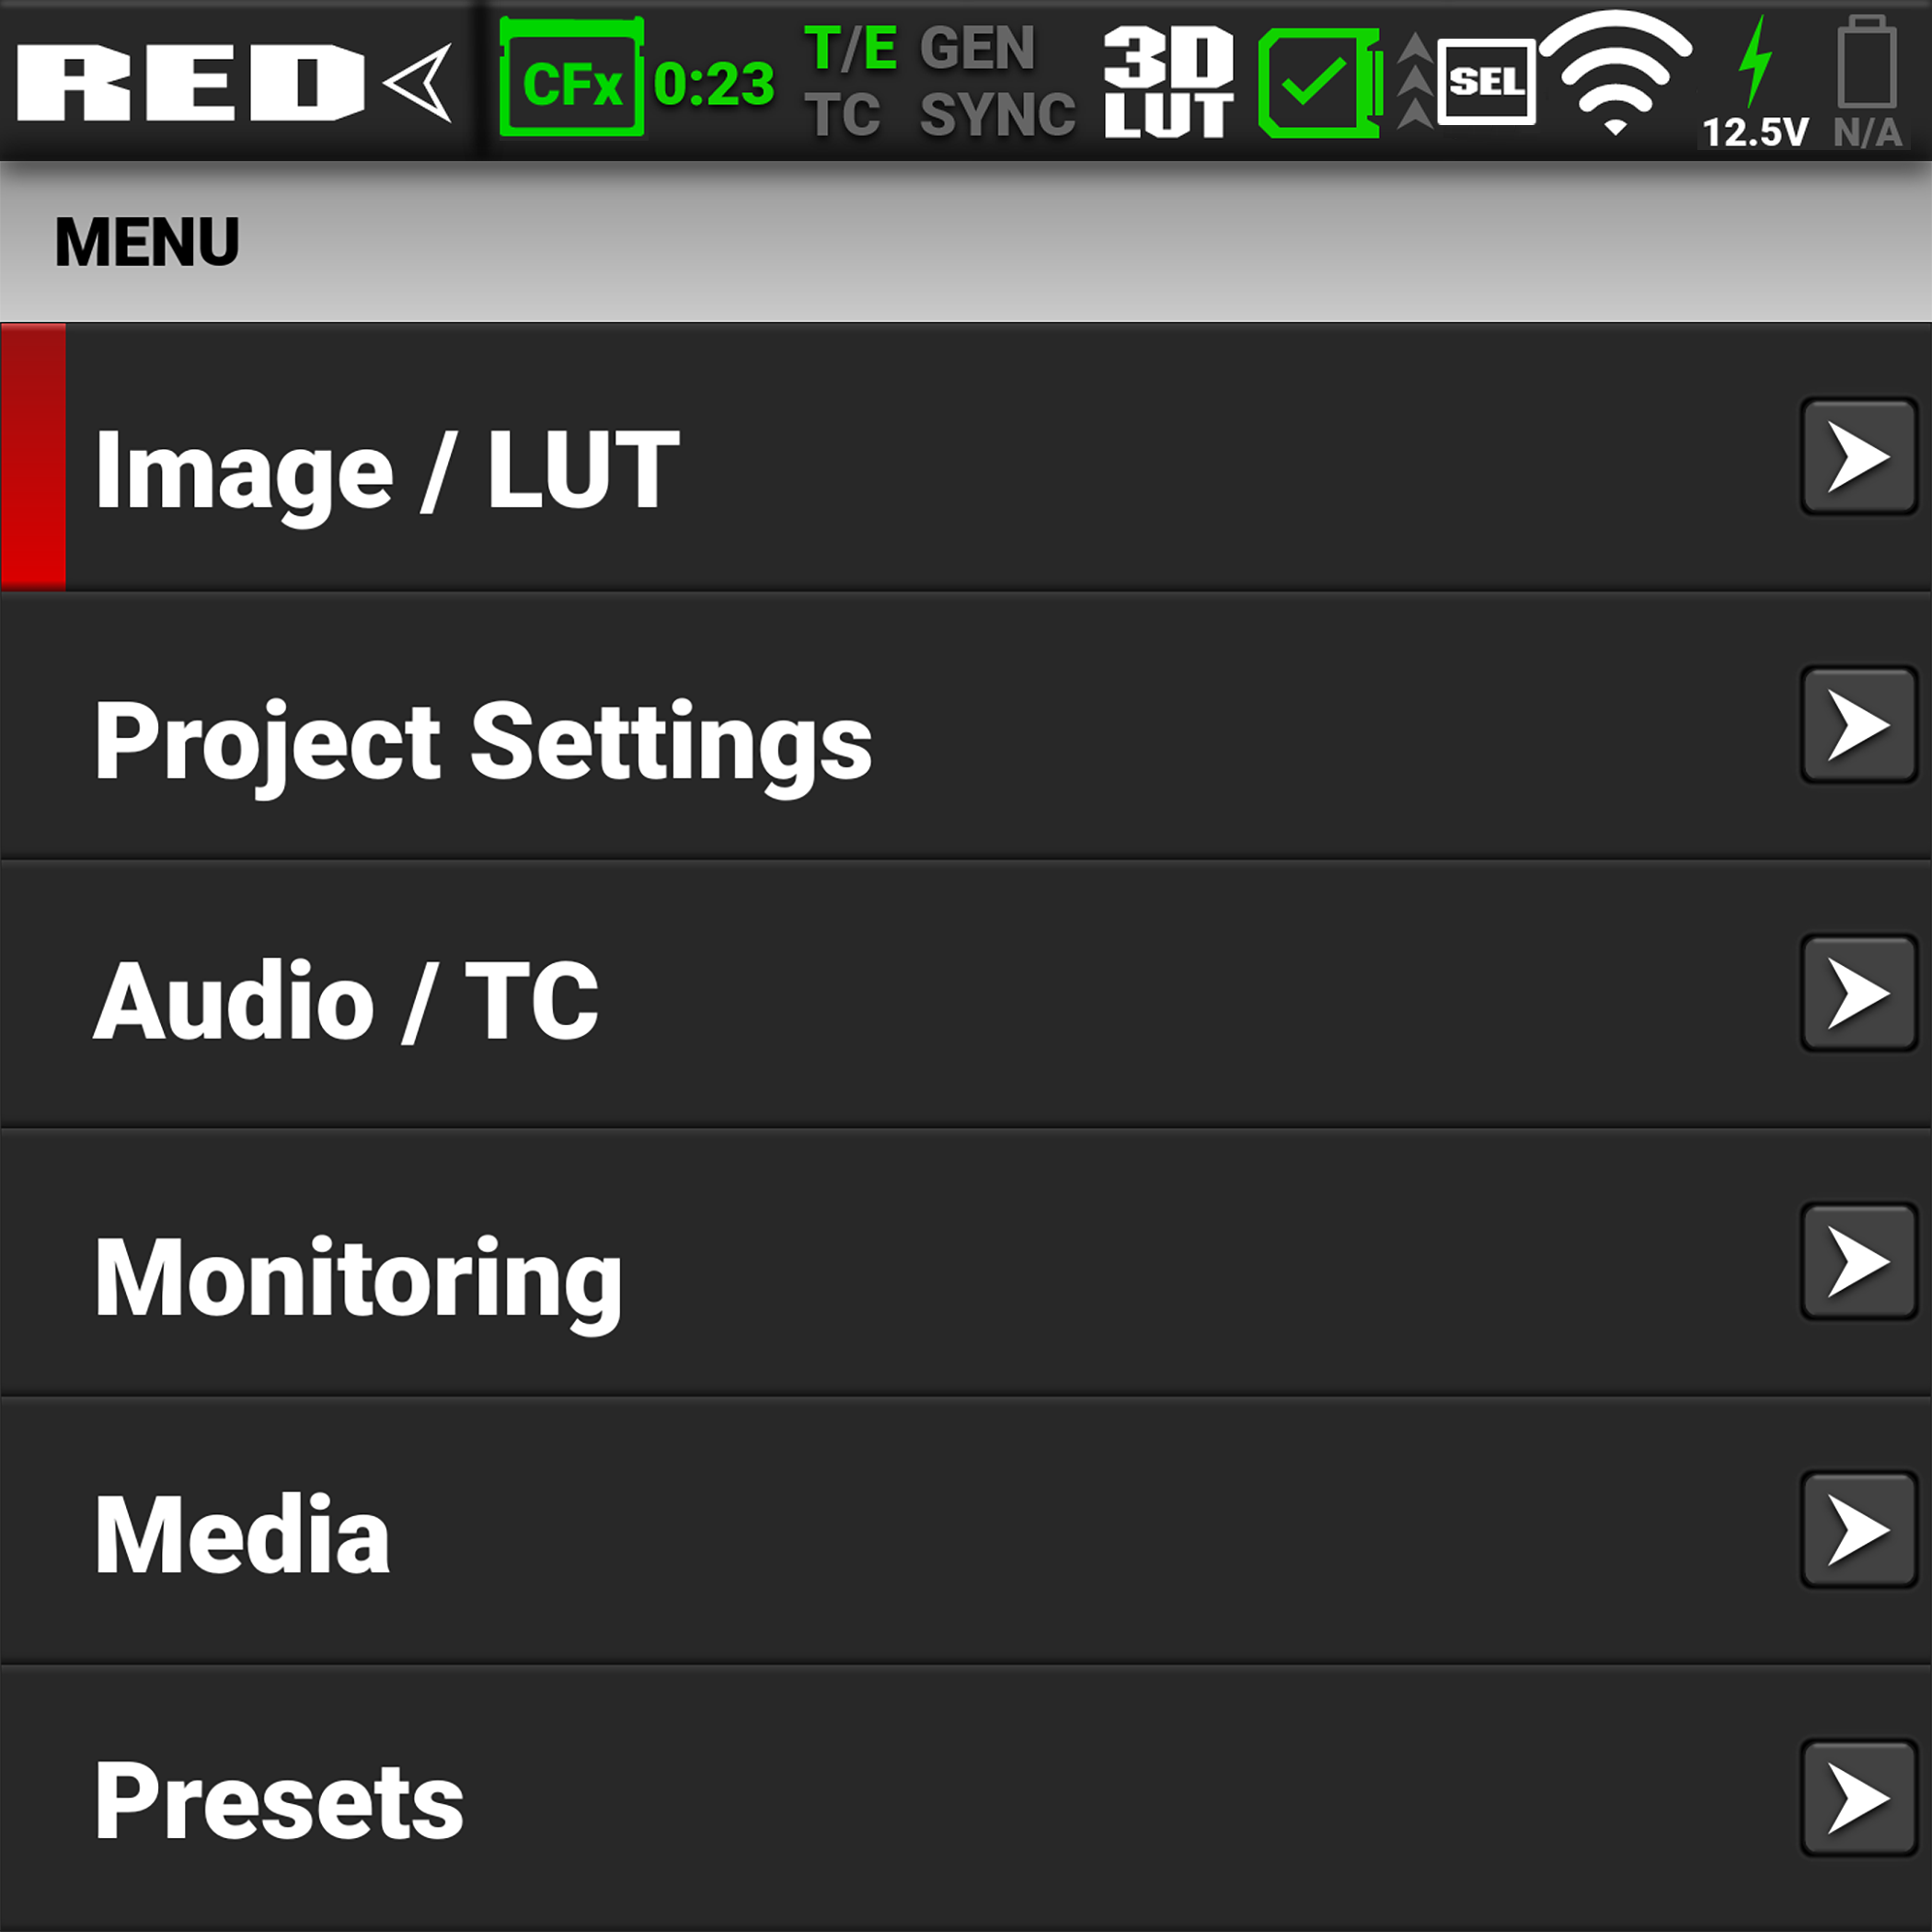
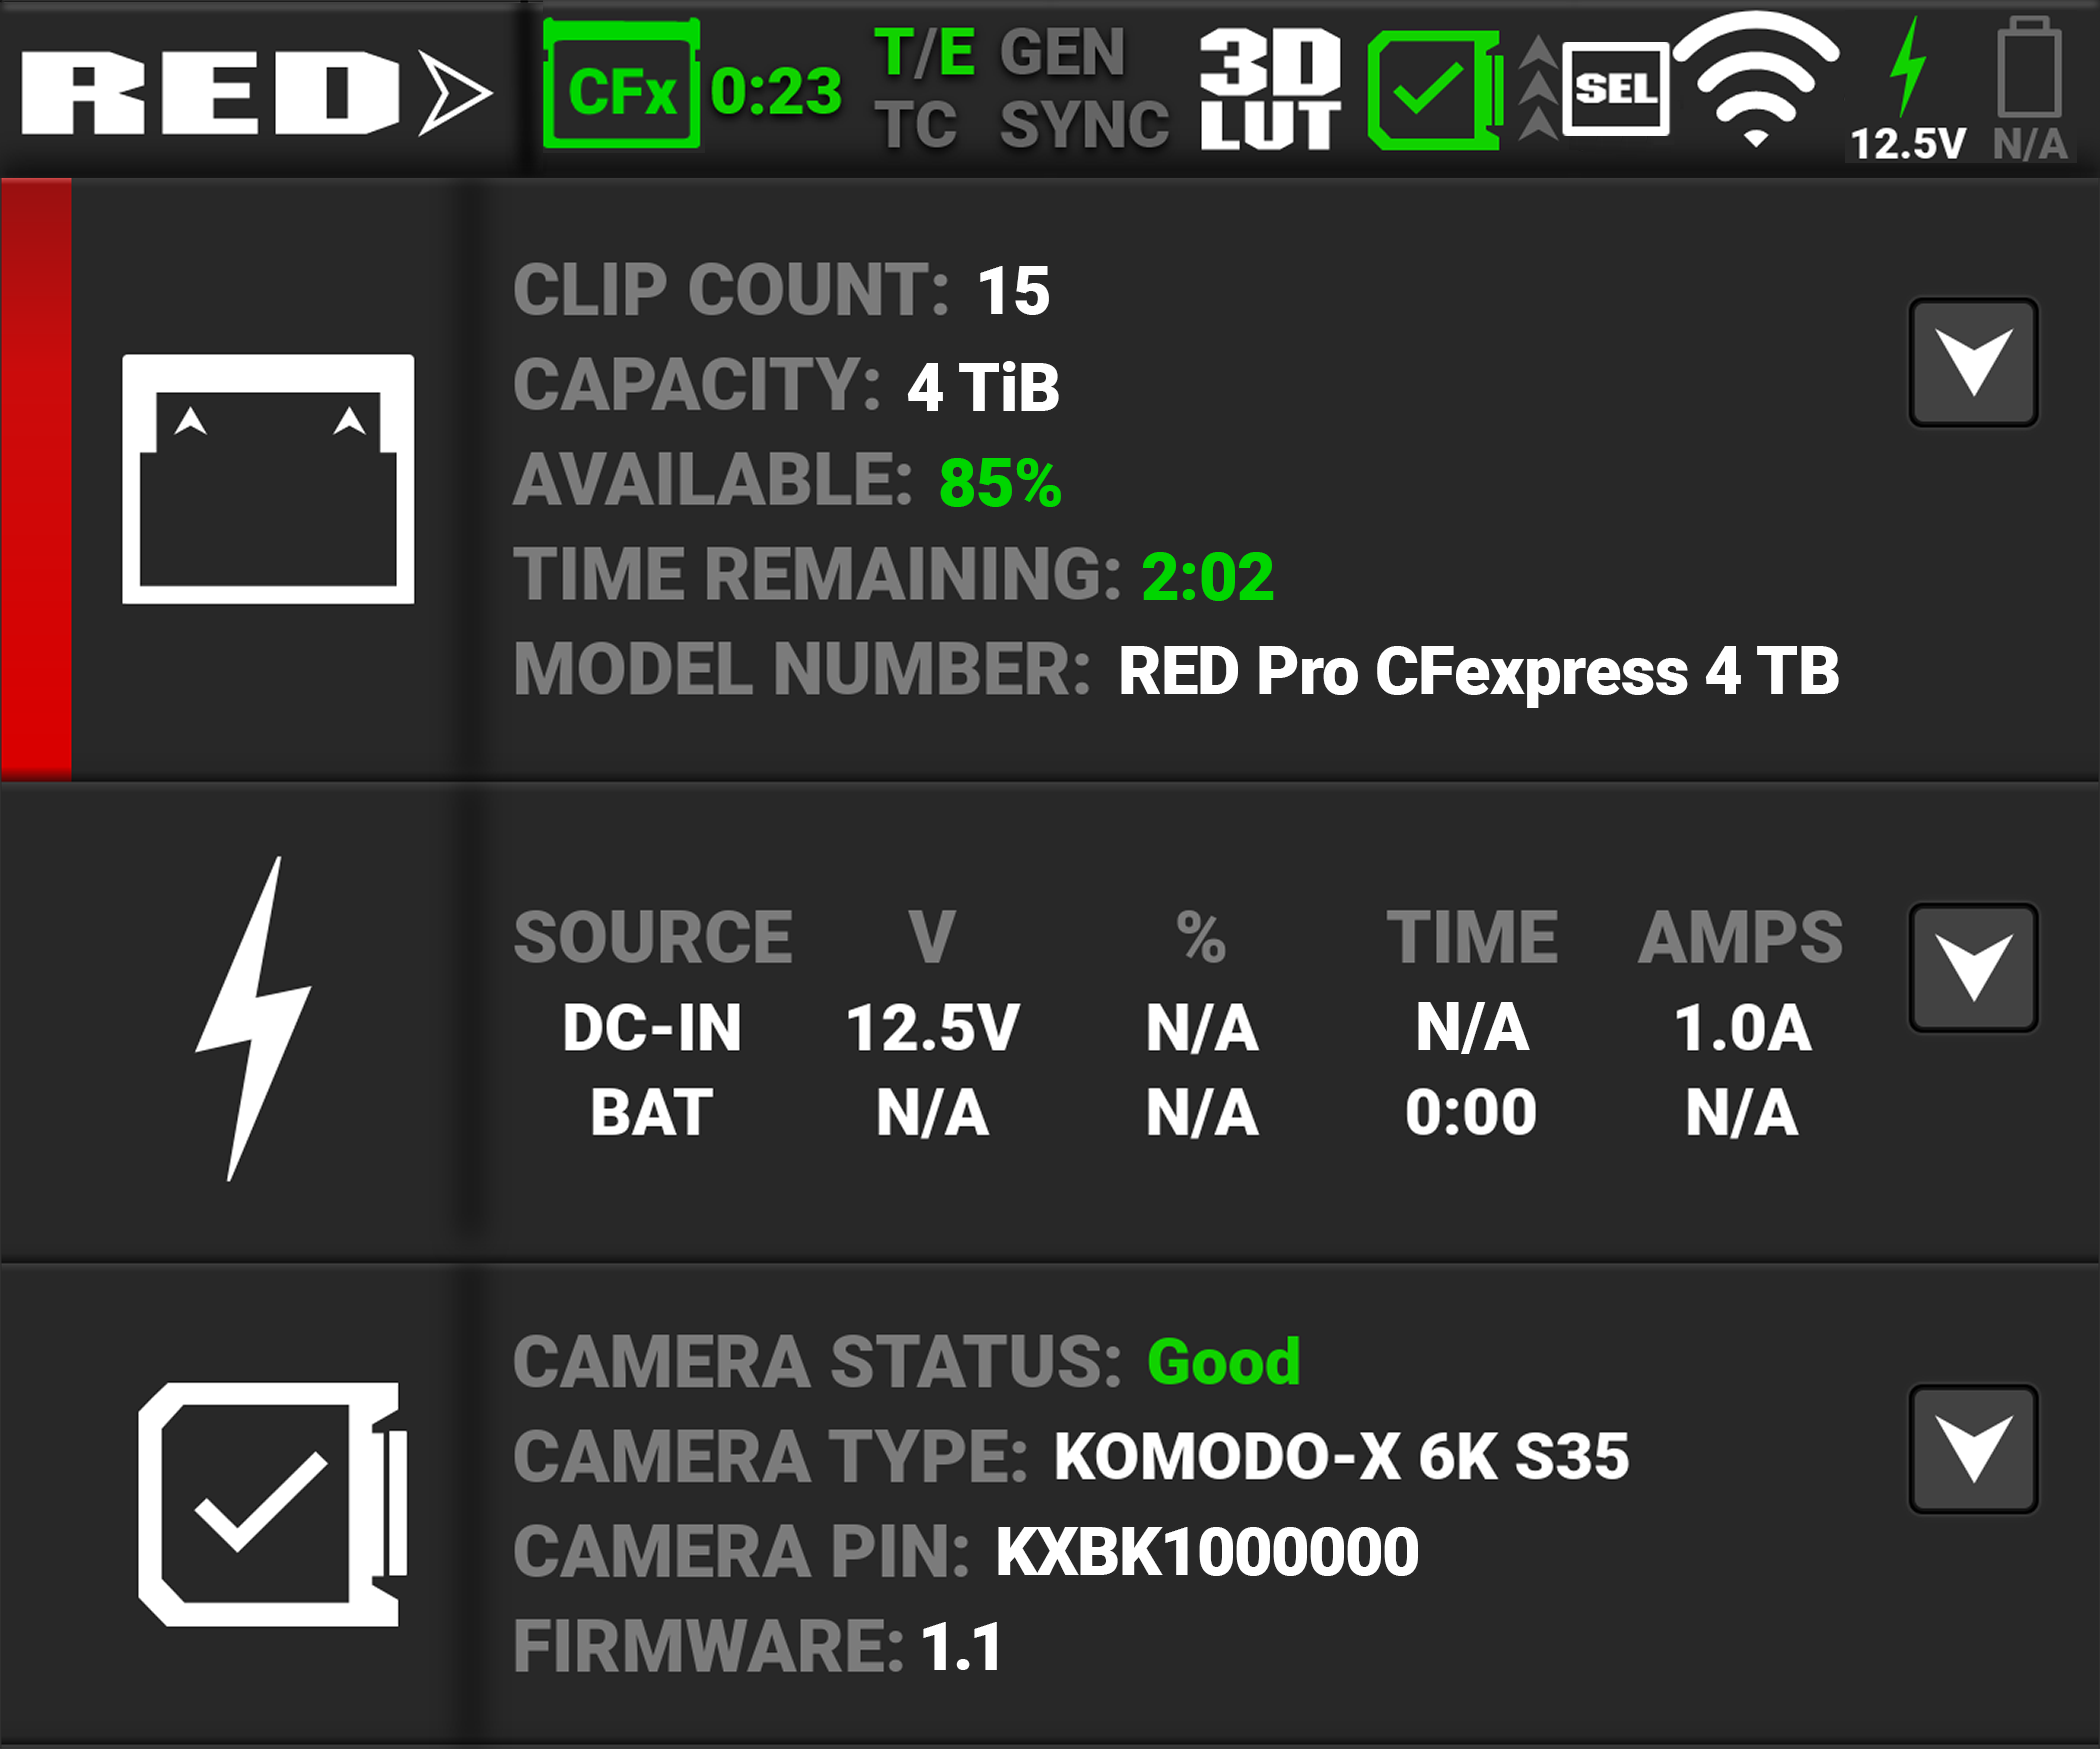
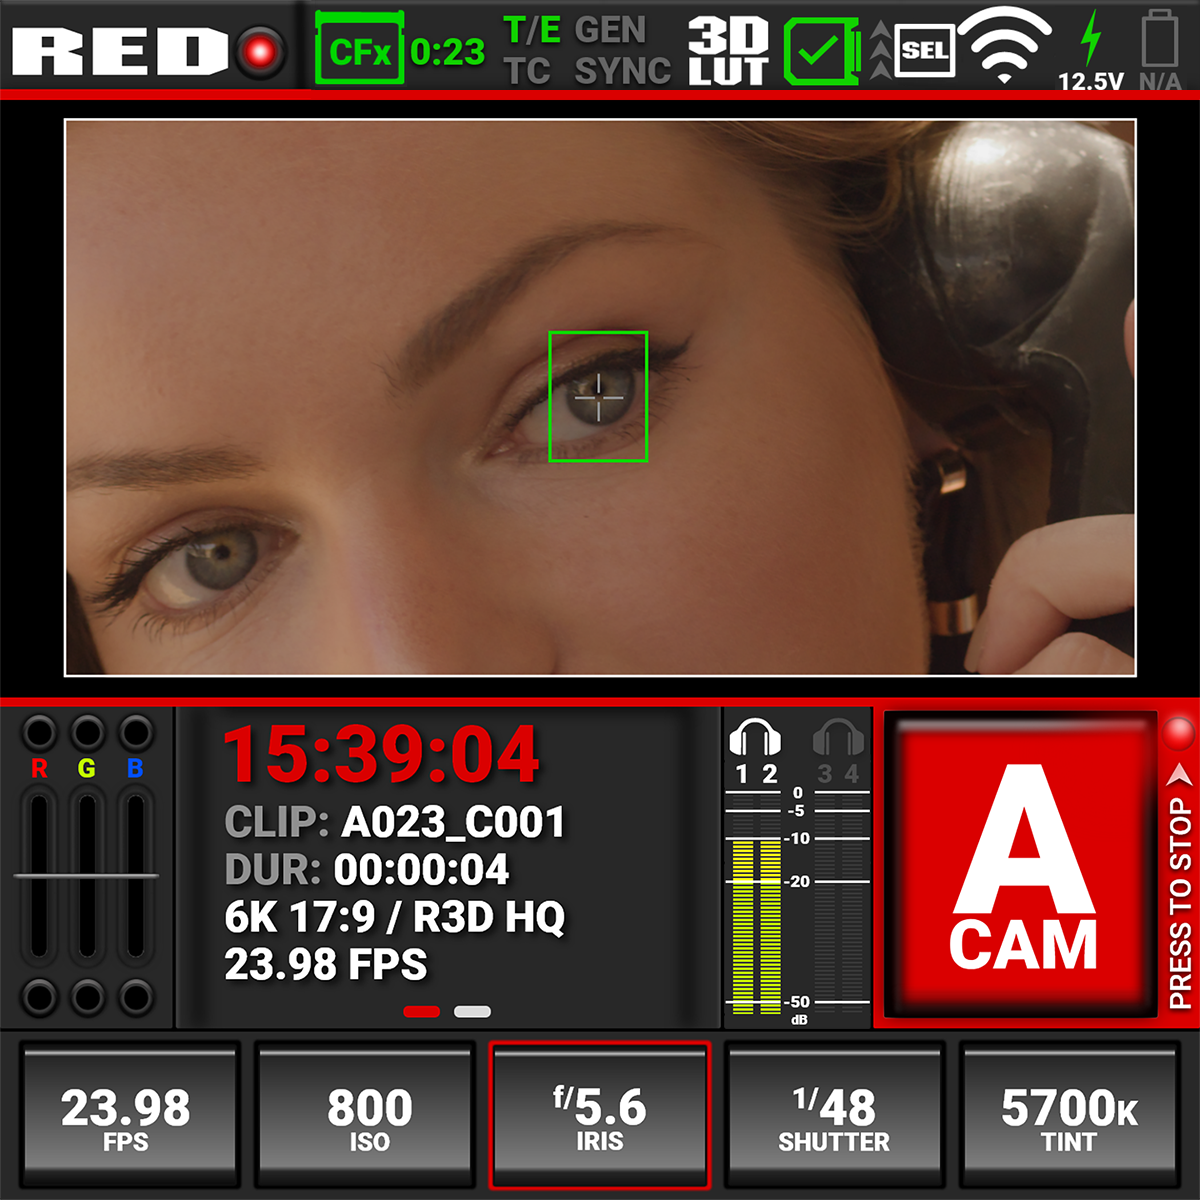
Status Bar

The Status Bar contains the button for displaying the Preview page and Menu page. It also contains status icons for various camera settings and inputs.
When you tap the Preview/Menu toggle button (RED logo), the camera toggles the display between the Menu page and the Preview page (or User Pages):
When you tap the Status bar icons the Status Page displays:
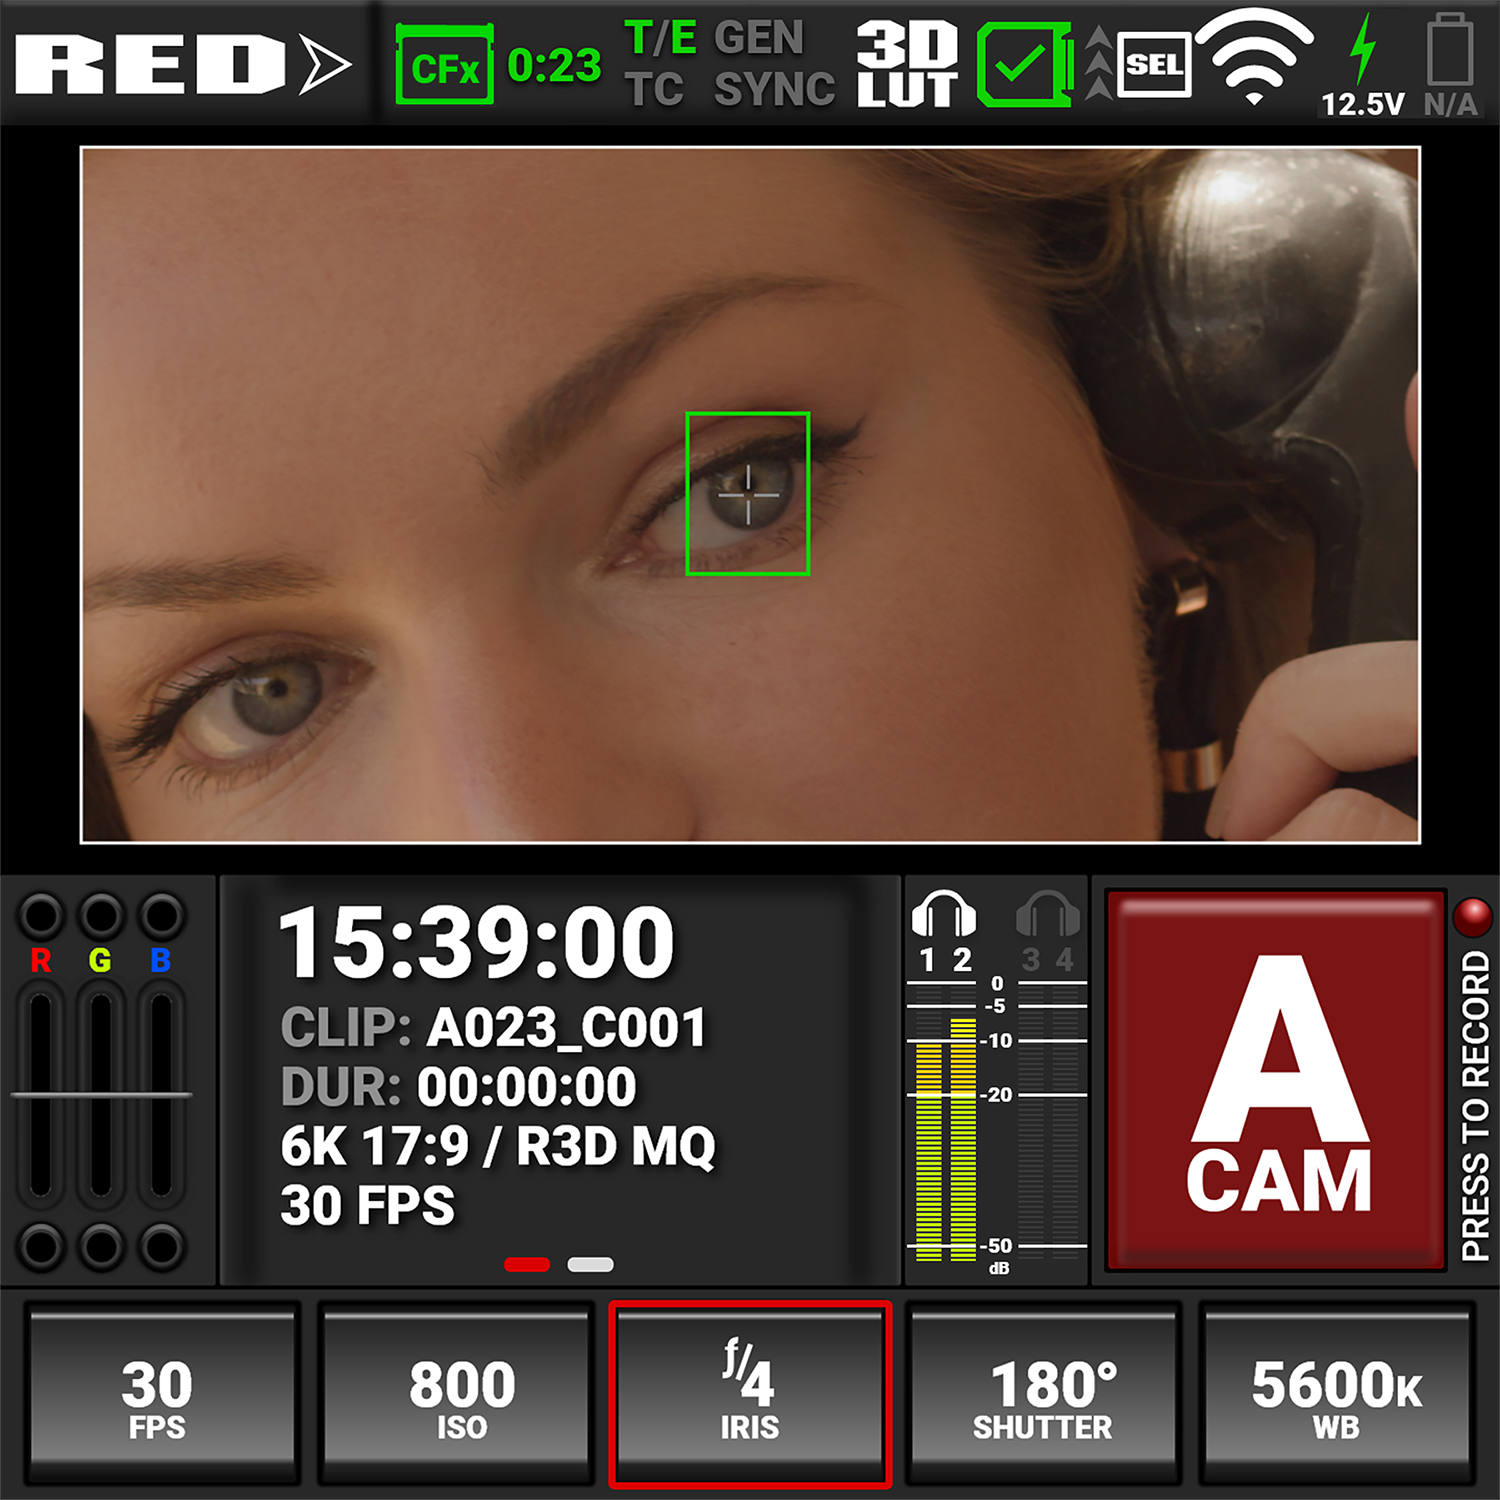
Exposure
The Exposure section of the
|
Exposure |
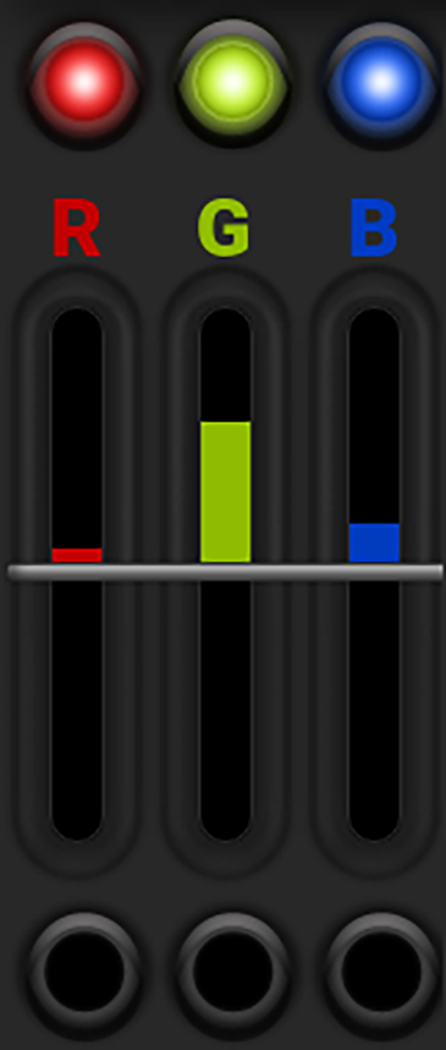
Overexposed Example |
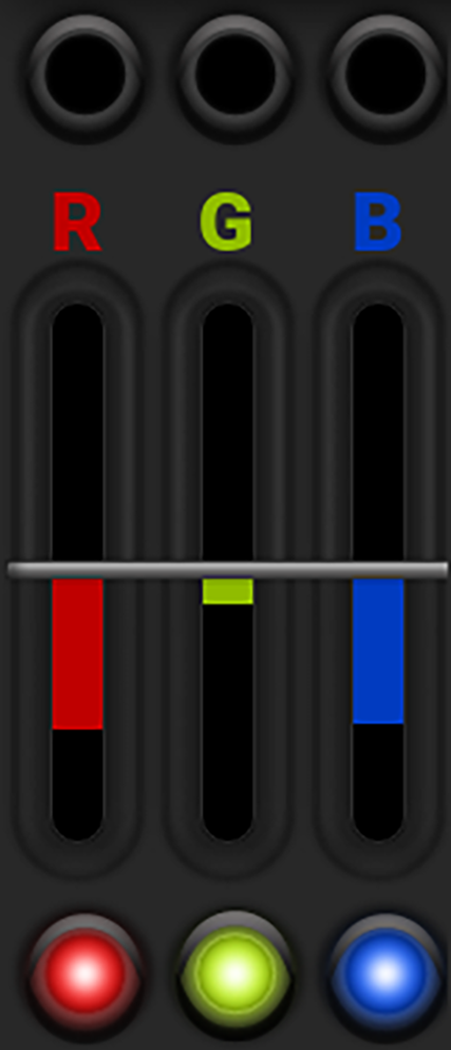
Underexposed Example |
Balanced Example |
|||
|
|
|
|
|
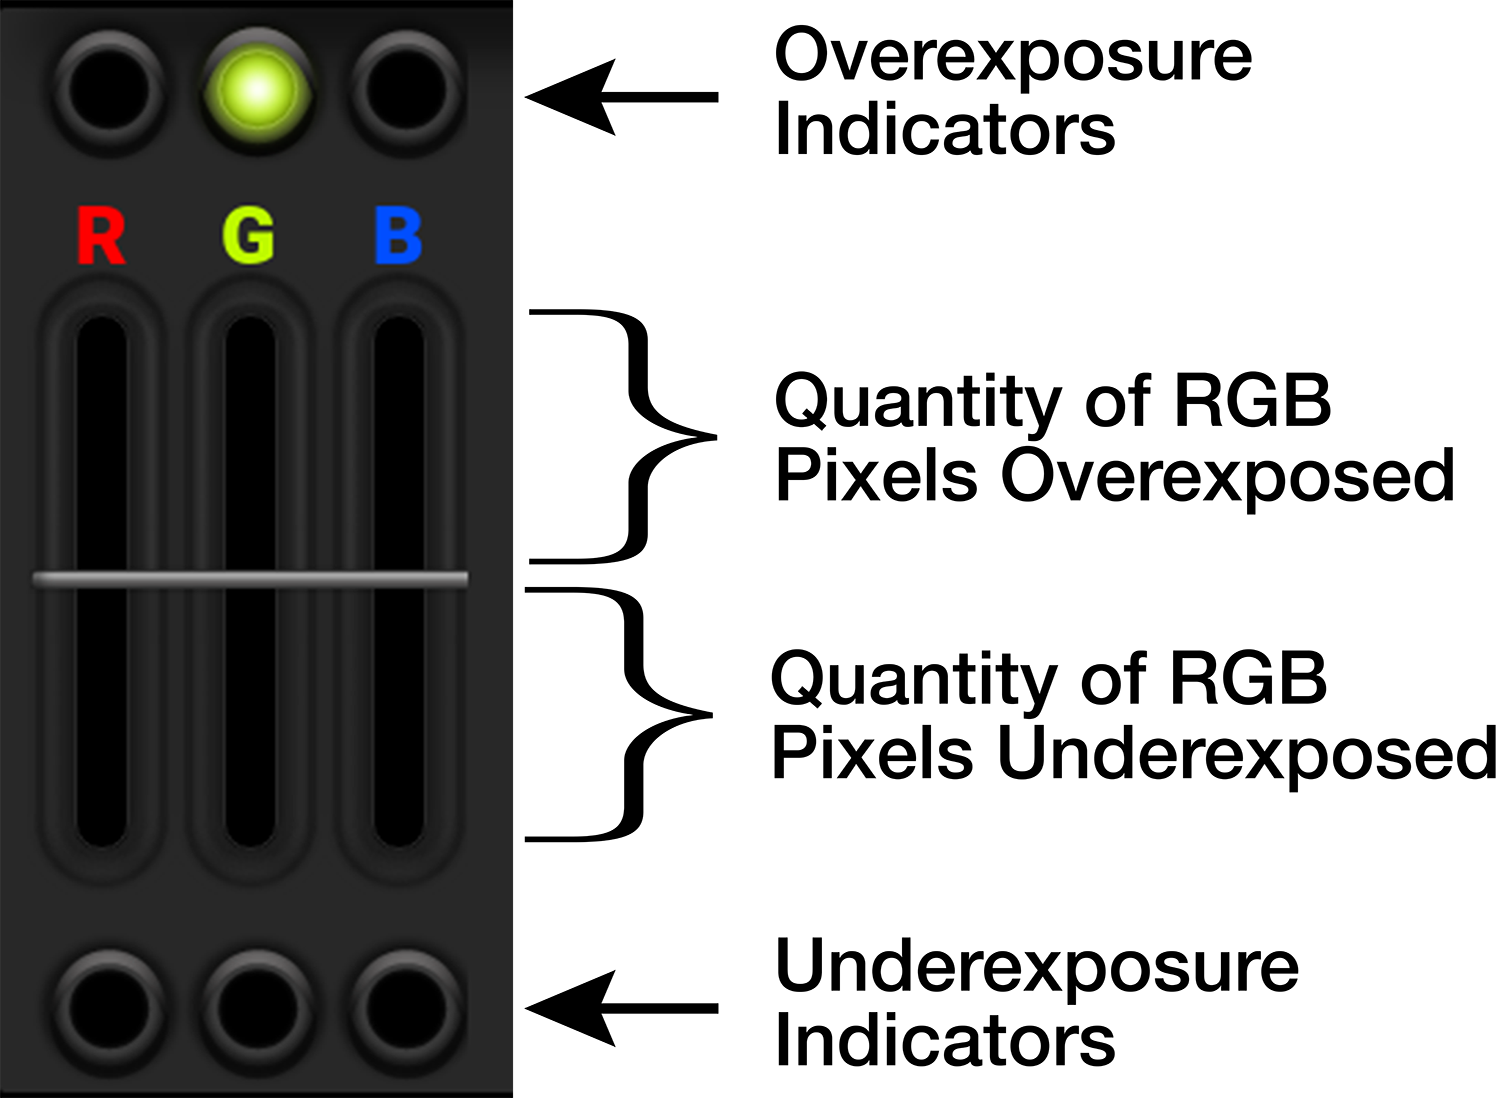
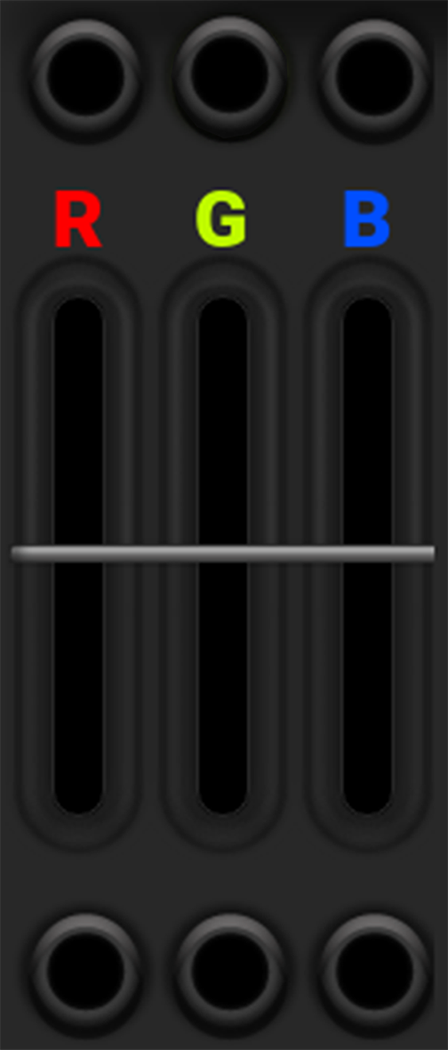
RGB Exposure displays the pixel exposure quantity of the separate RGB channels and indicates when a channel is underexposed or overexposed. This meter measures the raw image data regardless of the ISO and LUT settings.
The top and bottom RGB lights illuminate when a small number of pixels on the sensor are overexposed or underexposed. This indicates that a small bright or dark area is in the image.
The level bars show the levels of overexposed and underexposed RGB pixels on the sensor. Adjust the settings on the camera to compensate.
Tap the Exposure section to toggle between this display and the Monitoring Tools page display.
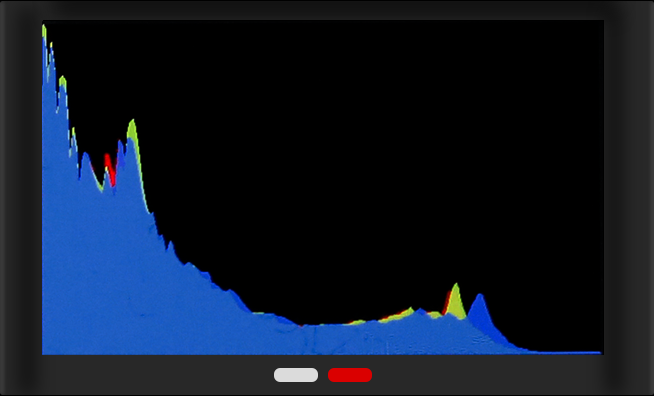
Media / Histogram
|
The Media section of the |
|
The Histogram section of the |
Audio
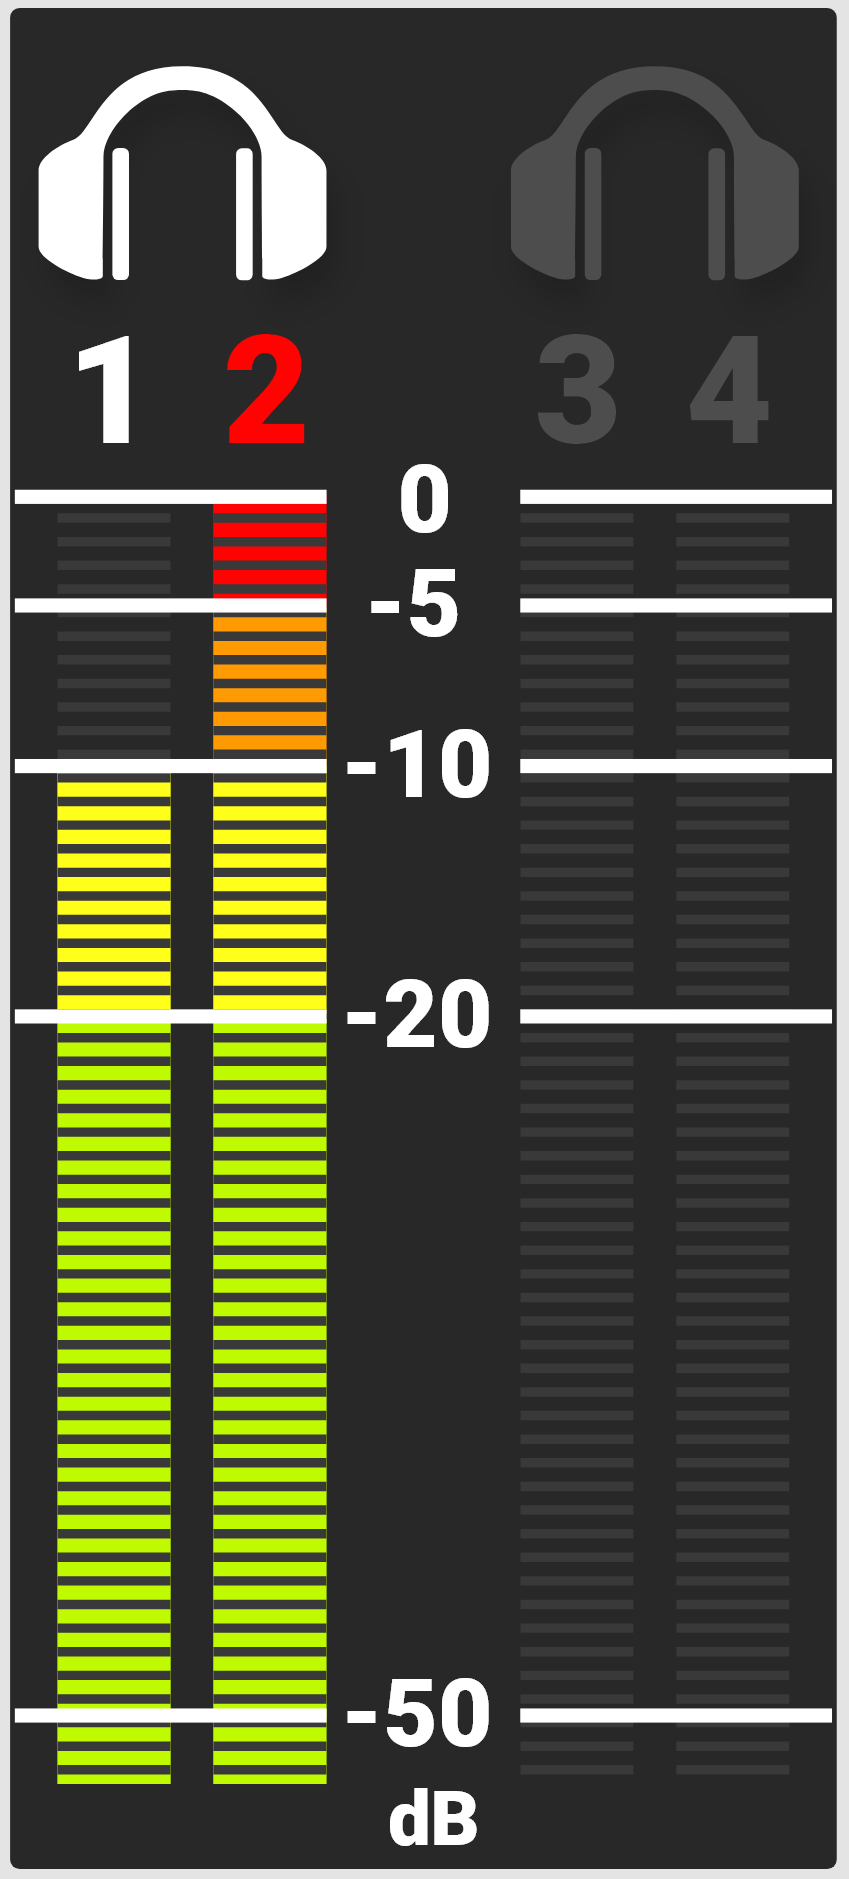
|
The Audio section of the The Audio VU meters display the audio levels in decibel (dB) for the selected channels. Refer to the Audio / TC Menu section for more information about the audio channels. In this example, channel 2 displays the VU meter clipping at maximum dB. |
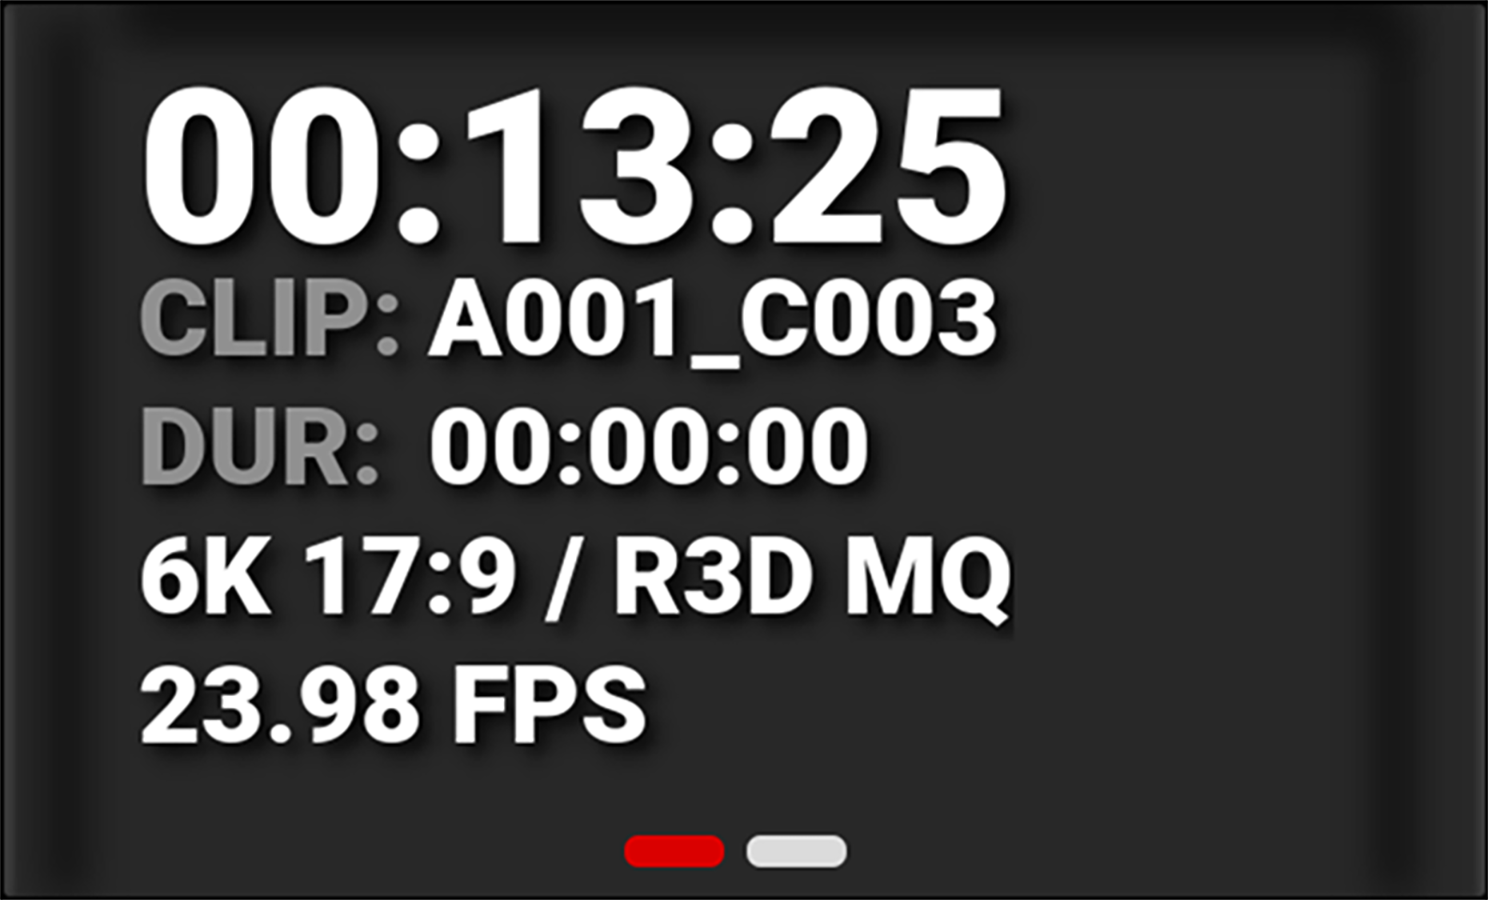
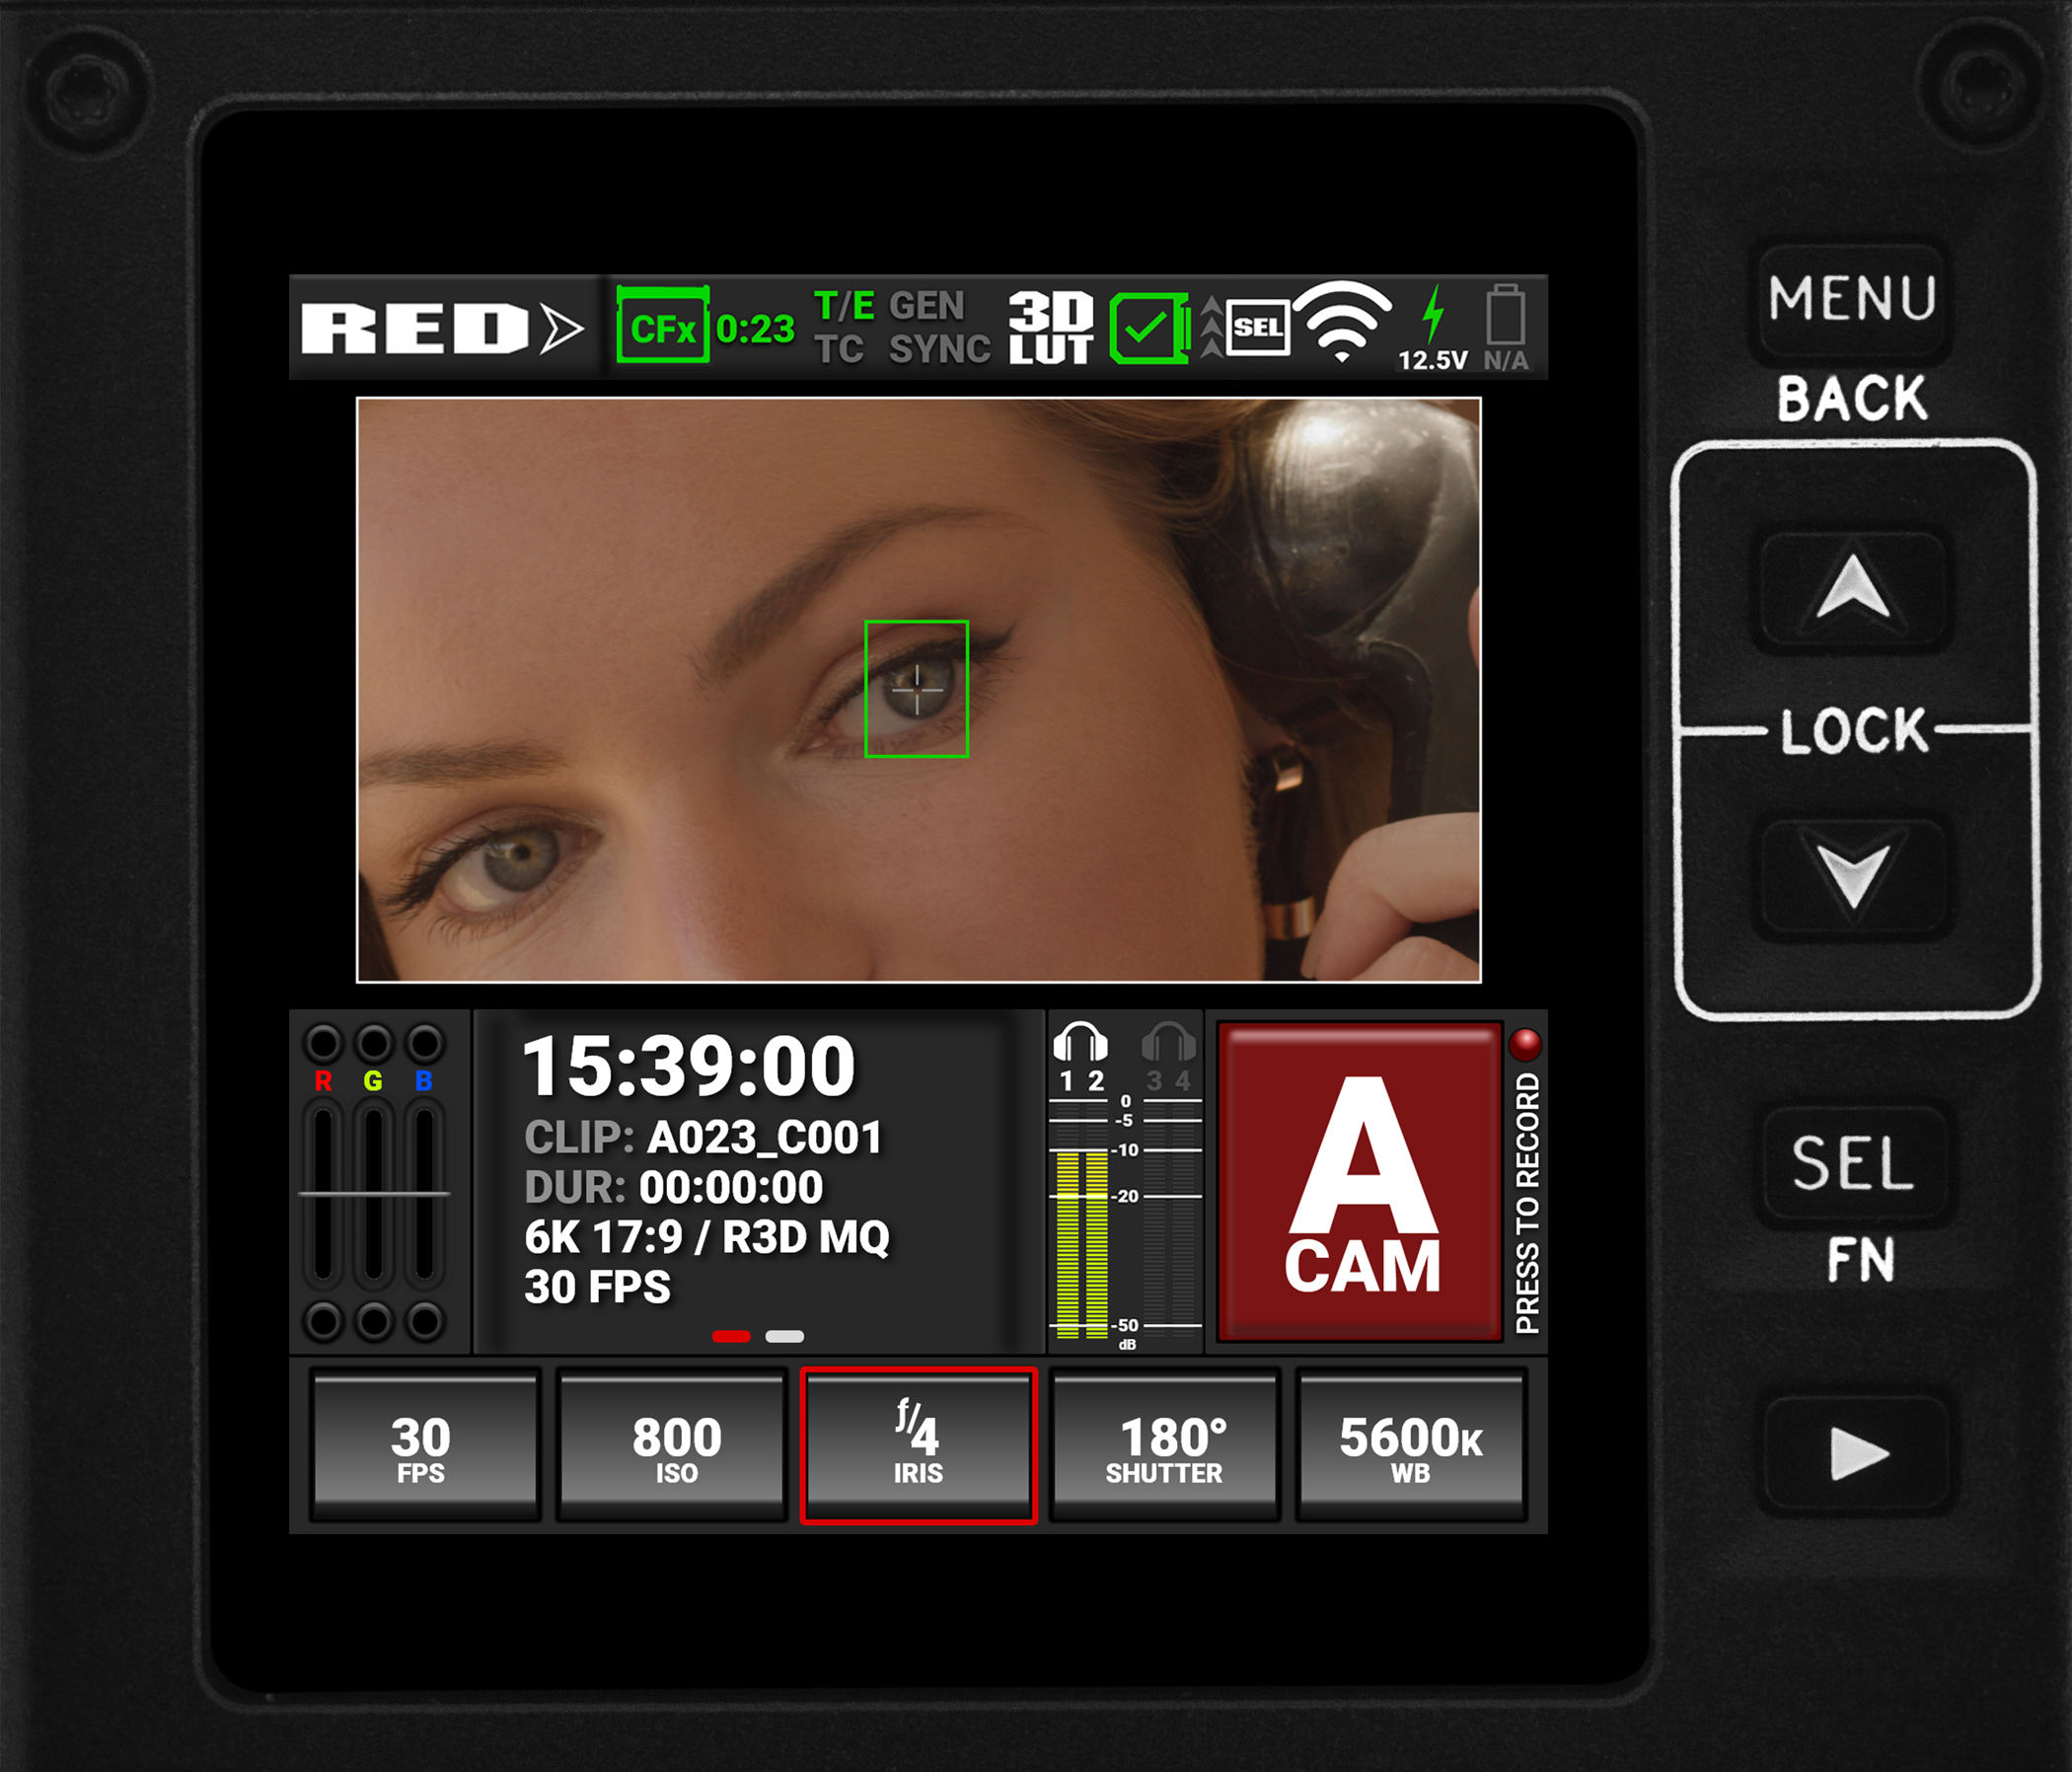
Camera Designation and REC Button


The Camera Designation and Record button on the
|
Pre-recording: |
Recording: |
|

|
|
Quick Settings

The Quick Settings section of the
|
|
Tap on a Quick Setting button to change the settings. Swipe the setting left or right to make a selection. Tap Edit to manually enter a value. Tap List to manage which values display in this tool. Tap on the Quick Setting button to close the selection slider. Tap and hold the Shutter button to quickly toggle between Time and Angle settings. Tap and hold the White Balance (WB) button to quickly switch between Kelvin and Presets. |

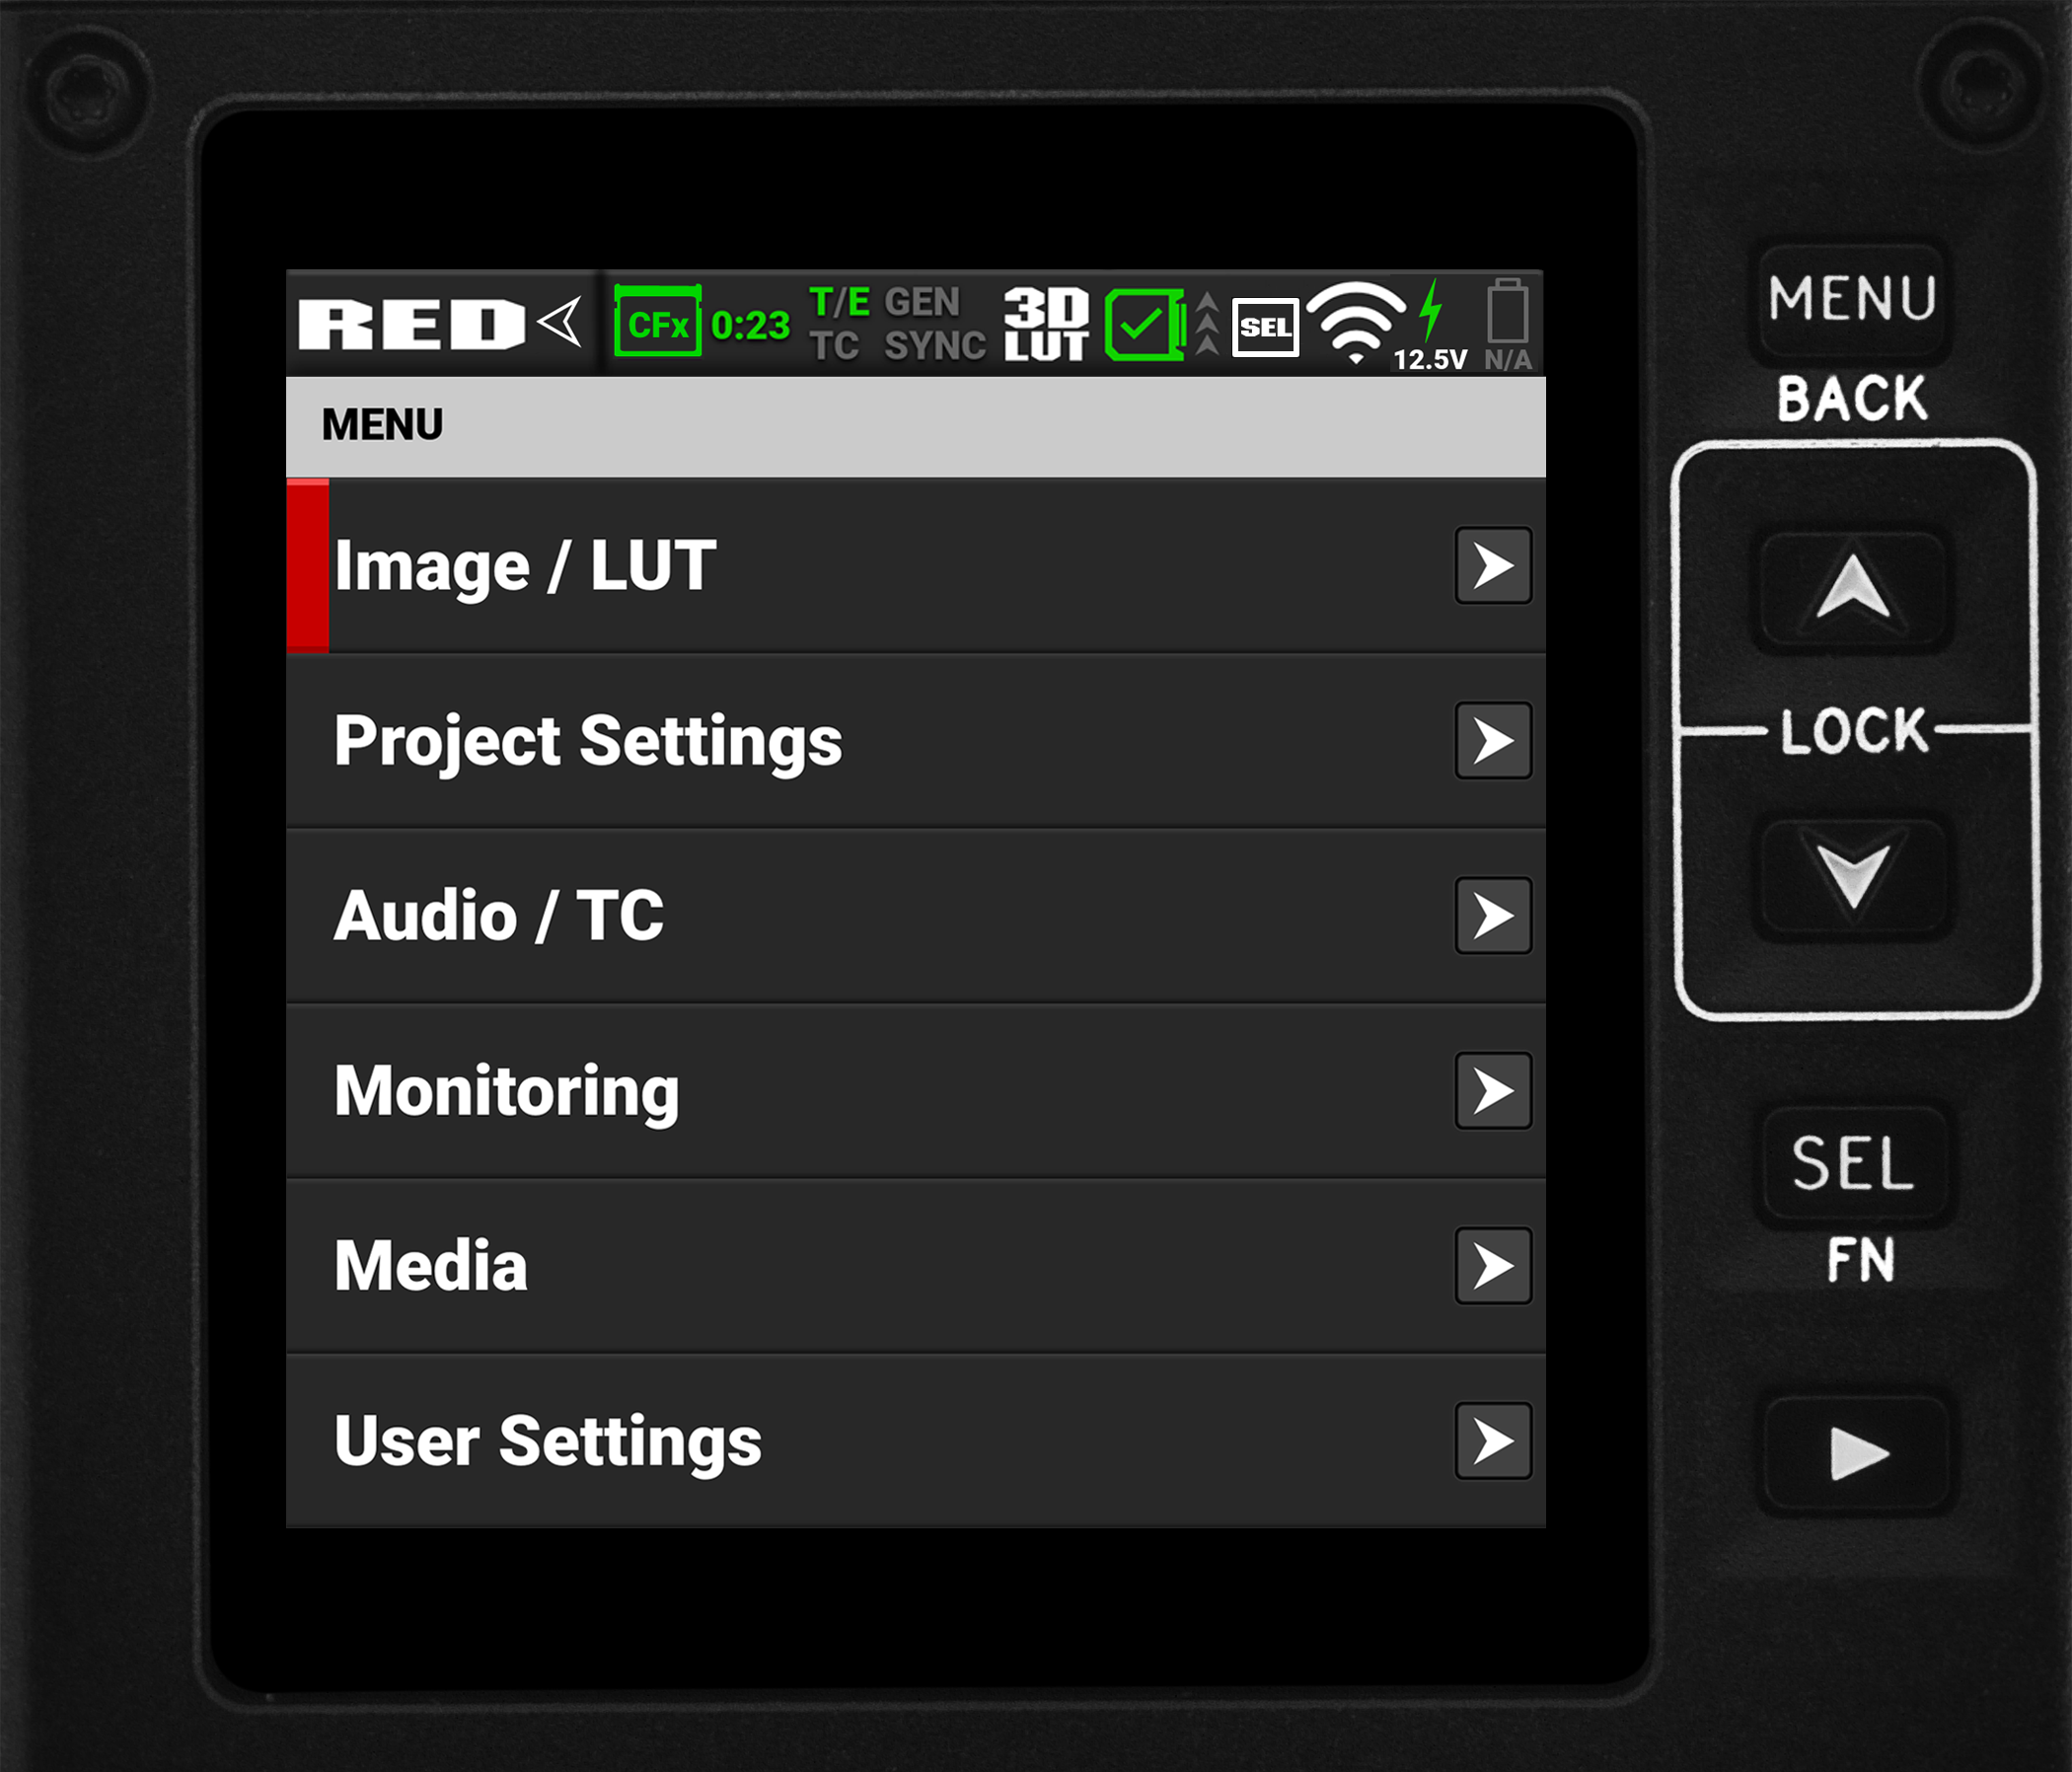
Button Navigation
Pressing the Menu button next to the
Pressing the Menu button also navigates backwards (BACK) from submenus in the menu tree.
Pressing the Up arrow and the Down arrow simultaneously locks/unlocks the touchscreen and the menu buttons. The Lock icon in the Status bar displays the lock status. The REC button is not locked and it functions normally.
Pressing the Playback button starts and stops playback (refer to Playback for more information).
|
Preview Page |
|
Menu Page |
||
|
|
|
|